


Monthly Archives: December 2021
Angular || How To Create A Simple Weather Forecast App Using Angular

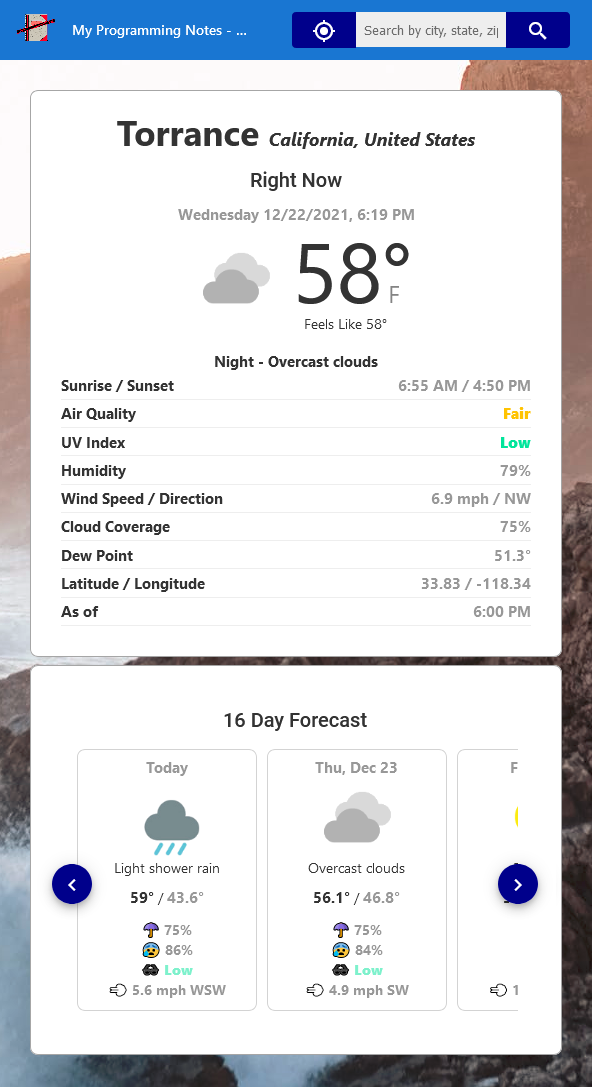
The following is an implementation which demonstrates how to create a simple weather forecast app using Angular.
This project allows you to view the current weather conditions, as well as a 16 day future weather forecast. Weather locations are searched by ip address (on initial page load), gps position, and by searching by entering a city, state, or region in the search box.
All location and weather information is obtained by using real data from APIs. Geolocation is used to predict nearest location match.
1. Get Started
To get started, make sure you have a package manager like Node.js installed. Node.js is used to install packages.
You’ll also want to have Angular cli installed. Visit the official documentation for more information on how this is done.
Next, navigate to the project directory in the terminal, then run the following commands (Node.js):
Project Setup
npm install
Compiles and hot-reloads for development
npm run start
2. Features
This project implements a simple weather forecast app which has the following features:
- Display the current weather and 16 day daily future forecast for a location
- Search weather by GPS position location, ip address location, and/or by city, state, region
- Make API calls for each of the above actions
- Make use of multiple components to display information
3. Screenshots
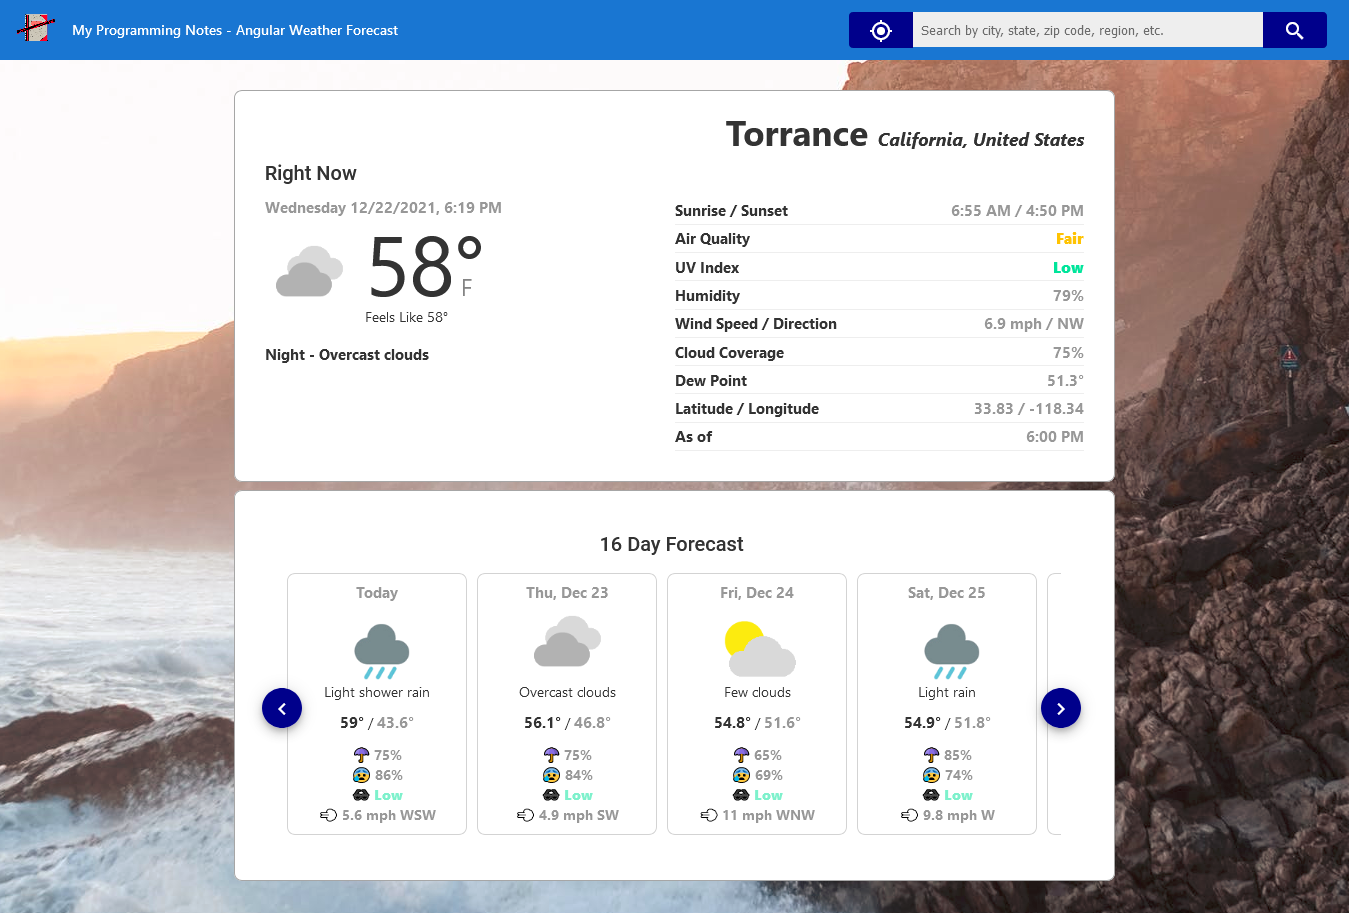
Initial weather information for a current location based off ip address
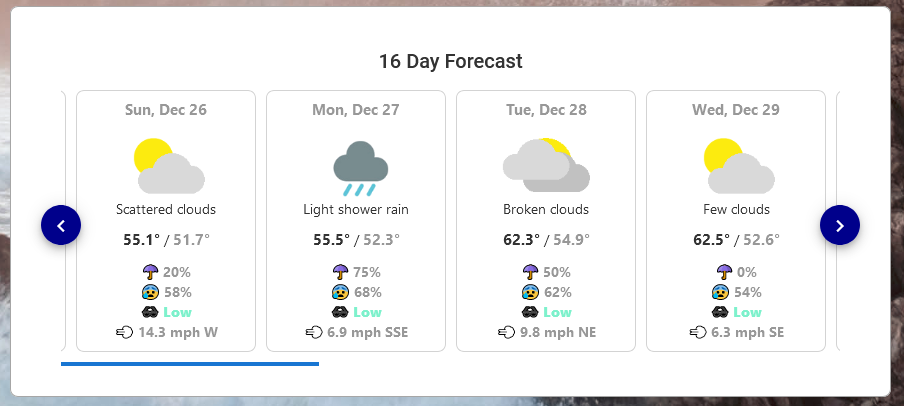
Custom scroll animation when viewing daily forecast
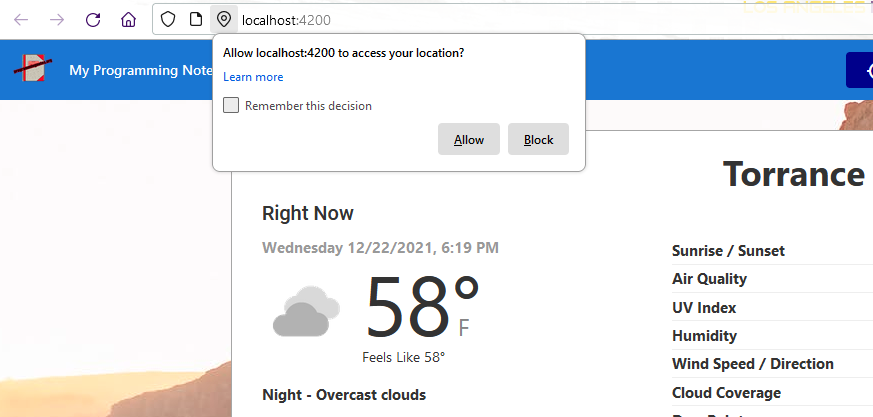
Getting weather information from current GPS position
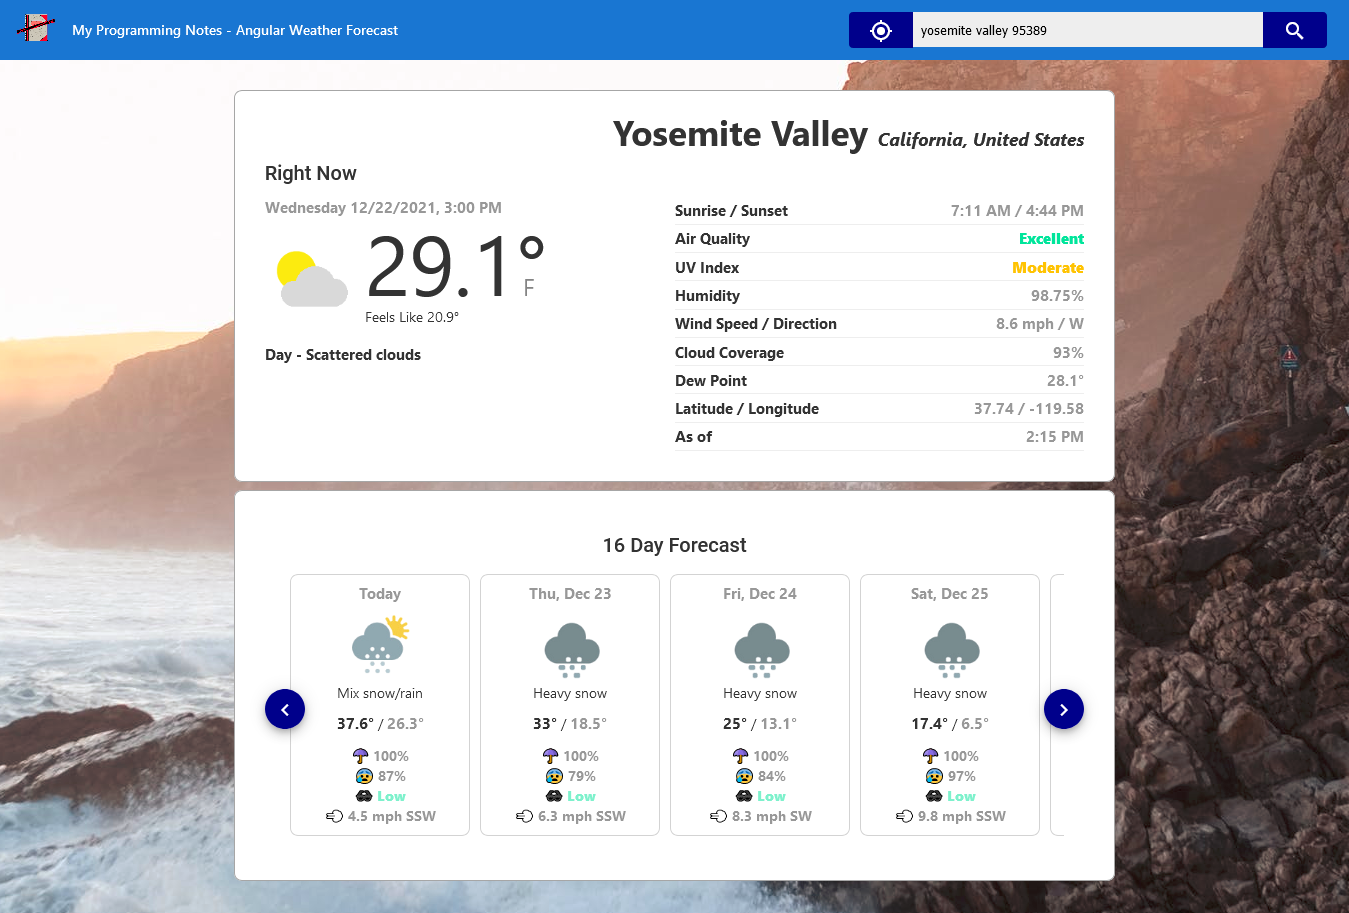
Result from entering a custom search location
Responsive view
4. Download
QUICK NOTES:
The highlighted lines are sections of interest to look out for.
The code is heavily commented, so no further insight is necessary. If you have any questions, feel free to leave a comment below.
JavaScript || How To Use Geolocation To Get Current Position With Promises Using Vanilla JavaScript

The following is a module with functions which demonstrates how to use geolocation to get the device current position with promises using vanilla JavaScript.
The following function is a wrapper for the navigator.geolocation.getCurrentPosition, updated to use promises to run as an asynchronous operation.
1. Get Current Position
The example below demonstrates the use of ‘Utils.getCurrentPosition‘ to get the current position of the device.
|
1 2 3 4 5 6 7 8 9 10 11 12 13 14 15 16 17 18 19 20 21 22 23 24 25 26 27 28 29 30 31 32 |
// Get Current Position <script> (async () => { try { // Get device position let position = await Utils.getCurrentPosition(); console.log(position); alert(`Latitude: ${position.coords.latitude}, Longitude: ${position.coords.longitude}`); } catch (error) { console.log(error); alert(`Error Code: ${error.code}, Error Message: ${error.message}`); } })(); </script> // example output: /* { "coords": { "accuracy": 13.094 "altitude": null "altitudeAccuracy": null "heading": null "latitude": 36.4458083 "longitude": -114.6677835 "speed": null } "timestamp": 1639609018611 } */ |
3. Utils Namespace
The following is the Utils.js Namespace. Include this in your project to start using!
|
1 2 3 4 5 6 7 8 9 10 11 12 13 14 15 16 17 18 19 20 21 22 23 24 25 26 27 28 29 30 31 32 33 34 35 36 37 38 39 40 41 42 |
// ============================================================================ // Author: Kenneth Perkins // Date: Dec 15, 2021 // Taken From: http://programmingnotes.org/ // File: Utils.js // Description: Javascript that handles general utility functions // ============================================================================ /** * NAMESPACE: Utils * USE: Handles general utility functions. */ var Utils = Utils || {}; (function(namespace) { 'use strict'; // Property to hold public variables and functions let exposed = namespace; /** * FUNCTION: getCurrentPosition * USE: Gets the current position of the device * @param options: The PositionOptions * @return: A promise that will contain the GeolocationPosition of the device on completion */ exposed.getCurrentPosition = (options = null) => { return new Promise((resolve, reject) => { if (navigator && navigator.geolocation) { navigator.geolocation.getCurrentPosition(resolve, reject, options); } else { reject(new Error('Geolocation is not supported by this environment')); } }); } (function (factory) { if (typeof define === 'function' && define.amd) { define([], factory); } else if (typeof exports === 'object') { module.exports = factory(); } }(function() { return namespace; })); }(Utils)); // http://programmingnotes.org/ |
QUICK NOTES:
The highlighted lines are sections of interest to look out for.
The code is heavily commented, so no further insight is necessary. If you have any questions, feel free to leave a comment below.
Angular || How To Resolve Issue: “Module Parse Failed: Unexpected Character – You May Need An Appropriate Loader” Using Angular

The following is a page which demonstrates how to resolve the issue: “Module parse failed: Unexpected character ”. You may need an appropriate loader to handle this file type, currently no loaders are configured to process this file” using Angular.
Contents
1. Overview

2. Install Custom Webpack Config Package

3. Update angular.json

4. Create Custom Webpack Config File

5. Rebuild Project
1. Overview
This error basically means there is no appropriate webpack file loader installed in the project to handle the file being referenced.
Out of the box, webpack only understands JavaScript and JSON files. File loaders allow webpack to process other types of files and convert them into valid modules that can be consumed by our application.
This page will demonstrate how to use webpack Asset Modules to configure the appropriate file loader for our project.
Asset Modules are loaders that specifies how a file should be handled. There are 4 module types:
- asset/resource: Emits a separate file and exports the URL. (file-loader)
- asset/inline: Exports a data URI of the asset. (url-loader)
- asset/source: Exports the source code of the asset. (raw-loader)
- asset: Automatically chooses between exporting a data URI and emitting a separate file. (url-loader with asset size limit)
If you are using >= webpack 5, you don’t need to install anything. These are included.
2. Install Custom Webpack Config Package
To configure a file loader in our Angular project, we need to allow for custom webpack configurations.
In the terminal, run the following command from your project directory. This command installs a package that allows for custom webpack build configurations with Angular. The custom configuration will allow us to configure the proper file loader for use in our project.
npm i -D @angular-builders/custom-webpack
3. Update angular.json
To tell Angular to use the custom build process, we need to update src/angular.json.
In src/angular.json, wherever ‘@angular-devkit/build-angular‘ is referenced, replace the value with ‘@angular-builders/custom-webpack‘.
For example:
- '@angular-devkit/build-angular:browser' will be changed to '@angular-builders/custom-webpack:browser'
- '@angular-devkit/build-angular:dev-server' will be changed to '@angular-builders/custom-webpack:dev-server'
The following is a sample of src/angular.json after making the above changes:
|
1 2 3 4 5 6 7 8 9 10 11 12 13 |
... "architect": { "build": { "builder": "@angular-builders/custom-webpack:browser", ... }, ... "serve": { "builder": "@angular-builders/custom-webpack:dev-server", ... } ... ... |
After the changes above have been made, we need to add a field that specifies the custom webpack config file path. It should be added in the following section of src/angular.json:
|
1 2 3 4 5 6 7 8 9 10 11 12 13 14 15 |
... "architect": { "build": { "builder": "@angular-builders/custom-webpack:browser", "options": { ... "customWebpackConfig": { "path": "./extra-webpack.config.js" }, ... } ... }, ... ... |
The file ‘extra-webpack.config‘ is where we will define the file loader.
4. Create Custom Webpack Config File
Create the ‘extra-webpack.config‘ file. It should be placed in the same path as specified in the ‘customWebpackConfig‘ node of src/angular.json.
The following is a sample ‘extra-webpack.config’ file. This file configures an Asset Module file loader rule for images.
|
1 2 3 4 5 6 7 8 9 10 11 12 13 14 15 16 17 |
// ============================================================================ // Author: Kenneth Perkins // Date: Dec 14, 2021 // Taken From: http://programmingnotes.org/ // File: extra-webpack.config.js // Description: Configures an Asset Module file loader for images // ============================================================================ module.exports = { module: { rules: [ { test: /\.(png|jpg|gif)$/i, type: 'asset', }, ], }, }; |
For more example configurations, visit the official documentation.
5. Rebuild Project
After making the above changes, save, and restart your project / server.
QUICK NOTES:
The highlighted lines are sections of interest to look out for.
The code is heavily commented, so no further insight is necessary. If you have any questions, feel free to leave a comment below.
Angular || How To Resolve Issue: “Cannot find name ‘require'” Using Angular
The following is a page which demonstrates how to resolve the issue: “Cannot find name ‘require’. Do you need to install type definitions for node?” using Angular.
1. Install Package Definition
The type definition for node may not be installed. In the terminal, run the following command from your project directory. This command installs a package that defines require.
npm i --save-dev @types/node
Note: If the package is already installed, go to the next step.
2. Update tsconfig.json & tsconfig.app.json
Tell TypeScript to globally include type definitions by updating and adding ‘node‘ to the ‘types‘ field in src/tsconfig.json and src/tsconfig.app.json.
|
1 2 3 4 5 6 7 |
... "compilerOptions": { ... "types": [ "node" ], ... }, ... |
|
1 2 3 4 5 6 7 |
... "compilerOptions": { ... "types": [ "node" ], ... }, ... |
3. Rebuild Project
After making the above changes, save, and restart your project / server.
QUICK NOTES:
The highlighted lines are sections of interest to look out for.
The code is heavily commented, so no further insight is necessary. If you have any questions, feel free to leave a comment below.
Angular || How To Create A Simple Personal Contact List Using Angular
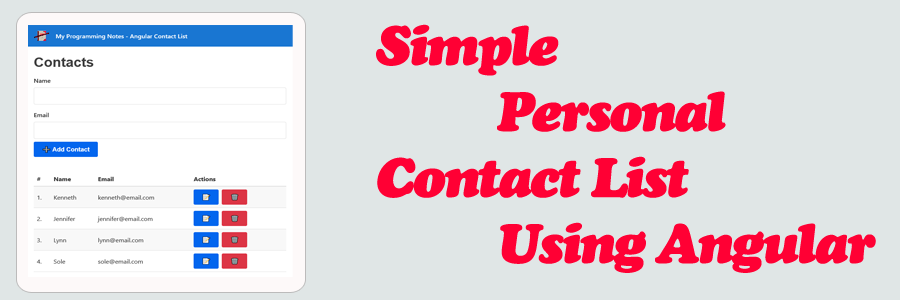
The following is an implementation which demonstrates how to create a simple personal contact list using Angular.
This project allows you to add a new contact, update an existing contact, and delete a contact. All contacts are retrieved and updated using web request calls on a mock API.
1. Get Started
To get started, make sure you have a package manager like Node.js installed. Node.js is used to install packages.
You’ll also want to have Angular cli installed. Visit the official documentation for more information on how this is done.
Next, navigate to the project directory in the terminal, then run the following commands (Node.js):
Project Setup
npm install
Compiles and hot-reloads for development
npm run start
2. Features
This project implements a simple personal contact list which demonstrates how to:
- Work with data, methods, conditional statements, and events
- Create, update, view, and delete contacts from the system
- Make API calls for each of the above actions
- Use tables, forms, and form validation
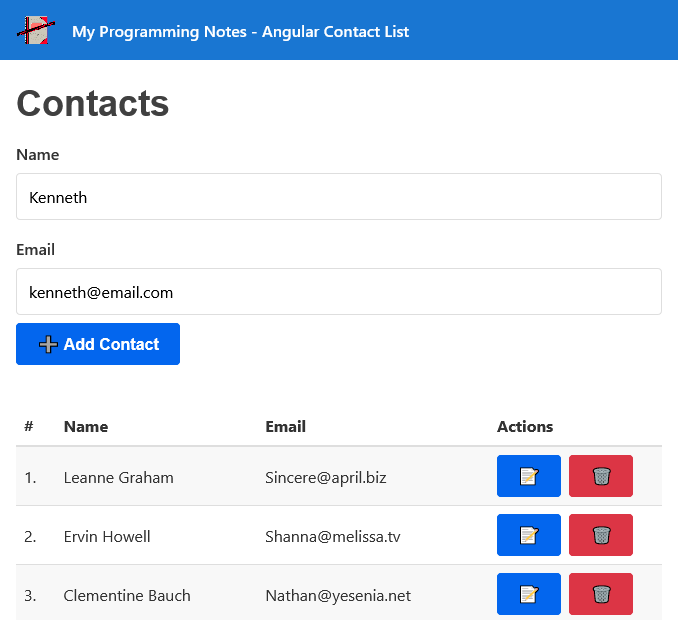
3. Screenshots
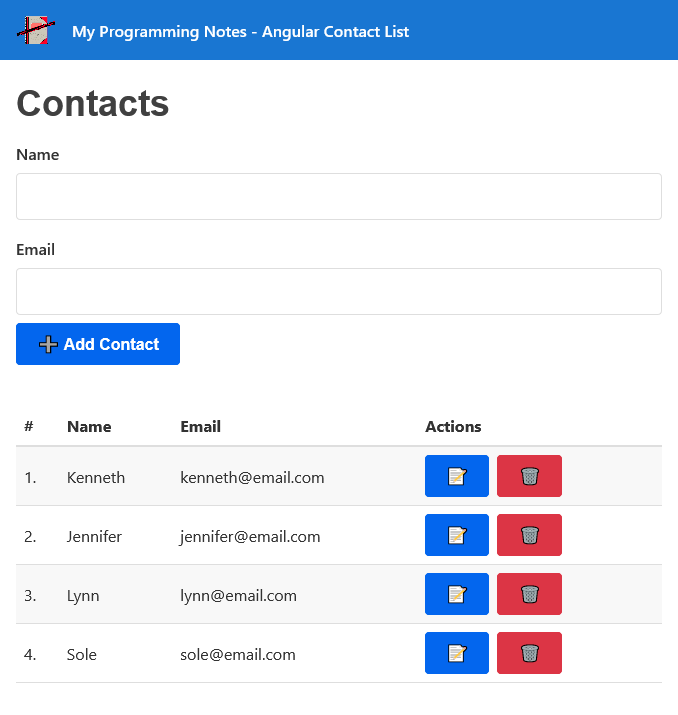
Initial Contact List Fetched From API
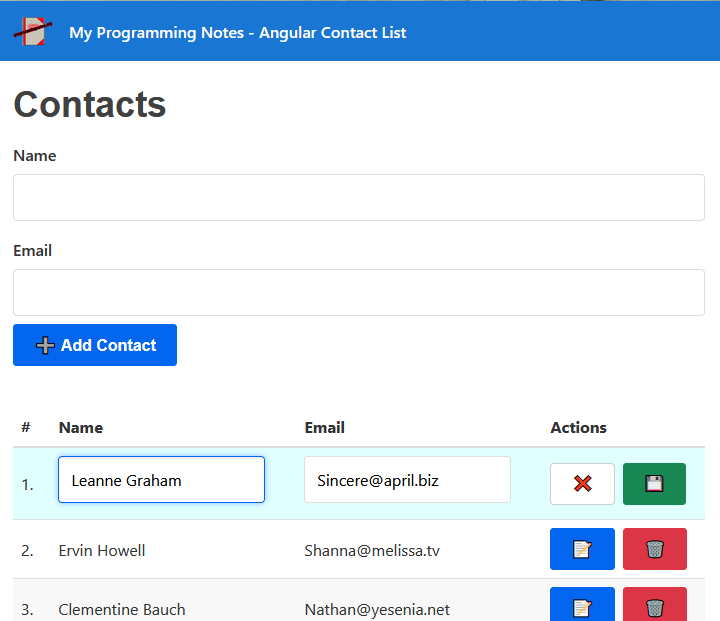
Adding A New Contact
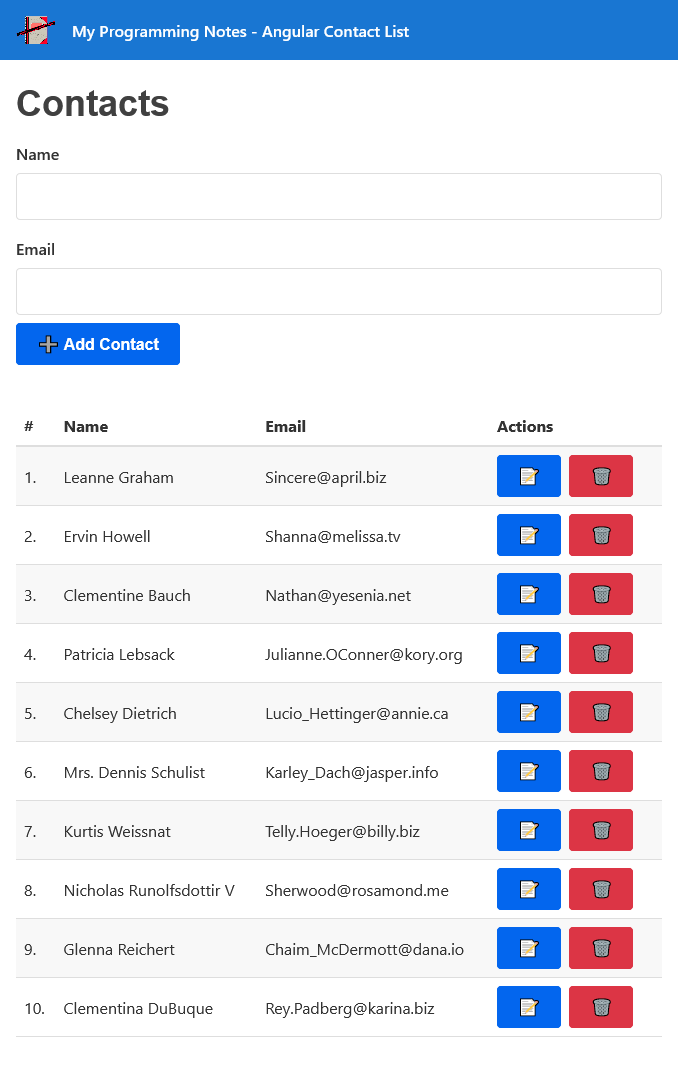
Contact List With New Contact Added

Updating A Contact
Contact List With New Entries
4. Download
QUICK NOTES:
The highlighted lines are sections of interest to look out for.
The code is heavily commented, so no further insight is necessary. If you have any questions, feel free to leave a comment below.
C# || Jump Game III – How To Check If You Can Reach Target Value In Array Using C#
The following is a module with functions which demonstrates how to check if you can reach a target value in an array using C#.
1. Can Reach – Problem Statement
Given an array of non-negative integers arr, you are initially positioned at start index of the array. When you are at index i, you can jump to i + arr[i] or i – arr[i], check if you can reach to any index with value 0.
Notice that you can not jump outside of the array at any time.
Example 1:
Input: arr = [4,2,3,0,3,1,2], start = 5

Output: true

Explanation:

All possible ways to reach at index 3 with value 0 are:

index 5 -> index 4 -> index 1 -> index 3

index 5 -> index 6 -> index 4 -> index 1 -> index 3
Example 2:
Input: arr = [4,2,3,0,3,1,2], start = 0

Output: true

Explanation:

One possible way to reach at index 3 with value 0 is:

index 0 -> index 4 -> index 1 -> index 3
Example 3:
Input: arr = [3,0,2,1,2], start = 2

Output: false

Explanation: There is no way to reach at index 1 with value 0.
2. Can Reach – Solution
The following are two solutions which demonstrates how to check if you can reach a target value in an array.
The following solution uses Depth First Search when looking for the target value.
|
1 2 3 4 5 6 7 8 9 10 11 12 13 14 15 16 17 18 19 20 21 22 23 24 25 26 27 28 29 30 31 32 33 34 35 |
// ============================================================================ // Author: Kenneth Perkins // Date: Dec 8, 2021 // Taken From: http://programmingnotes.org/ // File: Solution.cs // Description: Determines if a target value can be reached in an array // ============================================================================ public class Solution { public bool CanReach(int[] arr, int start) { var visited = new bool[arr.Length]; return DFS(arr, start, visited); } public bool DFS(int[] arr, int currentIndex, bool[] visited) { // Make sure parameters are in bounds if (currentIndex < 0 || currentIndex >= arr.Length) { return false; } // Check to see if the index has been visited if (visited[currentIndex]) { return false; } // Check to see if we found the target value if (arr[currentIndex] == 0) { return true; } // Mark current index as visited visited[currentIndex] = true; // Keep searching forwards and backwards var forwards = currentIndex + arr[currentIndex]; var backwards = currentIndex - arr[currentIndex]; return DFS(arr, backwards, visited) || DFS(arr, forwards, visited); } }// http://programmingnotes.org/ |
The following solution uses Breadth First Search when looking for the target value.
|
1 2 3 4 5 6 7 8 9 10 11 12 13 14 15 16 17 18 19 20 21 22 23 24 25 26 27 28 29 30 31 32 33 34 35 36 37 38 |
// ============================================================================ // Author: Kenneth Perkins // Date: Dec 8, 2021 // Taken From: http://programmingnotes.org/ // File: Solution.cs // Description: Determines if a target value can be reached in an array // ============================================================================ public class Solution { public bool CanReach(int[] arr, int start) { var visited = new bool[arr.Length]; var queue = new Queue<int>(); queue.Enqueue(start); while (queue.Count > 0) { var currentIndex = queue.Dequeue(); // Check to see if we found the target value if (arr[currentIndex] == 0) { return true; } // Mark current index as visited visited[currentIndex] = true; // Keep searching forwards and backwards var forwards = currentIndex + arr[currentIndex]; var backwards = currentIndex - arr[currentIndex]; var directions = new List<int>{forwards, backwards}; foreach (var direction in directions) { if (direction >= 0 && direction < arr.Length && !visited[direction]) { queue.Enqueue(direction); } } } return false; } }// http://programmingnotes.org/ |
QUICK NOTES:
The highlighted lines are sections of interest to look out for.
The code is heavily commented, so no further insight is necessary. If you have any questions, feel free to leave a comment below.
Once compiled, you should get this as your output for the example cases:
true

true

false
C# || Maximum Product Subarray – How To Find Largest Product In Contiguous Subarray Using C#

The following is a module with functions which demonstrates how to find the largest product in a contiguous subarray using C#.
1. Max Product – Problem Statement
Given an integer array nums, find a contiguous non-empty subarray within the array that has the largest product, and return the product.
It is guaranteed that the answer will fit in a 32-bit integer.
A subarray is a contiguous subsequence of the array.
Example 1:
Input: nums = [2,3,-2,4]

Output: 6

Explanation: [2,3] has the largest product 6.
Example 2:
Input: nums = [-2,0,-1]

Output: 0

Explanation: The result cannot be 2, because [-2,-1] is not a subarray.
2. Max Product – Solution
The following is a solution which demonstrates how to find the largest product in a contiguous subarray.
This solution is inspired by Kadane’s algorithm to find the result.
The idea here is similar to the ‘Maximum Subarray‘ problem.
In this solution, we have two values:
- The current cumulative maximum product up to current element
- The current cumulative minimum product up to current element
Each loop iteration, these values are updated by either multiplying the new element at the current index with the existing product, or starting fresh from current index.
When a negative number is encountered, the current max and current min values are swapped, because multiplying a negative number makes a big number smaller, and multiplying a negative number makes small number bigger. So their intent is redefined by swapping.
|
1 2 3 4 5 6 7 8 9 10 11 12 13 14 15 16 17 18 19 20 21 22 23 24 25 26 27 28 29 30 31 32 33 34 35 36 37 38 39 |
// ============================================================================ // Author: Kenneth Perkins // Date: Dec 2, 2021 // Taken From: http://programmingnotes.org/ // File: Solution.cs // Description: Demonstrates how to find maximum product contiguous subarray // ============================================================================ public class Solution { public int MaxProduct(int[] nums) { // Store the result var result = nums[0]; // The current maximum and minimum product of the subarray var currentMin = nums[0]; var currentMax = nums[0]; for (int index = 1; index < nums.Length; ++index) { // Swap current max/min because multiplying // a negative number makes a big number smaller, // and multiplying a negative number makes small number bigger. // So their intent is redefined by swapping if (nums[index] < 0) { var temp = currentMax; currentMax = currentMin; currentMin = temp; } // Determine the max/min product for the current number. // It is either the current number itself // or the max/min by the previous values times the current one currentMax = Math.Max(nums[index], currentMax * nums[index]); currentMin = Math.Min(nums[index], currentMin * nums[index]); // Keep track of the current max result result = Math.Max(result, currentMax); } return result; } }// http://programmingnotes.org/ |
QUICK NOTES:
The highlighted lines are sections of interest to look out for.
The code is heavily commented, so no further insight is necessary. If you have any questions, feel free to leave a comment below.
Once compiled, you should get this as your output for the example cases:
6

0
C# || Maximum Subarray – How To Find Largest Sum In Contiguous Subarray Using C#
The following is a module with functions which demonstrates how to find the largest sum in a contiguous subarray using C#.
1. Max Sub Array – Problem Statement
Given an integer array nums, find the contiguous subarray (containing at least one number) which has the largest sum and return its sum.
A subarray is a contiguous part of an array.
Example 1:
Input: nums = [-2,1,-3,4,-1,2,1,-5,4]

Output: 6

Explanation: [4,-1,2,1] has the largest sum = 6.
Example 2:
Input: nums = [1]

Output: 1
Example 3:
Input: nums = [5,4,-1,7,8]

Output: 23
2. Max Sub Array – Solution
The following is a solution which demonstrates how to find the largest sum in a contiguous subarray.
This solution uses Kadane’s algorithm to find the result.
|
1 2 3 4 5 6 7 8 9 10 11 12 13 14 15 16 17 18 19 20 |
// ============================================================================ // Author: Kenneth Perkins // Date: Dec 2, 2021 // Taken From: http://programmingnotes.org/ // File: Solution.cs // Description: Demonstrates how to find maximum sum in contiguous subarray // ============================================================================ public class Solution { public int MaxSubArray(int[] nums) { var result = nums[0]; var current = result; for (int index = 1; index < nums.Length; ++index) { current = Math.Max(nums[index], nums[index] + current); result = Math.Max(result, current); } return result; } }// http://programmingnotes.org/ |
QUICK NOTES:
The highlighted lines are sections of interest to look out for.
The code is heavily commented, so no further insight is necessary. If you have any questions, feel free to leave a comment below.
Once compiled, you should get this as your output for the example cases:
6

1

23
