


Monthly Archives: January 2021
JavaScript || How To Add & Populate A Dropdown List With An Array Using Vanilla JavaScript

The following is a module with functions which demonstrates how to add and populate a dropdown select list with an array of items using vanilla JavaScript.
The function demonstrated on this page allows to add items from an array into a dropdown list, as well as adding option groups and custom data attributes.
1. Basic Usage
The example below demonstrates the use of ‘Utils.bindDropdown‘ to bind the data in a simple array to a dropdown list.
|
1 2 3 4 5 6 7 8 9 10 11 12 13 14 15 16 17 |
<!-- Basic Usage --> <!-- Declare dropdown --> <select id="dropdown"></select> <script> (() => { // Declare dropdown items let items = ['Kenneth', 'Jennifer', 'Lynn', 'Sole']; // Get dropdown let dropdown = document.querySelector('#dropdown'); // Add dropdown items Utils.bindDropdown(dropdown, items); })(); </script> |
Sample:

2. Additional Options
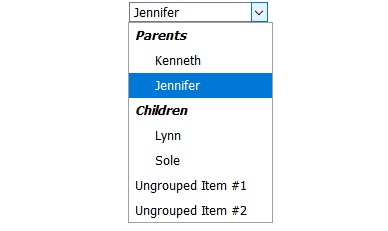
The example below demonstrates the use of ‘Utils.bindDropdown‘ to bind the data in an options initialization array to a dropdown list.
In this example, the text and values are specified, as well as custom option groups, the selected option value, and custom data attributes.
You can add any properties you wish to the object, and it will be added to the dropdown list option!
Note: Option groups are not required using this notation, as indicated by the ‘Ungrouped Items’.
|
1 2 3 4 5 6 7 8 9 10 11 12 13 14 15 16 17 18 19 20 21 22 23 24 |
<!-- Additional Options --> <!-- Declare dropdown --> <select id="dropdown"></select> <script> (() => { // Declare dropdown items let items = [ {text: 'Kenneth', value: 31, group: 'Parents'}, {text: 'Jennifer', value: 28, group: 'Parents', selected: true}, {text: 'Lynn', value: 87, group: 'Children'}, {text: 'Sole', value: 91, group: 'Children', 'data-test': 'test attribute'}, {text: 'Ungrouped Item #1', value: 1019}, {text: 'Ungrouped Item #2', value: 8791, disabled: false}, ]; // Get dropdown let dropdown = document.querySelector('#dropdown'); // Add dropdown items Utils.bindDropdown(dropdown, items); })(); </script> |
Sample:
3. Utils Namespace
The following is the Utils.js Namespace. Include this in your project to start using!
|
1 2 3 4 5 6 7 8 9 10 11 12 13 14 15 16 17 18 19 20 21 22 23 24 25 26 27 28 29 30 31 32 33 34 35 36 37 38 39 40 41 42 43 44 45 46 47 48 49 50 51 52 53 54 55 56 57 58 59 60 61 62 63 64 65 66 67 68 69 70 71 72 73 74 75 76 77 78 79 80 81 82 83 84 85 86 87 88 89 90 91 92 93 94 95 96 97 98 99 |
// ============================================================================ // Author: Kenneth Perkins // Date: Jan 30, 2021 // Taken From: http://programmingnotes.org/ // File: Utils.js // Description: Javascript that handles general utility functions // ============================================================================ /** * NAMESPACE: Utils * USE: Handles general utility functions. */ var Utils = Utils || {}; (function(namespace) { 'use strict'; // Property to hold public variables and functions let exposed = namespace; /** * FUNCTION: bindDropdown * USE: Binds data to a dropdown list * @param dropdown: Javascript element to add dropdown options * @param items: An array of items to bind to the dropdown list * @return: N/A */ exposed.bindDropdown = (dropdown, items) => { // Clear existing entries while (dropdown.hasChildNodes()) { dropdown.removeChild(dropdown.firstChild); } // Set up option groups for the dropdown const groupKey = 'group'; let groups = {}; for (let item of items) { if (typeof item !== 'object' || !(groupKey in item) || (item[groupKey] in groups)) { continue; } let groupName = item[groupKey]; let optGroup = document.createElement('optgroup'); optGroup.label = groupName; groups[groupName] = { element: optGroup, added: false }; } // Add new entries for (let item of items) { if (typeof item !== 'object') { let text = String(item); item = {}; item.text = text; item.value = text; } let isEmptyOption = true; let isGroupOption = false; let option = document.createElement('option'); for (let prop in item) { if (prop === groupKey) { isGroupOption = true; continue; } let value = item[prop]; if (prop in option) { option[prop] = value; } else { option.setAttribute(prop, value); } isEmptyOption = false; } // Add option to the dropdown if (isGroupOption) { let groupInfo = groups[item[groupKey]]; let optGroup = groupInfo.element; if (!groupInfo.added) { dropdown.appendChild(optGroup); groupInfo.added = true; } if (!isEmptyOption) { optGroup.appendChild(option); } } else { dropdown.appendChild(option); } } } (function (factory) { if (typeof define === 'function' && define.amd) { define([], factory); } else if (typeof exports === 'object') { module.exports = factory(); } }(function() { return namespace; })); }(Utils)); // http://programmingnotes.org/ |
4. More Examples
Below are more examples demonstrating the use of ‘Utils.js‘. Don’t forget to include the module when running the examples!
|
1 2 3 4 5 6 7 8 9 10 11 12 13 14 15 16 17 18 19 20 21 22 23 24 25 26 27 28 29 30 31 32 33 34 35 36 37 38 39 40 41 42 43 44 45 46 47 48 49 50 51 52 53 54 55 56 57 58 59 60 61 62 63 64 65 66 67 |
<!-- // ============================================================================ // Author: Kenneth Perkins // Date: Jan 30, 2021 // Taken From: http://programmingnotes.org/ // File: Utils.html // Description: Demonstrates the use of Utils.js // ============================================================================ --> <!DOCTYPE html> <html> <head> <meta charset="utf-8"/> <meta name="viewport" content="width=device-width, initial-scale=1"> <title>My Programming Notes Utils.js Demo</title> <style> .main { text-align:center; margin-left:auto; margin-right:auto; } </style> <!-- // Include module --> <script type="text/javascript" src="./Utils.js"></script> </head> <body> <main class="main"> <div>My Programming Notes Utils.js Demo</div> <!-- Declare dropdown --> <select id="dropdown"></select> </main> <script> document.addEventListener('DOMContentLoaded', function(eventLoaded) { // Get dropdown let dropdown = document.querySelector('#dropdown'); dropdown.addEventListener('change', (e) => { let text = dropdown.options[dropdown.selectedIndex].text; let value = dropdown.value; alert(`Text: ${text} - Value: ${value}`); }); // Declare dropdown items let items = [ {text: 'Kenneth', value: 31, group: 'Parents'}, {text: 'Jennifer', value: 28, group: 'Parents', selected: true}, {text: 'Lynn', value: 87, group: 'Children'}, {text: 'Sole', value: 91, group: 'Children', 'data-test': 'test attribute'}, {text: 'Ungrouped Item #1', value: 1019}, {text: 'Ungrouped Item #2', value: 8791, disabled: false}, ]; //items = ['Kenneth', 'Jennifer', 'Lynn', 'Sole']; //items = [31, 28, 87, 91, 1019, 8791]; // Add dropdown items Utils.bindDropdown(dropdown, items); }); </script> </body> </html><!-- // http://programmingnotes.org/ --> |
QUICK NOTES:
The highlighted lines are sections of interest to look out for.
The code is heavily commented, so no further insight is necessary. If you have any questions, feel free to leave a comment below.
C++ || Circular Array – How To Index Into Array As If It Is Circular Using C++
The following is a module with functions which demonstrates how to index into an array as if it is circular using C++.
This function adjusts a range as circular and ‘wraps around’ the value to become in bounds.
1. Circular Array
The example below demonstrates the use of ‘Utils::circularWrap‘ to index into a vector as if it is circular and adjusts a range as circular so the value become in bounds.
Note: A vector is used in this example, but it is not required.
|
1 2 3 4 5 6 7 8 9 10 11 12 13 14 15 16 17 18 19 20 21 22 23 24 25 26 27 28 29 30 31 32 33 34 35 36 37 38 |
// Circular Array // Declare words std::vector<std::string> words = { "Kenneth", "Jennifer", "Lynn", "Sole" }; // Display words for (int index = -9; index <= 10; ++index) { // Wrap index to be in bounds auto adjusted = Utils::circularWrap(index, words.size()); // Display results std::cout << "Index: " << index << ", Adjusted Index: " << adjusted << ", Word: " << words[adjusted] << std::endl; } // expected output: /* Index: -9, Adjusted Index: 3, Word: Sole Index: -8, Adjusted Index: 0, Word: Kenneth Index: -7, Adjusted Index: 1, Word: Jennifer Index: -6, Adjusted Index: 2, Word: Lynn Index: -5, Adjusted Index: 3, Word: Sole Index: -4, Adjusted Index: 0, Word: Kenneth Index: -3, Adjusted Index: 1, Word: Jennifer Index: -2, Adjusted Index: 2, Word: Lynn Index: -1, Adjusted Index: 3, Word: Sole Index: 0, Adjusted Index: 0, Word: Kenneth Index: 1, Adjusted Index: 1, Word: Jennifer Index: 2, Adjusted Index: 2, Word: Lynn Index: 3, Adjusted Index: 3, Word: Sole Index: 4, Adjusted Index: 0, Word: Kenneth Index: 5, Adjusted Index: 1, Word: Jennifer Index: 6, Adjusted Index: 2, Word: Lynn Index: 7, Adjusted Index: 3, Word: Sole Index: 8, Adjusted Index: 0, Word: Kenneth Index: 9, Adjusted Index: 1, Word: Jennifer Index: 10, Adjusted Index: 2, Word: Lynn */ |
2. Utils Namespace
The following is the Utils Namespace. Include this in your project to start using!
|
1 2 3 4 5 6 7 8 9 10 11 12 13 14 15 16 17 18 19 20 21 |
// ============================================================================ // Author: Kenneth Perkins // Date: Jan 27, 2021 // Taken From: http://programmingnotes.org/ // File: Utils.h // Description: Handles general utility functions // ============================================================================ #pragma once namespace Utils { /** * FUNCTION: circularWrap * USE: Adjusts a range as circular and 'wraps around' the value to become in bounds * @param left: The current number, or the 'numerator' * @param right: The upper bound maximum range number, or the 'denominator' * @return: The adjusted value according to the denominator */ int circularWrap(int left, int right) { return ((left % right) + right) % right; } }// http://programmingnotes.org/ |
3. More Examples
Below are more examples demonstrating the use of the ‘Utils‘ Namespace. Don’t forget to include the module when running the examples!
|
1 2 3 4 5 6 7 8 9 10 11 12 13 14 15 16 17 18 19 20 21 22 23 24 25 26 27 28 29 30 31 32 33 34 35 36 37 38 39 40 |
// ============================================================================ // Author: Kenneth Perkins // Date: Jan 27, 2021 // Taken From: http://programmingnotes.org/ // File: program.cpp // Description: The following demonstrates the use of the Utils Namespace // ============================================================================ #include <iostream> #include <string> #include <exception> #include <vector> #include "Utils.h" void display(const std::string& message); int main() { try { // Declare words std::vector<std::string> words = { "Kenneth", "Jennifer", "Lynn", "Sole" }; // Display words for (int index = -9; index <= 10; ++index) { // Wrap index to be in bounds auto adjusted = Utils::circularWrap(index, words.size()); // Display results std::cout << "Index: " << index << ", Adjusted Index: " << adjusted << ", Word: " << words[adjusted] << std::endl; } } catch (std::exception& e) { display("\nAn error occurred: " + std::string(e.what())); } std::cin.get(); return 0; } void display(const std::string& message) { std::cout << message << std::endl; }// http://programmingnotes.org/ |
QUICK NOTES:
The highlighted lines are sections of interest to look out for.
The code is heavily commented, so no further insight is necessary. If you have any questions, feel free to leave a comment below.
C++ || How To Split & Parse A String Into Tokens With Multiple Delimiters Using C++

The following is a module with functions which demonstrates how to split and parse a string into substring tokens with multiple delimiters using C++.
The function demonstrated on this page parses and splits a string and returns a vector that contains the substring tokens according to the delimiters.
The delimiters can be either a single character or multiple characters. If no delimiting characters are specified, the string is split at whitespace characters.
1. Split – Basic Usage
The example below demonstrates the use of ‘Utils::split‘ to split a string into substring tokens.
In this example, the default delimiter is used to split a string, which is a whitespace.
|
1 2 3 4 5 6 7 8 9 10 11 12 13 14 15 16 17 18 19 20 |
// Split - Basic Usage // Declare data std::string input = "Kenneth Jennifer Lynn Sole"; // Get string split results auto results = Utils::split(input); // Display results for (const auto& substring : results) { std::cout << "Substring: " << substring << std::endl; } // expected output: /* Substring: Kenneth Substring: Jennifer Substring: Lynn Substring: Sole */ |
2. Split – Multiple Delimiters
The example below demonstrates the use of ‘Utils::split‘ to split a string into substring tokens.
In this example, multiple delimiters are used to split a string.
|
1 2 3 4 5 6 7 8 9 10 11 12 13 14 15 16 17 18 19 20 21 22 23 24 25 26 27 28 29 30 31 |
// Split - Multiple Delimiters // Declare data std::string input = "- This, is. a sample string? 3!30$' 19: 68/, LF+, 1, 1"; // Declare delimiters std::string delimeters = " ,.-':;?()+*/%$#!\"@^&"; // Get string split results auto results = Utils::split(input, delimeters); // Display results for (const auto& substring : results) { std::cout << "Substring: " << substring << std::endl; } // expected output: /* Substring: This Substring: is Substring: a Substring: sample Substring: string Substring: 3 Substring: 30 Substring: 19 Substring: 68 Substring: LF Substring: 1 Substring: 1 */ |
3. Utils Namespace
The following is the Utils Namespace. Include this in your project to start using!
|
1 2 3 4 5 6 7 8 9 10 11 12 13 14 15 16 17 18 19 20 21 22 23 24 25 26 27 28 29 30 31 32 33 34 35 36 |
// ============================================================================ // Author: Kenneth Perkins // Date: Jan 23, 2021 // Taken From: http://programmingnotes.org/ // File: Utils.h // Description: Handles general utility functions // ============================================================================ #pragma once #include <vector> #include <string> namespace Utils { /** * FUNCTION: split * USE: Splits a string into tokens and saves them into a vector * @param source: String to be broken up into substrings (tokens) * @param delimiters: String containing the delimiter character(s) * @return: A vector containing all the found tokens in the string */ std::vector<std::string> split(const std::string& source, const std::string& delimiters = " ") { std::size_t prev = 0; std::size_t currentPos = 0; std::vector<std::string> results; while ((currentPos = source.find_first_of(delimiters, prev)) != std::string::npos) { if (currentPos > prev) { results.push_back(source.substr(prev, currentPos - prev)); } prev = currentPos + 1; } if (prev < source.length()) { results.push_back(source.substr(prev)); } return results; } }// http://programmingnotes.org/ |
4. More Examples
Below are more examples demonstrating the use of the ‘Utils‘ Namespace. Don’t forget to include the module when running the examples!
|
1 2 3 4 5 6 7 8 9 10 11 12 13 14 15 16 17 18 19 20 21 22 23 24 25 26 27 28 29 30 31 32 33 34 35 36 37 38 39 40 41 42 43 44 45 46 47 48 49 50 51 52 53 54 |
// ============================================================================ // Author: Kenneth Perkins // Date: Jan 23, 2021 // Taken From: http://programmingnotes.org/ // File: program.cpp // Description: The following demonstrates the use of the Utils Namespace // ============================================================================ #include <iostream> #include <string> #include <exception> #include <vector> #include "Utils.h" void display(const std::string& message); int main() { try { // Declare data std::string input = "Kenneth Jennifer Lynn Sole"; // Get string split results auto results = Utils::split(input); // Display results for (const auto& substring : results) { display("Substring: " + substring); } display(""); // Declare data std::string input2 = "- This, is. a sample string? 3!30$' 19: 68/, LF+, 1, 1"; // Declare delimiters std::string delimeters = " ,.-':;?()+*/%$#!\"@^&"; // Get string split results auto results2 = Utils::split(input2, delimeters); // Display results for (const auto& substring : results2) { display("Substring: " + substring); } } catch (std::exception& e) { display("\nAn error occurred: " + std::string(e.what())); } std::cin.get(); return 0; } void display(const std::string& message) { std::cout << message << std::endl; }// http://programmingnotes.org/ |
QUICK NOTES:
The highlighted lines are sections of interest to look out for.
The code is heavily commented, so no further insight is necessary. If you have any questions, feel free to leave a comment below.
C++ || How To Get Distinct & Unique Values In An Array/Vector/Container & Remove Duplicates Using C++

The following is a module with functions which demonstrates how to get distinct and unique values in an array/vector/container and remove duplicates using C++.
The function demonstrated on this page is a template, so it should work on containers of any type.
The function also does not require a sort, it preserves the original order of the vector, uses the equality operator (operator==), and allows for a custom predicate comparison function to determine whether the arguments are equal.
1. Distinct – String Array
The example below demonstrates the use of ‘Utils::distinct‘ to get the distinct elements from an array.
|
1 2 3 4 5 6 7 8 9 10 11 12 13 14 15 16 17 18 19 20 21 22 23 24 |
// Distinct - String Array // Declare array std::string names[] = { "Kenneth", "Jennifer", "Lynn", "Sole", "Kenneth", "Jennifer" }; // Get array size int size = sizeof(names) / sizeof(names[0]); // Get distinct values auto results = Utils::distinct(names, names + size); // Display results for (const auto& name : results) { std::cout << "Name: " << name << std::endl; } // expected output: /* Name: Kenneth Name: Jennifer Name: Lynn Name: Sole */ |
2. Distinct – Object Vector
The example below demonstrates the use of ‘Utils::distinct‘ to get the distinct elements from an object vector.
The object in this example overloads the equality operator to determine whether arguments are equal.
|
1 2 3 4 5 6 7 8 9 10 11 12 13 14 15 16 17 18 19 20 21 22 23 24 25 26 27 28 29 30 31 |
// Distinct - Object Vector // Declare object struct Person { int id; std::string name; bool operator==(const Person& rhs) const {return name == rhs.name;} }; // Declare data std::vector<Person> people = { {31, "Kenneth"}, {28, "Jennifer"}, {87, "Lynn"}, {91, "Sole"}, {22, "Kenneth"}, {19, "Jennifer"} }; // Get distinct values using object equality operator auto results = Utils::distinct(people.begin(), people.end()); // Display results for (const auto& person : results) { std::cout << "ID: " << person.id << ", Name: " << person.name << std::endl; } // expected output: /* ID: 31, Name: Kenneth ID: 28, Name: Jennifer ID: 87, Name: Lynn ID: 91, Name: Sole */ |
3. Distinct – Object Vector Predicate
The example below demonstrates the use of ‘Utils::distinct‘ to get the distinct elements from an object vector.
In this example, a predicate is used to determine whether arguments are equal.
|
1 2 3 4 5 6 7 8 9 10 11 12 13 14 15 16 17 18 19 20 21 22 23 24 25 26 27 28 29 30 31 32 33 |
// Distinct - Object Vector Predicate // Declare object struct Person { int id; std::string name; }; // Declare data std::vector<Person> people = { {31, "Kenneth"}, {28, "Jennifer"}, {87, "Lynn"}, {91, "Sole"}, {22, "Kenneth"}, {19, "Jennifer"} }; // Declare custom comparison predicate auto pred = [](const auto& lhs, const auto& rhs) {return lhs.name == rhs.name;}; // Get distinct values using predicate auto results = Utils::distinct(people.begin(), people.end(), pred); // Display results for (const auto& person : results) { std::cout << "ID: " << person.id << ", Name: " << person.name << std::endl; } // expected output: /* ID: 31, Name: Kenneth ID: 28, Name: Jennifer ID: 87, Name: Lynn ID: 91, Name: Sole */ |
4. Utils Namespace
The following is the Utils Namespace. Include this in your project to start using!
|
1 2 3 4 5 6 7 8 9 10 11 12 13 14 15 16 17 18 19 20 21 22 23 24 25 26 27 28 29 30 31 32 33 34 35 36 37 38 39 40 41 42 43 44 45 46 47 |
// ============================================================================ // Author: Kenneth Perkins // Date: Jan 22, 2021 // Taken From: http://programmingnotes.org/ // File: Utils.h // Description: Handles general utility functions // ============================================================================ #pragma once #include <vector> #include <algorithm> #include <iterator> namespace Utils { /** * FUNCTION: distinct * USE: Returns distinct elements in the given range [first, last) * @param first: The first position of the sequence * @param last: The last position of the sequence * @param predicate: A comparison function to check whether arguments are equal * @return: A container with distinct elements from the given range */ template<typename InputIt, typename T = typename std::iterator_traits<InputIt>::value_type, typename Pred> std::vector<T> distinct(InputIt first, InputIt last, const Pred& predicate) { std::vector<T> results; std::copy_if(first, last, std::back_inserter(results), [&](const T& lhs) { return std::find_if(results.begin(), results.end(), [&](const T& rhs) { return predicate(lhs, rhs); }) == results.end(); } ); return results; } /** * FUNCTION: distinct * USE: Returns distinct elements in the given range [first, last) * @param first: The first position of the sequence * @param last: The last position of the sequence * @return: A container with distinct elements from the given range */ template<typename InputIt, typename T = typename std::iterator_traits<InputIt>::value_type> std::vector<T> distinct(InputIt first, InputIt last) { auto pred = [](const T& x, const T& y) { return x == y; }; return distinct(first, last, pred); } }// http://programmingnotes.org/ |
5. More Examples
Below are more examples demonstrating the use of the ‘Utils‘ Namespace. Don’t forget to include the module when running the examples!
|
1 2 3 4 5 6 7 8 9 10 11 12 13 14 15 16 17 18 19 20 21 22 23 24 25 26 27 28 29 30 31 32 33 34 35 36 37 38 39 40 41 42 43 44 45 46 47 48 49 50 51 52 53 54 55 56 57 58 59 60 61 62 63 64 65 66 67 68 69 70 71 72 73 74 75 76 77 |
// ============================================================================ // Author: Kenneth Perkins // Date: Jan 22, 2021 // Taken From: http://programmingnotes.org/ // File: program.cpp // Description: The following demonstrates the use of the Utils Namespace // ============================================================================ #include <iostream> #include <string> #include <exception> #include <vector> #include "Utils.h" void display(const std::string& message); int main() { try { // Declare array std::string names[] = { "Kenneth", "Jennifer", "Lynn", "Sole", "Kenneth", "Jennifer" }; // Get array size int size = sizeof(names) / sizeof(names[0]); // Get distinct values auto results = Utils::distinct(names, names + size); // Display results for (const auto& name : results) { display("Name: " + name); } display(""); // Declare object struct Person { int id; std::string name; bool operator==(const Person& rhs) const { return name == rhs.name; } }; // Declare data std::vector<Person> people = { {31, "Kenneth"}, {28, "Jennifer"}, {87, "Lynn"}, {91, "Sole"}, {22, "Kenneth"}, {19, "Jennifer"} }; // Get distinct values using object equality operator auto results2 = Utils::distinct(people.begin(), people.end()); // Display results for (const auto& person : results2) { display("ID: " + std::to_string(person.id) + ", Name: " + person.name); } display(""); // Declare custom comparison predicate auto pred = [](const auto& lhs, const auto& rhs) { return lhs.name == rhs.name; }; // Get distinct values using predicate auto results3 = Utils::distinct(people.begin(), people.end(), pred); // Display results for (const auto& person : results3) { display("ID: " + std::to_string(person.id) + ", Name: " + person.name); } } catch (std::exception& e) { display("\nAn error occurred: " + std::string(e.what())); } std::cin.get(); return 0; } void display(const std::string& message) { std::cout << message << std::endl; }// http://programmingnotes.org/ |
QUICK NOTES:
The highlighted lines are sections of interest to look out for.
The code is heavily commented, so no further insight is necessary. If you have any questions, feel free to leave a comment below.
Vue || How To Build & Deploy A Vue Site/App For Production Under A Web Hosting Environment
The following page demonstrates how to build and deploy a Vue site/app for production under a shared hosting environment.
Note: This page assumes you already have a domain and hosting plan setup. It also assumes your project is completed and ready to be deployed. For an overview on how to get started with Vue, visit the official documentation.
Contents
1. Build The Project

2. Deploy Site

3. Deploy Site - Subfolder

4. Server Configuration - HTML5 History Mode
1. Build The Project
The first step is to build the project for production. This can be achieved by a simple command.
First, navigate to the project directory in the terminal, then type one of the following commands depending on your package manager.
NPM:
npm run build
Yarn:
yarn build
Once this process is complete, in your project directory you will see a new folder named ‘dist‘. This dist folder will contain the files that are needed to upload to the server.
The ‘dist‘ folder should contain something like the following:
• css - [folder]

• img - [folder]

• js - [folder]

• favicon.ico - [file]

• index.html - [file]
2. Deploy Site
The files generated in Step 1 contained in the ‘dist‘ folder can be uploaded to your server using any method familiar to you.
On your server, the public_html directory is typically where you would place the files, which is the document root folder for your primary domain name.
Once the files are uploaded, your site should be live!
3. Deploy Site – Subfolder
If you wish to deploy your site into a subfolder (i.e: site.com/your-subfolder/), this can be done by making only a few changes!
Before you build your project (as highlighted in Step 1), it needs to be updated to point to the subfolder as the ‘base’ path. This is configured in the vue.config.js file.
If this file doesn’t already exist in your project, you can create it. It should be placed in the root directory of your project.
Next, add the following to the vue.config.js file:
|
1 2 3 4 5 6 7 8 9 10 11 12 13 14 15 16 17 18 |
// ============================================================================ // Author: Kenneth Perkins // Date: Jan 17, 2021 // Taken From: http://programmingnotes.org/ // File: vue.config.js // Description: Adds additional options to the site config // ============================================================================ module.exports = { // Project deployment base // By default we assume your app will be deployed at the root of a domain, // e.g. https://www.my-app.com/ // If your app is deployed at a sub-path, you will need to specify that // sub-path here. For example, if your app is deployed at // https://www.foobar.com/my-app/ // then change this to '/my-app/' publicPath: process.env.NODE_ENV === 'production' ? '/your-subfolder/' : '/', }// http://programmingnotes.org/ |
If you are using Vue Router in your project, make sure to update the related base property of the router.
This can be done by updating the router index.js like so:
|
1 2 3 4 5 6 7 8 9 10 11 12 13 14 15 16 17 18 |
// ============================================================================ // Author: Kenneth Perkins // Date: Jan 17, 2021 // Taken From: http://programmingnotes.org/ // File: index.js // Description: Router index file which sets up the routes for the project // ============================================================================ import { createWebHistory, createRouter } from 'vue-router'; let routes = []; // This sets the base url using the 'publicPath' property from vue.config.js const router = createRouter({ history: createWebHistory( process.env.BASE_URL ), routes }); export default router; // http://programmingnotes.org/ |
After the changes above are applied, follow the steps highlighted in Step 1 to build your project.
Next, upload the files generated in the ‘dist‘ folder into the subfolder directory on your server. The files can be uploaded using any method familiar to you.
Once the files are uploaded, your site should be live!
4. Server Configuration – HTML5 History Mode
When using Vue Router with HTML5 history mode, without a proper server configuration, users will get a 404 server error if they access ‘http://yoursite.com/user/id’ directly in their browser.
To fix the issue, all you need to do is add a simple catch-all fallback route to your server. If the URL doesn’t match any static assets, it should serve the same index.html page that your app lives in.
For example, if using Apache, this is configured in the .htaccess file.
If this file doesn’t already exist, you can create it. It should be placed in the same directory as your apps index.html file.
Next, add the following to the .htaccess file:
|
1 2 3 4 5 6 7 8 9 10 11 12 13 14 15 16 |
# ============================================================================ # Author: Kenneth Perkins # Date: Jan 17, 2021 # Taken From: http://programmingnotes.org/ # File: .htaccess # Description: Catch all server fallback for routes in a app # ============================================================================ <IfModule mod_rewrite.c> RewriteEngine On RewriteBase / RewriteRule ^index\.html$ - [L] RewriteCond %{REQUEST_FILENAME} !-f RewriteCond %{REQUEST_FILENAME} !-d RewriteRule . /index.html [L] </IfModule> # http://programmingnotes.org/ |
If your app is deployed in a subfolder, using Apache, this is also configured in the .htaccess file.
If this file doesn’t already exist, you can create it. It should be placed in the same directory as your apps index.html file.
Next, add the following to the .htaccess file:
Note: Replace ‘[[[your-subfolder]]]‘ with the subfolder name where your app resides.
|
1 2 3 4 5 6 7 8 9 10 11 12 13 14 15 16 |
# ============================================================================ # Author: Kenneth Perkins # Date: Jan 17, 2021 # Taken From: http://programmingnotes.org/ # File: .htaccess # Description: Catch all server fallback for routes in a subfolder app # ============================================================================ <IfModule mod_rewrite.c> RewriteEngine On RewriteBase / RewriteRule ^index\.html$ - [L] RewriteCond %{REQUEST_FILENAME} !-f RewriteCond %{REQUEST_FILENAME} !-d RewriteRule . /[[[your-subfolder]]]/index.html [L] </IfModule> # http://programmingnotes.org/ |
For more example configurations, visit the official documentation for more information!
QUICK NOTES:
The highlighted lines are sections of interest to look out for.
The code is heavily commented, so no further insight is necessary. If you have any questions, feel free to leave a comment below.
Vue || How To Create A Simple Store With Shopping Cart Using Vuex, Vue Router & Vue
The following is an implementation which demonstrates how to create a simple store with a shopping cart using Vuex, Vue Router and Vue.
This store allows you to add and remove items from a cart, filter items by category, create a new user, log in and log out (with automatic redirect), and “purchase” the items in the cart on the checkout page.
1. Get Started
To get started, make sure you have a package manager like Node.js installed. Node.js is used to install packages.
You’ll also want to have vue-cli installed. Visit the official documentation for more information on how this is done.
Next, navigate to the project directory in the terminal, then run the following commands (Node.js):
Project Setup
npm install
Compiles and hot-reloads for development
npm run serve
2. Features
This project implements a simple store with the following features:
    1. Login / Create account (with automatic redirect)

    2. Retrieve products from a mock 'API'

    3. Add/Remove item to shopping cart

    4. Simulate purchasing items on checkout

    5. Custom 404 page

    6. Display products per category

    7. Hamburger 'options' menu
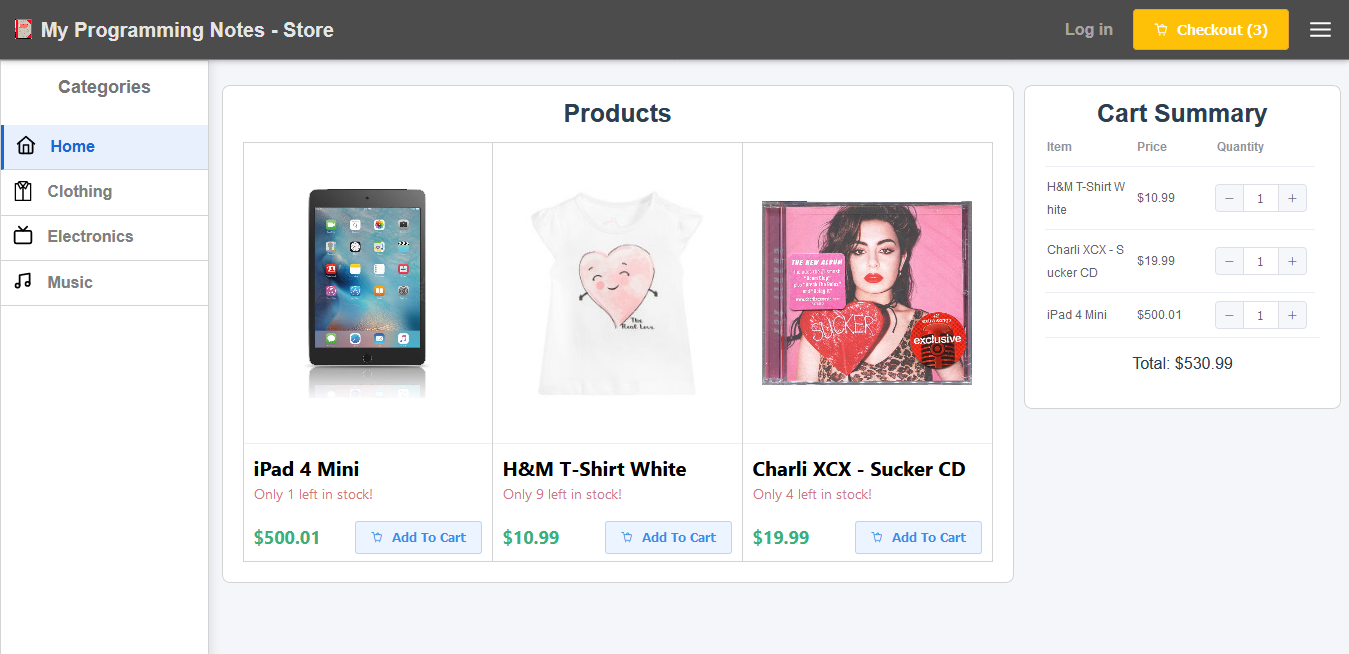
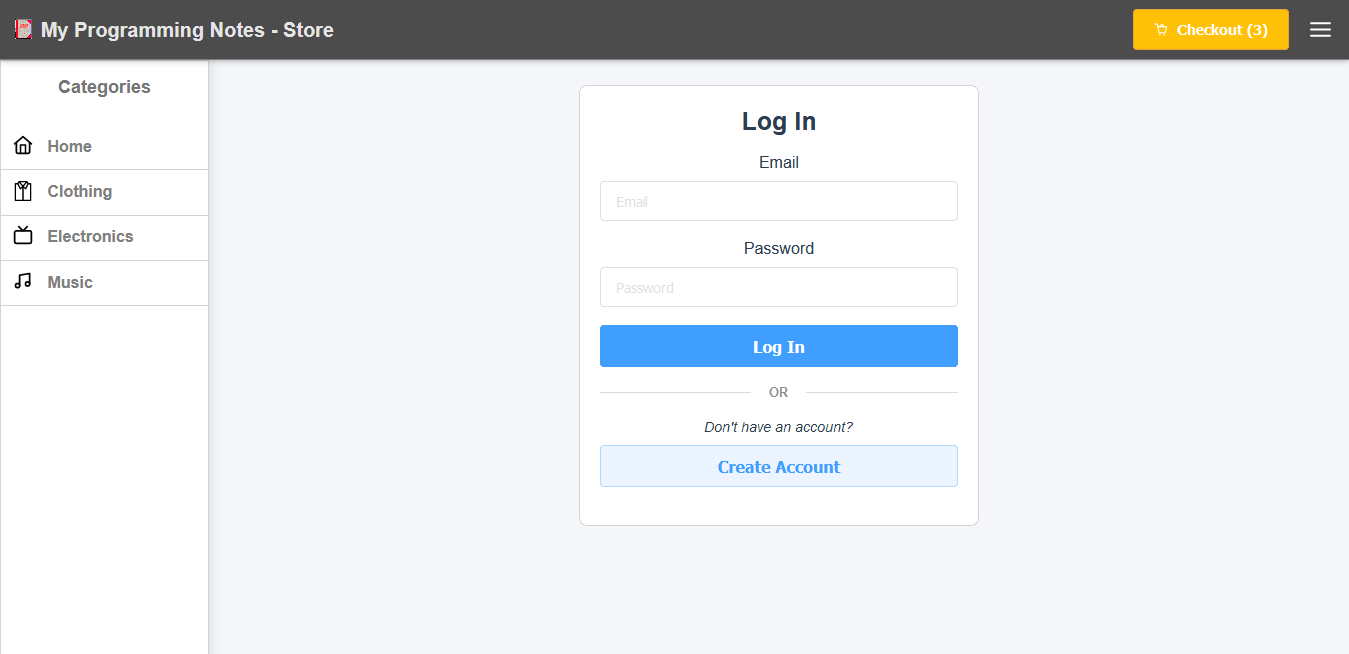
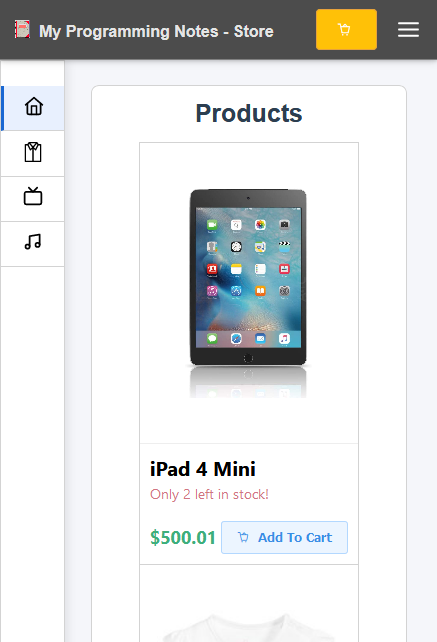
3. Screenshots
Home Page
Log In Page
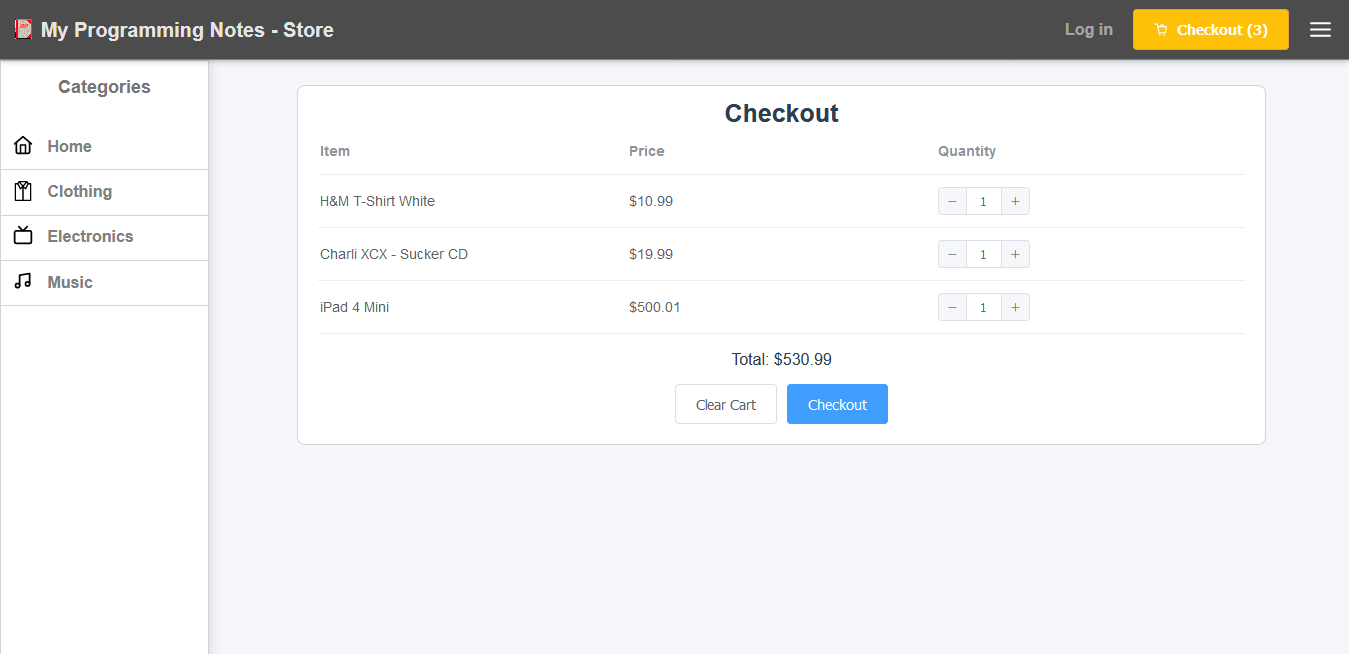
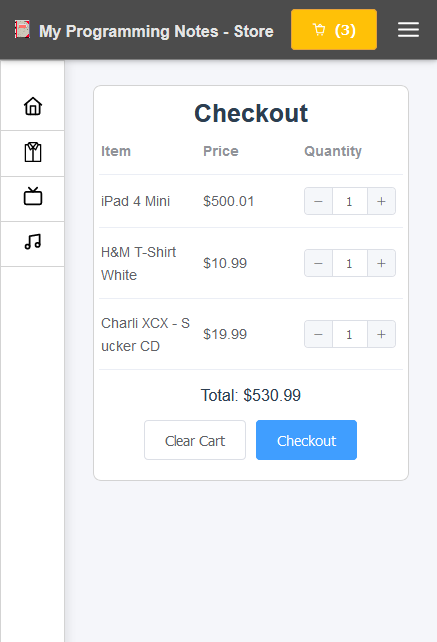
Check Out Page
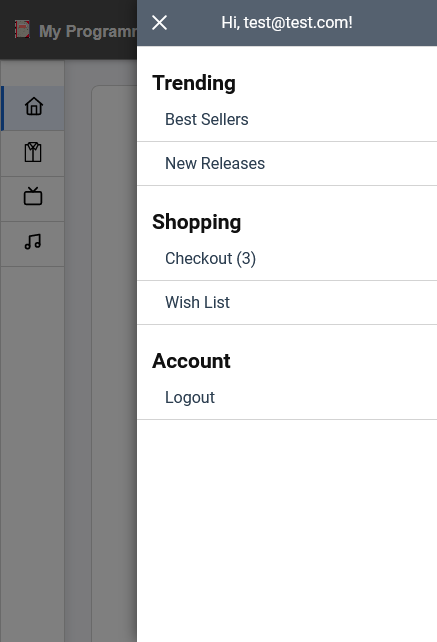
Hamburger Options Menu
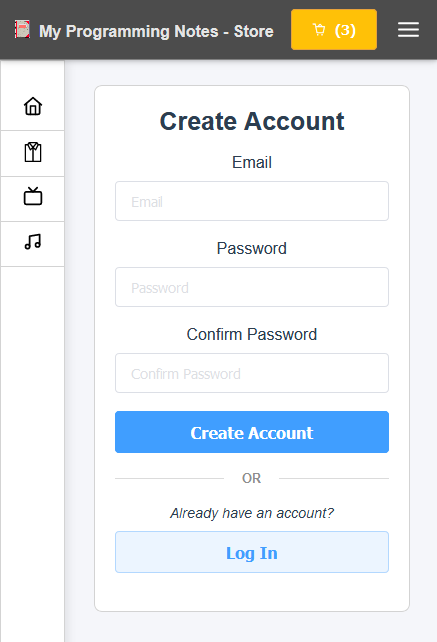
Create Account Page
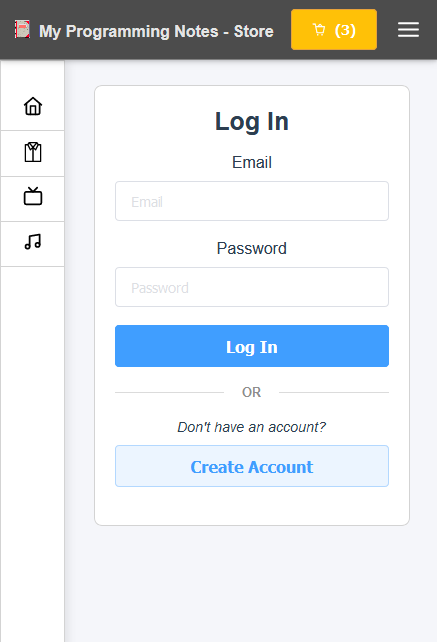
Log In Page
Home Page
Check Out Page
4. Download
QUICK NOTES:
The highlighted lines are sections of interest to look out for.
The code is heavily commented, so no further insight is necessary. If you have any questions, feel free to leave a comment below.
JavaScript/CSS/HTML || SlidePanel.js – How To Create An Animated Sidebar Navigation Menu Panel Using Vanilla JavaScript
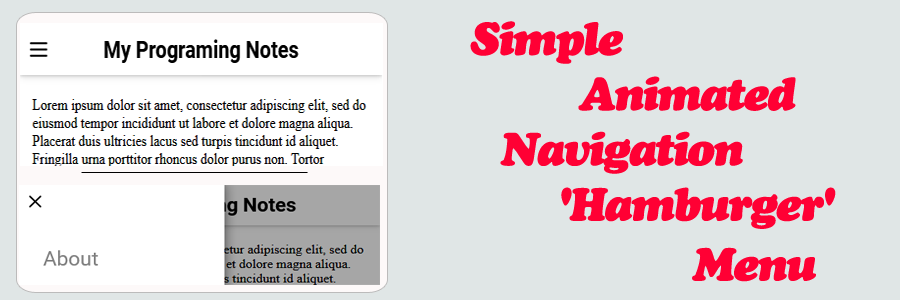
The following is a module with functions that demonstrates how to create an animated sliding sidebar navigation ‘hamburger’ menu panel using Vanilla JavaScript.
Using Vanilla JavaScript and CSS, by default the menu panel swipes in and out from left to right. The panel can also be opened from right to left, top to bottom, and bottom to top. All of this behavior, as well as its look and feel can be adjusted via CSS.
Contents
1. Basic Usage

2. Navigation SlidePanel Menu HTML

3. SlidePanel.js & CSS Source

4. More Examples
1. Basic Usage
Syntax is very straightforward. The following demonstrates the JavaScript used to setup the sidebar navigation slide panels and menu event listeners.
Calling this function sets up all of the slide panels and buttons on the page.
|
1 2 3 4 5 6 7 8 |
<!-- Basic Usage --> <script> document.addEventListener("DOMContentLoaded", function(eventLoaded) { // Setup navigation slide panels and event listeners SlidePanel.init(); }); </script> |
2. Navigation SlidePanel Menu HTML
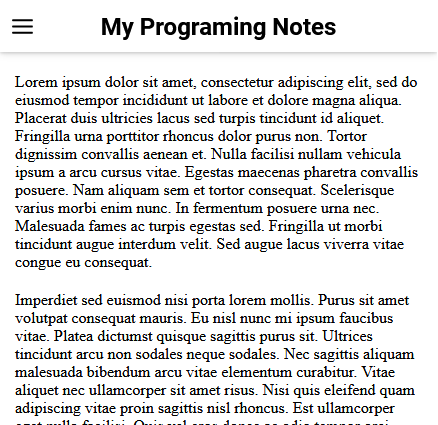
The following is the HTML used to setup the sidebar navigation slide panel. The placement of the ‘hamburger’ button, as well as the direction that the sidebar menu opens can easily be adjusted via CSS.
Below is a stripped down simple example demonstrating the basic html used to setup a sidebar panel. In this example, the panel is opened from left to right.
Navigation slide panel menus can also open from right to left, top to bottom, and bottom to top. Check out the end of the page for a full example!
Open Left To Right
The following demonstrates how to open the navigation slide panel menu from right to left.
By default, the menu opens on the left side of the page. Adding ‘right‘ to the class list places the menu on the right side of the page.
|
1 2 3 4 5 6 7 8 9 10 11 12 13 14 15 16 17 18 19 20 21 22 23 24 25 26 27 28 29 30 31 32 33 34 35 36 37 38 |
<!-- SlidePanel Menu HTML --> <!-- Top Nav --> <nav> <!-- SlidePanel menu 'hamburger' button. -- The property 'data-for' specifies the element id of the slide panel the button should open --> <button class="slide-panel-button open" data-for="nav-menu"></button> <div style="margin: auto;"> <h1>My Programing Notes</h1> </div> </nav> . . . <!-- This is the SlidePanel. The opening behavior of the panel is defined here. -- The property 'data-includeBackground' determines whether a background overlay should be displayed behind the menu panel -- The property 'data-closeOnBackgroundClick' determines whether the menu panel should close when clicking on the background overlay --> <section class="slide-panel" id="nav-menu" data-includeBackground="true" data-closeOnBackgroundClick="true"> <!-- Close button --> <button class="slide-panel-button close"></button> <a href="#">About</a> <a href="#">Services</a> <a href="#">Clients</a> <a href="#">Contact</a> </section> |
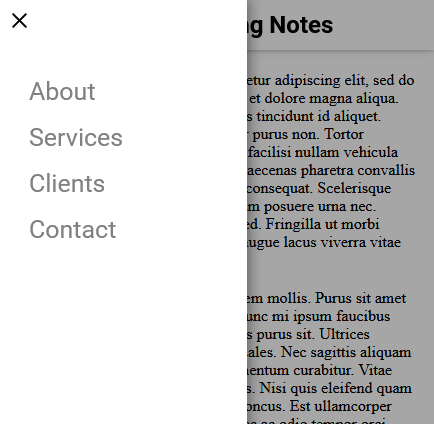
Sample Navigation Menu:
Sample When Opened:
Open Right To Left
The following demonstrates how to open the navigation slide panel menu from right to left.
By default, the menu opens on the left side of the page. Adding ‘right‘ to the class list places the menu on the right side of the page.
|
1 2 3 4 5 6 |
<!-- SlidePanel Menu HTML - Open Right To Left --> <section class="slide-panel right" id="nav-menu"> <!-- Close button --> <button class="slide-panel-button close"></button> </section> |
Open Top To Bottom
The following demonstrates how to open the navigation slide panel menu from top to bottom.
By default, the menu opens on the left side of the page. Adding ‘right‘ to the class list places the menu on the right side of the page.
|
1 2 3 4 5 6 |
<!-- SlidePanel Menu HTML - Open Top To Bottom --> <section class="slide-panel top" id="nav-menu"> <!-- Close button --> <button class="slide-panel-button close"></button> </section> |
Open Bottom To Top
The following demonstrates how to open the navigation slide panel menu from bottom to top.
By default, the menu opens on the left side of the page. Adding ‘right‘ to the class list places the menu on the right side of the page.
|
1 2 3 4 5 6 |
<!-- SlidePanel Menu HTML - Open Bottom To Top --> <section class="slide-panel bottom" id="nav-menu"> <!-- Close button --> <button class="slide-panel-button close"></button> </section> |
3. SlidePanel.js & CSS Source
The following is the SlidePanel.js Namespace & CSS Source. Include this in your project to start using!
|
1 2 3 4 5 6 7 8 9 10 11 12 13 14 15 16 17 18 19 20 21 22 23 24 25 26 27 28 29 30 31 32 33 34 35 36 37 38 39 40 41 42 43 44 45 46 47 48 49 50 51 52 53 54 55 56 57 58 59 60 61 62 63 64 65 66 67 68 69 70 71 72 73 74 75 76 77 78 79 80 81 82 83 84 85 86 87 88 89 90 91 92 93 94 95 96 97 98 99 100 101 102 103 104 105 106 107 108 109 110 111 112 113 114 115 116 117 118 119 120 121 122 123 124 125 126 127 128 129 130 131 132 133 134 135 136 137 138 139 140 141 142 143 144 145 146 147 148 149 150 151 152 153 154 155 156 157 158 159 160 161 162 163 164 165 166 167 168 169 170 171 172 173 174 175 176 177 178 179 180 181 182 183 184 185 186 187 188 189 190 191 192 193 194 195 196 197 198 199 200 201 202 203 204 205 206 207 208 209 210 211 212 213 214 215 216 217 218 219 220 221 222 223 224 225 226 227 228 229 230 231 232 233 234 235 236 237 238 239 240 241 242 243 244 245 246 247 248 249 250 251 252 253 254 255 256 257 258 259 260 261 262 263 264 265 266 267 268 |
// ============================================================================ // Author: Kenneth Perkins // Date: Jan 9, 2021 // Taken From: http://programmingnotes.org/ // File: SlidePanel.js // Description: Module that opens/closes a slide panel // Example: // // Open SlidePanel // SlidePanel.open(element) // // // Close SlidePanel // SlidePanel.close(element) // ============================================================================ /** * NAMESPACE: SlidePanel * USE: Handles SlidePanel related functions */ var SlidePanel = SlidePanel || {}; (function(namespace) { 'use strict'; // -- Public data -- // Property to hold public variables and functions let exposed = namespace; // Set class names and other shared data const settings = { // Element class names classNameSlidePanel: '.slide-panel', classNameSlidePanelOpen: '.open', classNameSlidePanelClose: '.close', classNameSlidePanelButton: '.slide-panel-button', classNameSlidePanelBackground: '.slide-panel-background', // Element data names dataNamePanelFor: 'data-for', dataNameCloseOnBackgroundClick: 'data-closeOnBackgroundClick', dataNameIncludeBackground: 'data-includeBackground', cleanClassName: (str) => { return str ? str.trim().replace('.', '') : ''; }, }; exposed.settings = settings; /** * FUNCTION: init * USE: Adds click events for the slide panel menus * @param element: JavaScript element to search for slide panel buttons * @return: N/A */ exposed.init = (element = document) => { // Setup panels let panels = getPanels(element); for (let panel of panels) { // Include background if needed if (shouldIncludeBackground(panel)) { let background = getBackground(panel) || createBackground(panel); if (shouldCloseOnBackgroundClick(panel)) { background.addEventListener('click', backgroundCloseEvent); } } } // Register open button events let openButtons = getOpenButtons(element); for (let openButton of openButtons) { // Get the slide panel panel for the button let panel = getPanel(openButton); // Make sure panel exists if (isNull(panel)) { console.error(`Unable to open: SlidePanel element id '${getPanelFor(openButton)}' does not exist`); continue; } // Add click event openButton.addEventListener('click', openEvent); } // Register close button events let closeButtons = getCloseButtons(element); for (let closeButton of closeButtons) { // Add click event closeButton.addEventListener('click', closeEvent); } } /** * FUNCTION: open * USE: Opens the slide panel * @param panel: JavaScript element of the slide panel * @return: N/A */ exposed.open = (panel) => { let background = getBackground(panel); if (!isNull(background)) { addClass(background, settings.classNameSlidePanelOpen); } addClass(panel, settings.classNameSlidePanelOpen); } /** * FUNCTION: close * USE: Closes the slide panel * @param panel: JavaScript element of the slide panel * @return: N/A */ exposed.close = (panel) => { let background = getBackground(panel); if (!isNull(background)) { let duration = getTransitionDuration(panel); setTimeout(() => { removeClass(background, settings.classNameSlidePanelOpen); }, duration - 30); } removeClass(panel, settings.classNameSlidePanelOpen); } // -- Private data -- let openEvent = (event) => { let panel = getPanel(event.target); exposed.open(panel); } let closeEvent = (event) => { let panel = getPanel(event.target); exposed.close(panel); } let backgroundCloseEvent = (event) => { if (event.target != event.currentTarget) { return; } let panel = getPanel(event.target); exposed.close(panel); } let getPanel = (element) => { let panel = null; // Button if (hasClass(element, settings.classNameSlidePanelButton)) { // Open button if (hasClass(element, settings.classNameSlidePanelOpen)) { let navFor = getPanelFor(element); if (isEmpty(navFor)) { console.error(`'${settings.dataNamePanelFor}' is not specified for a SlidePanel 'open' button`); } else { panel = document.querySelector(`#${navFor}`); } // Close button } else if (hasClass(element, settings.classNameSlidePanelClose)) { panel = element.closest(settings.classNameSlidePanel) } // Background } else if (hasClass(element, settings.classNameSlidePanelBackground)) { panel = element.querySelector(settings.classNameSlidePanel) } return panel; } let getPanelFor = (element) => { return element.getAttribute(settings.dataNamePanelFor); } let getBackground = (panel) => { return panel.closest(settings.classNameSlidePanelBackground); } let getPanels = (element = document) => { return element.querySelectorAll(settings.classNameSlidePanel); } let getOpenButtons = (element = document) => { return element.querySelectorAll(`${settings.classNameSlidePanelButton}${settings.classNameSlidePanelOpen}`); } let getCloseButtons = (element = document) => { return element.querySelectorAll(`${settings.classNameSlidePanelButton}${settings.classNameSlidePanelClose}`); } let shouldCloseOnBackgroundClick = (element) => { let value = element.getAttribute(settings.dataNameCloseOnBackgroundClick); if (isNull(value)) { value = true; } return toBoolean(value); } let shouldIncludeBackground = (element) => { let value = element.getAttribute(settings.dataNameIncludeBackground); if (isNull(value)) { value = true; } return toBoolean(value); } let createBackground = (element) => { let container = document.createElement('div'); let parentNode = element.parentNode; addClass(container, settings.classNameSlidePanelBackground); parentNode.insertBefore(container, element); container.appendChild(element); return container; } let addClass = (element, cssClass) => { cssClass = settings.cleanClassName(cssClass); let modified = false; if (cssClass.length > 0 && !hasClass(element, cssClass)) { element.classList.add(cssClass) modified = true; } return modified; } let removeClass = (element, cssClass) => { cssClass = settings.cleanClassName(cssClass); let modified = false; if (cssClass.length > 0 && hasClass(element, cssClass)) { element.classList.remove(cssClass); modified = true; } return modified; } let hasClass = (element, cssClass) => { cssClass = settings.cleanClassName(cssClass); return element.classList.contains(cssClass); } let toBoolean = (value) => { value = String(value).trim().toLowerCase(); let ret = false; switch (value) { case 'true': case 'yes': case '1': ret = true; break; } return ret; } let isNull = (item) => { return undefined === item || null === item; } let isEmpty = (str) => { return isNull(str) || String(str).trim().length < 1; } let getTransitionDuration = (element) => { let style = window.getComputedStyle(element); let duration = style['transitionDuration'] || style['transition-duration']; // fix miliseconds vs seconds duration = (duration.indexOf('ms') > -1) ? parseFloat(duration) : parseFloat(duration) * 1000; return duration; } (function (factory) { if (typeof define === 'function' && define.amd) { define([], factory); } else if (typeof exports === 'object') { module.exports = factory(); } }(function() { return namespace; })); }(SlidePanel)); // http://programmingnotes.org/ |
The following is SlidePanel.css.
|
1 2 3 4 5 6 7 8 9 10 11 12 13 14 15 16 17 18 19 20 21 22 23 24 25 26 27 28 29 30 31 32 33 34 35 36 37 38 39 40 41 42 43 44 45 46 47 48 49 50 51 52 53 54 55 56 57 58 59 60 61 62 63 64 65 66 67 68 69 70 71 72 73 74 75 76 77 78 79 80 81 82 83 84 85 86 87 88 89 90 91 92 93 94 95 96 97 98 99 100 101 102 103 104 105 106 107 108 109 110 111 112 113 114 115 116 117 118 119 120 |
/* // ============================================================================ // Author: Kenneth Perkins // Date: Jan 9, 2021 // Taken From: http://programmingnotes.org/ // File: SlidePanel.css // Description: CSS for the slide panel // ============================================================================ */ @import url('https://fonts.googleapis.com/css?family=Roboto:400,400italic,500,500italic,700,700italic,900,900italic,300italic,300,100italic,100'); .slide-panel { position: fixed; width: 300px; top: 0; left: 0; transform: translate(-100%, 0%); /* (x, y) */ height: 100%; overflow: auto; transition: transform 220ms ease-in-out; z-index: 1000; background-color: #f3f3f3; background-color: white; box-shadow: 0 0 15px rgba(0,0,0,0.55); font-family: "Roboto",sans-serif, Marmelad,"Lucida Grande",Arial,"Hiragino Sans GB",Georgia,"Helvetica Neue",Helvetica; } .slide-panel.right { right: 0; left: auto; transform: translate(100%, 0%); } .slide-panel.top { top: 0; bottom: auto; transform: translate(0%, -100%); } .slide-panel.bottom { bottom: 0; top: auto; transform: translate(0%, 100%); } .slide-panel.open { transform: translate(0%, 0%); } @media screen and (max-width: 450px) { .slide-panel { width: 80%; } .slide-panel.top, .slide-panel.bottom { width: 100%; } } .slide-panel-background { position: fixed; z-index: 1000; padding-top: 60px; left: 0; top: 0; width: 100%; height: 100%; background-color: rgba(0,0,0,0.5); opacity: 0; visibility: hidden; transition: visibility 300ms, opacity 300ms; } .slide-panel-background.open { opacity: 1; visibility: visible; } .slide-panel-button:hover { background-color: #eee; } .slide-panel-button { display: inline-block; cursor: pointer; padding: 10px; background: none; border: none; position: absolute; left: 0; } .slide-panel-button.right { right: 0; left: auto; } .slide-panel-button.open {} .slide-panel-button.close { top: 0; } .slide-panel-button:before { width: 25px; height: 25px; content: ""; display: inline-block; vertical-align: middle; background-size: 100%; background-repeat: no-repeat; } .slide-panel-button.open:before { background-image: url("data:image/svg+xml,%3Csvg xmlns='http://www.w3.org/2000/svg' width='35' height='35' viewBox='0 0 24 24' fill='none' stroke='%23000000' stroke-width='2' stroke-linecap='round' stroke-linejoin='round'%3E%3Cline x1='3' y1='12' x2='21' y2='12'%3E%3C/line%3E%3Cline x1='3' y1='6' x2='21' y2='6'%3E%3C/line%3E%3Cline x1='3' y1='18' x2='21' y2='18'%3E%3C/line%3E%3C/svg%3E"); } .slide-panel-button.close:before { background-image: url("data:image/svg+xml,%3Csvg xmlns='http://www.w3.org/2000/svg' width='35' height='35' viewBox='0 0 24 24' fill='none' stroke='%23000000' stroke-width='2' stroke-linecap='round' stroke-linejoin='round'%3E%3Cline x1='18' y1='6' x2='6' y2='18'%3E%3C/line%3E%3Cline x1='6' y1='6' x2='18' y2='18'%3E%3C/line%3E%3C/svg%3E"); }/* http://programmingnotes.org/ */ |
4. More Examples
Below are more examples demonstrating the use of ‘SlidePanel.js‘. Don’t forget to include the module when running the examples!
|
1 2 3 4 5 6 7 8 9 10 11 12 13 14 15 16 17 18 19 20 21 22 23 24 25 26 27 28 29 30 31 32 33 34 35 36 37 38 39 40 41 42 43 44 45 46 47 48 49 50 51 52 53 54 55 56 57 58 59 60 61 62 63 64 65 66 67 68 69 70 71 72 73 74 75 76 77 78 79 80 81 82 83 84 85 86 87 88 89 90 91 92 93 94 95 96 97 98 99 100 101 102 103 104 105 106 107 108 109 110 111 112 113 114 115 116 117 118 119 120 121 122 123 124 125 126 127 128 129 130 131 132 133 134 135 136 137 138 139 140 141 142 143 144 145 146 147 148 149 150 151 152 153 154 155 156 157 158 159 160 161 162 163 164 165 166 167 168 169 170 171 172 173 174 175 176 177 178 179 180 181 182 183 184 185 186 187 |
<!-- // ============================================================================ // Author: Kenneth Perkins // Date: Jan 9, 2021 // Taken From: http://programmingnotes.org/ // File: SlidePanel.html // Description: Demonstrates a simple animated slide panel // ============================================================================ --> <!DOCTYPE html> <html> <head> <meta charset="utf-8"/> <meta name="viewport" content="width=device-width, initial-scale=1"> <title>My Programming Notes SlidePanel.js Demo</title> <style> * { margin:0; padding:0; box-sizing:border-box; } .content { margin: 15px; } p { margin-top: 20px; } .nav { display: flex; align-items: center; position: sticky; top: 0; background-color: #e0e0cc; background-color: white; z-index: 1; padding: 8px 0; height: 52px; box-shadow: 0 1px 2px rgba(0,0,0,0.10),0 1px 4px rgba(0,0,0,0.10),0 2px 8px rgba(0,0,0,0.10); font-family: "Roboto",sans-serif, Marmelad,"Lucida Grande",Arial,"Hiragino Sans GB",Georgia,"Helvetica Neue",Helvetica; } .links a { padding: 8px 8px 8px 32px; text-decoration: none; font-size: 25px; color: #818181; display: block; } .links a:hover { color: orangered; } .links { padding-top: 40px; margin: auto; } .menu-header { margin-top: 50px; text-align: center; } </style> <!-- // Include module --> <link type="text/css" rel="stylesheet" href="./SlidePanel.css"> <script type="text/javascript" src="./SlidePanel.js"></script> </head> <body> <main> <nav class="nav"> <!-- SlidePanel menu 'hamburger' button. -- The property 'data-for' specifies the element id of the slide panel the button should open --> <button class="slide-panel-button open" data-for="nav-menu"></button> <button class="slide-panel-button open" data-for="nav-menu-top" style="left: 50px;"></button> <button class="slide-panel-button open right" data-for="nav-menu-right"></button> <button class="slide-panel-button open right" data-for="nav-menu-right-bottom" style="right: 50px;"></button> <div style="margin: auto;"> <h1>My Programing Notes</h1> </div> </nav> <section class="content"> <p> Lorem ipsum dolor sit amet, consectetur adipiscing elit, sed do eiusmod tempor incididunt ut labore et dolore magna aliqua. Placerat duis ultricies lacus sed turpis tincidunt id aliquet. Fringilla urna porttitor rhoncus dolor purus non. Tortor dignissim convallis aenean et. Nulla facilisi nullam vehicula ipsum a arcu cursus vitae. Egestas maecenas pharetra convallis posuere. Nam aliquam sem et tortor consequat. Scelerisque varius morbi enim nunc. In fermentum posuere urna nec. Malesuada fames ac turpis egestas sed. Fringilla ut morbi tincidunt augue interdum velit. Sed augue lacus viverra vitae congue eu consequat. </p> <p> Imperdiet sed euismod nisi porta lorem mollis. Purus sit amet volutpat consequat mauris. Eu nisl nunc mi ipsum faucibus vitae. Platea dictumst quisque sagittis purus sit. Ultrices tincidunt arcu non sodales neque sodales. Nec sagittis aliquam malesuada bibendum arcu vitae elementum curabitur. Vitae aliquet nec ullamcorper sit amet risus. Nisi quis eleifend quam adipiscing vitae proin sagittis nisl rhoncus. Est ullamcorper eget nulla facilisi. Quis vel eros donec ac odio tempor orci dapibus ultrices. Dapibus ultrices in iaculis nunc sed augue lacus viverra. Nec feugiat nisl pretium fusce id velit ut. A cras semper auctor neque vitae tempus. Faucibus scelerisque eleifend donec pretium vulputate sapien nec sagittis. Eget mi proin sed libero enim sed faucibus. <p> Bibendum enim facilisis gravida neque. A scelerisque purus semper eget. Nisl nisi scelerisque eu ultrices vitae auctor. Semper viverra nam libero justo laoreet sit. Nunc congue nisi vitae suscipit tellus mauris a diam maecenas. Auctor eu augue ut lectus arcu bibendum. Adipiscing commodo elit at imperdiet dui accumsan sit amet. Pellentesque habitant morbi tristique senectus et netus. Mauris nunc congue nisi vitae suscipit tellus mauris a diam. Felis donec et odio pellentesque diam. Ornare aenean euismod elementum nisi quis eleifend quam adipiscing. Ullamcorper malesuada proin libero nunc consequat. Viverra mauris in aliquam sem fringilla ut morbi tincidunt. Sodales ut etiam sit amet nisl purus in. Sed faucibus turpis in eu mi bibendum neque egestas congue. Viverra nam libero justo laoreet sit amet. Egestas quis ipsum suspendisse ultrices gravida dictum fusce ut. </p> <p> Felis imperdiet proin fermentum leo. Lacinia at quis risus sed vulputate odio ut enim blandit. Vitae sapien pellentesque habitant morbi. Amet facilisis magna etiam tempor orci eu lobortis. Massa placerat duis ultricies lacus sed turpis tincidunt id aliquet. Duis ut diam quam nulla porttitor massa. In egestas erat imperdiet sed euismod nisi porta lorem mollis. Interdum posuere lorem ipsum dolor sit amet consectetur adipiscing. Nunc sed id semper risus in hendrerit gravida. Ornare arcu dui vivamus arcu felis bibendum ut. Amet porttitor eget dolor morbi non. Vitae justo eget magna fermentum iaculis eu. Nibh tellus molestie nunc non blandit massa enim nec. Sollicitudin nibh sit amet commodo nulla facilisi nullam vehicula ipsum. Proin nibh nisl condimentum id venenatis a condimentum vitae sapien. Tempor id eu nisl nunc mi ipsum faucibus vitae. </p> <p> Et molestie ac feugiat sed lectus vestibulum mattis. Tristique senectus et netus et malesuada fames. Purus in mollis nunc sed id semper. Mauris cursus mattis molestie a iaculis. Auctor elit sed vulputate mi sit amet mauris commodo quis. Vel orci porta non pulvinar neque. Augue neque gravida in fermentum et. Non odio euismod lacinia at quis risus. In hac habitasse platea dictumst vestibulum rhoncus. Sapien et ligula ullamcorper malesuada proin. Sed vulputate mi sit amet mauris commodo. Et pharetra pharetra massa massa ultricies mi quis hendrerit. In nisl nisi scelerisque eu ultrices vitae auctor eu. Luctus accumsan tortor posuere ac ut consequat semper. </p> </section> </main> <!-- This is the SlidePanel. The opening behavior of the panel is defined here. -- The property 'data-includeBackground' determines whether a background overlay should be displayed behind the menu panel -- The property 'data-closeOnBackgroundClick' determines whether the menu panel should close when clicking on the background overlay --> <section class="slide-panel" id="nav-menu" data-includeBackground="true" data-closeOnBackgroundClick="true"> <!-- Close button --> <button class="slide-panel-button close"></button> <div class="menu-header"> Left SlidePanel Menu </div> <div class="links"> <a href="#">About</a> <a href="#">Services</a> <a href="#">Clients</a> <a href="#">Contact</a> </div> </section> <section class="slide-panel top" id="nav-menu-top"> <!-- Close button --> <button class="slide-panel-button close"></button> <div class="menu-header"> Left Top SlidePanel Menu </div> <div class="links"> <a href="#">About</a> <a href="#">Services</a> <a href="#">Clients</a> <a href="#">Contact</a> </div> </section> <section class="slide-panel right" id="nav-menu-right"> <!-- Close button --> <button class="slide-panel-button close"></button> <div class="menu-header"> Right SlidePanel Menu </div> <div class="links"> <a href="#">About</a> <a href="#">Services</a> <a href="#">Clients</a> <a href="#">Contact</a> </div> </section> <section class="slide-panel right bottom" id="nav-menu-right-bottom"> <!-- Close button --> <button class="slide-panel-button close"></button> <div class="menu-header"> Right Bottom SlidePanel Menu </div> <div class="links"> <a href="#">About</a> <a href="#">Services</a> <a href="#">Clients</a> <a href="#">Contact</a> </div> </section> <script> document.addEventListener('DOMContentLoaded', function(eventLoaded) { SlidePanel.init(); }); </script> </body> </html><!-- // http://programmingnotes.org/ --> |
QUICK NOTES:
The highlighted lines are sections of interest to look out for.
The code is heavily commented, so no further insight is necessary. If you have any questions, feel free to leave a comment below.
JavaScript || How To Get Timespan Between Two Dates & Convert Time From Seconds Into Years, Days, Hours, Minutes & Seconds Using Vanilla JavaScript
The following is a module with functions which demonstrates how to get the timespan between two dates and convert time from seconds into years, days, hours, minutes and seconds using vanilla JavaScript.
This page also demonstrates how to convert time from -seconds- into HH::MM::SS (hours, minutes seconds) format. So for example, if you had an input time of 9630 seconds, the program would display the converted time of 2 hours, 40 minutes, and 30 seconds.
Using simple math, this function utilizes the modulus operator, and the division operator during the conversion process.
1. Get Timespan – Dates
The example below demonstrates the use of ‘Utils.getTimespan‘ to get the timespan between two dates and return the time difference in years, days, hours, minutes and seconds.
|
1 2 3 4 5 6 7 8 9 10 11 12 13 14 15 16 17 18 19 20 21 22 23 24 25 26 27 28 29 30 31 32 33 34 35 36 37 38 39 |
// Get Timespan - Dates <script> (() => { // Declare dates let date1 = new Date('1987-07-28 19:22:31'); let date2 = new Date('1991-01-27 10:19:28'); // Get the timespan let timespan = Utils.getTimespan(date1, date2); // Display result console.log(`Date 1: ${date1.toLocaleString()}`); console.log(`Date 2: ${date2.toLocaleString()}`); console.log(timespan.toString()); console.log(timespan); })(); </script> // expected output: /* Date 1: 7/28/1987, 7:22:31 PM Date 2: 1/27/1991, 10:19:28 AM 3 years, 183 days, 14 hours, 56 minutes, 57 seconds { "years": 3, "days": 183, "hours": 14, "minutes": 56, "seconds": 57, "milliseconds": 0, "totalYears": 3.5030763888888887, "totalDays": 1278.6228819444445, "totalHours": 30686.949166666665, "totalMinutes": 1841216.95, "totalSeconds": 110473017, "totalMilliseconds": 110473017000 } */ |
2. Get Timespan – Seconds
The example below demonstrates the use of ‘Utils.getTimespan‘ to get the timespan from seconds and return the timespan in years, days, hours, minutes and seconds.
|
1 2 3 4 5 6 7 8 9 10 11 12 13 14 15 16 17 18 19 20 21 22 23 24 25 26 27 28 29 30 31 32 33 34 35 36 |
// Get Timespan - Seconds <script> (() => { // Declare seconds let seconds = 9630; // Get the timespan let timespan = Utils.getTimespan(seconds); // Display result console.log(`Seconds: ${seconds}`); console.log(timespan.toString()); console.log(timespan); })(); </script> // expected output: /* Seconds: 9630 2 hours, 40 minutes, 30 seconds { "years": 0, "days": 0, "hours": 2, "minutes": 40, "seconds": 30, "milliseconds": 0, "totalYears": 0.000305365296803653, "totalDays": 0.11145833333333334, "totalHours": 2.675, "totalMinutes": 160.5, "totalSeconds": 9630, "totalMilliseconds": 9630000 } */ |
3. Utils Namespace
The following is the Utils.js Namespace. Include this in your project to start using!
|
1 2 3 4 5 6 7 8 9 10 11 12 13 14 15 16 17 18 19 20 21 22 23 24 25 26 27 28 29 30 31 32 33 34 35 36 37 38 39 40 41 42 43 44 45 46 47 48 49 50 51 52 53 54 55 56 57 58 59 60 61 62 63 64 65 66 67 68 69 70 71 72 73 74 75 76 77 78 79 80 81 82 83 84 85 86 87 88 89 90 91 92 93 94 95 96 97 98 99 100 101 102 103 104 105 106 107 108 109 |
// ============================================================================ // Author: Kenneth Perkins // Date: Jan 1, 2021 // Taken From: http://programmingnotes.org/ // File: Utils.js // Description: Javascript that handles general utility functions // ============================================================================ /** * NAMESPACE: Utils * USE: Handles general utility functions. */ var Utils = Utils || {}; (function(namespace) { 'use strict'; // Property to hold public variables and functions let exposed = namespace; /** * FUNCTION: getTimespan * USE: Returns the timespan between two dates, or a time value in seconds * @param start: The starting time * @param end: The ending time * @return: An object which contains information about the timespan */ exposed.getTimespan = (start, end = null) => { // Get the seconds let seconds = Number(start); if (isDate(start) && isDate(end)) { seconds = exposed.getDurationSeconds(start, end); } // Convert seconds to time let timespan = {}; let remainingTime = seconds; for (const def of conversion) { // Get time conversion timespan[def.key] = Math.floor(remainingTime / def.value); remainingTime %= def.value; // Add additional info let additionalKey = `total${capitalize(def.key)}`; timespan[additionalKey] = seconds / def.value; } // Add additional info timespan.toString = () => { let string = ''; for (const def of conversion) { let value = timespan[def.key] if (value != 0) { let name = def.key; if (name.endsWith('s')) { name = name.substring(0, name.length - 1); } string += string.length > 0 ? ',' : ''; string += ` ${value} ${name}${value == 1 ? '' : 's'}`; } } return string.trim(); } return timespan; } /** * FUNCTION: getDurationSeconds * USE: Returns the number of seconds between the two dates * @param dateStart: The starting date * @param dateEnd: The ending date * @return: The number of seconds between the two dates */ exposed.getDurationSeconds = (dateStart, dateEnd) => { let timeStart = dateStart ? treatAsUTC(dateStart).getTime() : 0; let timeEnd = dateEnd ? treatAsUTC(dateEnd).getTime() : 0; return (timeEnd - timeStart) / 1000; } let treatAsUTC = (date) => { let result = new Date(date); result.setMinutes(result.getMinutes() - result.getTimezoneOffset()); return result; } let isDate = (expression) => { return expression && (expression instanceof Date); } let capitalize = (string) => { return string.charAt(0).toUpperCase() + string.substring(1); } // Set the time conversion definitions (from seconds) const conversion = [ {key: 'years', value: 60 * 60 * 24 * 365}, {key: 'days', value: 60 * 60 * 24}, {key: 'hours', value: 60 * 60}, {key: 'minutes', value: 60}, {key: 'seconds', value: 1}, {key: 'milliseconds', value: 1 / 1000} ]; (function (factory) { if (typeof define === 'function' && define.amd) { define([], factory); } else if (typeof exports === 'object') { module.exports = factory(); } }(function() { return namespace; })); }(Utils)); // http://programmingnotes.org/ |
QUICK NOTES:
The highlighted lines are sections of interest to look out for.
The code is heavily commented, so no further insight is necessary. If you have any questions, feel free to leave a comment below.


