Monthly Archives: July 2013
Python || How To Install PyPdf Using Python 3

“pyPdf” is a pure Python library built as a PDF toolkit. It is capable of:
• Extracting document information (title, author, ...),

• Splitting documents page by page,

• Merging documents page by page,

• Cropping pages,

• Merging multiple pages into a single page,

• Encrypting and decrypting PDF files.
By being pure Python, it should run on any Python platform without any dependencies on external libraries. It can also work entirely on StringIO objects rather than file streams, allowing for PDF manipulation in memory. It is therefore a useful tool for websites that manage or manipulate PDFs.
=== 1. INSTALLING PYPDF ===
A Windows installer for pyPdf is available here. At the time of this writing, the installer that was listed on the download page was titled “pyPdf-1.13.win32.exe.”
Note: If you are using Python 2 and want to install pyPdf, the Windows installer available on the download page should be all you need. No further installation instructions are necessary.
Next, follow the command prompts from the installer and wait!
When the pyPdf installer is completed, you should see the newly installed files which correspond to this module located in the following directory:
C:\Python32\Lib\site-packages\pyPdf
Note: Python 3.2 is installed on my system, and the above directory reflects that. The Python directory may be named something different on your individual system depending on the Python version you are using.
If everything installed correctly, proceed to the next step.
=== 2. UPDATE EXISTING PYPDF FILES ===
pyPdf was originally written for Python 2, but a Python 3 compatible branch has since been made available. The updated files can be found here, and enable pyPdf to be integrated with Python 3.
To update these new Python 3 files with the old Python 2 files, locate the following directory on your system:
C:\Python32\Lib\site-packages\pyPdf
Here is a sample screenshot demonstrating the files which resides in the above directory: (click to enlarge)

Next, update all of the old Python 2 files that’s listed in the above directory with the new Python 3 files that’s listed on this page.
One way to update the files that’s currently stored on your computer is to locate the file on your system with the exact same file name as listed here, and copy/paste the contents of the new file into the contents of the old file that’s currently stored on your computer.
Or you can download all of the files at once here, and move/replace these new files with the existing files that’s currently located on your system.
=== 3. UBUNTU USERS ===
If you are an Ubuntu Linux user and want to install pypdf, open the terminal and run the following command:
NOTE: Replace “python3.2” with whatever version of python that’s installed on your system.
sudo mkdir /usr/local/lib/python3.2/dist-packages/pyPdf
Next, copy and paste the files located in the above download link into the following directory:
/usr/local/lib/python3.2/dist-packages/pyPdf
Once the following steps are completed, you should now be ready to use pyPdf with Python 3 programs!
Python || How To Create An Executable Using Cx_Freeze
Python is a simple and powerful programming language for scripting and application development. Various GUI packages available for Python makes it a great choice for developing applications. But what if you want to create an executable file from the Python script you just created? This page demonstrates that process using a free third party module called “cx_Freeze.” This module is ideal for use because it supports Python 2.7 or higher, including Python 3.
Contents
1. Introduction

2. Installing cx_freeze

3. Verify Installation

4. Create The Setup Script

5. Begin Compilation

6. Output Directory
1. Introduction
cx_Freeze is a set of scripts and modules for freezing Python scripts into executables, in much the same way that py2exe and py2app do. Unlike these two tools, cx_Freeze is cross platform and should work on any platform that Python itself works on. It supports Python 2.7 or higher, including Python 3.
2. Installing cx_freeze
In the terminal (cmd), install by running the following command:
pip install cx-Freeze
– OR –
python -m pip install cx-Freeze
If this process completes with no errors, skip to the next step!
Note: If using Windows and you get an error that says 'python' is not recognized as an internal or external command, a simple solution is to navigate in the terminal (cmd) to the directory of your Python installation folder, and then follow the steps below.
The default Python installation directory is the following:
C:\Users\YOUR_USERNAME\AppData\Local\Programs\Python\Your-Python-Version\
Once you have navigated to the Python folder for the version you are using, in the terminal (cmd), run the following command.
python.exe -m pip install cx-Freeze
Tip: If you want to run the Python command from the terminal without having to navigate to the installation folder, it is recommended that you add your Python directory to the Windows Path. Click here for information on how this is done.
3. Verify Installation
Once the cx_Freeze installation is complete, you should see the newly installed files for this module located in the following directory (Windows):
C:\Path-To-Your-Python-Version\Lib\site-packages\cx_Freeze
If everything installed correctly, you should now be ready to create executable Python programs!
4. Create The Setup Script
To use cx_Freeze we need to create a setup.py file which tells the cx_Freeze “compiler” what you want to do. Here’s a sample setup.py file whose simplicity is appropriate for our sample “Hello World” program.
This is the sample Python file.
|
1 2 3 4 5 6 7 8 9 10 11 12 13 14 |
# ============================================================================= # Author: Kenneth Perkins # Date: Jul 25, 2013 # Taken From: http://programmingnotes.org/ # File: hello.py # Description: Simple hello world program # ============================================================================= def main(): print("Hello World, created using Python") input("\nPlease press ENTER to continue...") if __name__ == "__main__": main() # http://programmingnotes.org/ |
This is the setup.py file.
|
1 2 3 4 5 6 7 8 9 10 11 12 13 14 15 16 17 18 19 20 21 22 23 24 25 26 27 28 29 30 31 32 33 34 35 36 |
# ============================================================================= # Author: Kenneth Perkins # Date: Jul 25, 2013 # Updated: Feb 12, 2021 # Taken From: http://programmingnotes.org/ # File: setup.py # Description: This is the cx_Freeze setup file for creating an exe program # ============================================================================= from cx_Freeze import setup, Executable # NOTE: you can include any other necessary external imports here aswell includefiles = [] # include any files here that you wish excludes = [] packages = [] exe = Executable( # what to build script = "hello.py", # the name of your main python script goes here init_script = None, base = None, # if creating a GUI instead of a console app, type "Win32GUI" target_name = "Hello World.exe", # this is the name of the executable file icon = None # if you want to use an icon file, specify the file name here ) setup( # the actual setup & the definition of other misc. info name = "Hello World", # program name version = "0.1", description = 'A general enhancement utility', author = "Kenneth Perkins", author_email = "admin@programmingnotes.org", options = {"build_exe": {"excludes":excludes,"packages":packages, "include_files":includefiles}}, executables = [exe] ) # http://programmingnotes.org/ |
5. Begin Compilation
In order to start compiling the hello.py file, we need to open the terminal (cmd).
Next, once you have created the setup.py file, save the setup.py file into the same directory as your project, and run the following command in the terminal (cmd) from your project directory:
python setup.py build
This command essentially starts compiling the hello.py file.
If this process completes with no errors, skip to the next step!
Note: If using Windows and you get an error that says 'python' is not recognized as an internal or external command, a simple solution is to copy and paste the setup.py file and ALL of the Python files associated with your project into the directory of your Python installation before running the command.
The default Python installation directory is the following:
C:\Users\YOUR_USERNAME\AppData\Local\Programs\Python\Your-Python-Version\
Note: I have Python installed in the following directory, so the steps below will use this path.
C:\Python39
Here is a sample screenshot of the instructions after copy and pasting the files into the Python installation directory: (click to enlarge)

Next, copy and paste these commands into the terminal (cmd).
#1. Change directories into your Python installation folder
cd C:\Python39
#2. Start compiling the hello.py program using the setup.py file
python.exe setup.py build
6. Output Directory
If the cx_Freeze build finished with no errors, then the process should be complete!
By default, the Python executable should be located in a folder titled ‘build‘, located in the same directory as where your setup.py resides.
If you followed the steps above to copy and paste your files during the build process, it should be located at the following:
C:\Path-To-Your-Python-Version\build\exe.win-3.9
Here is a sample screenshot demonstrating the directory where the executable file resides: (click to enlarge)

Note: In order for the executable file to run, the other files within that folder that are generated by cx_Freeze must be bundled with the executable file at all times.
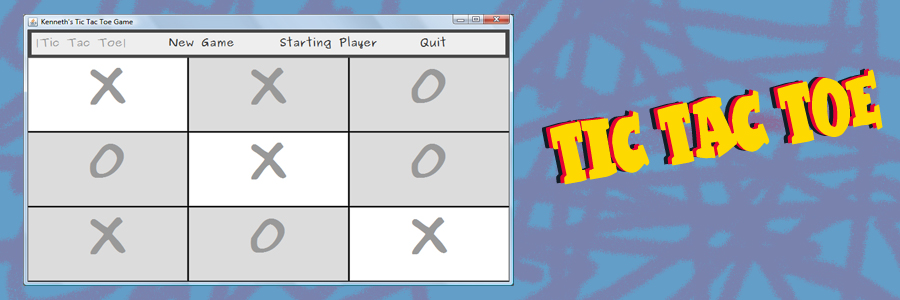
And there you have it! Here is a sample screenshot of the running ‘Hello World’ executable: (click to enlarge)

QUICK NOTES:
The highlighted lines are sections of interest to look out for.
The code is heavily commented, so no further insight is necessary. If you have any questions, feel free to leave a comment below.
C++ || Snippet – Simple Timer Class Using The Clock Function

The following is sample code for a simple timer class using the “clock()” function. The “clock” function returns the processor time that has been consumed by the program during its execution; or in other words, it returns the number of clock ticks that has elapsed since the program was launched.
The timer class demonstrated on this page has the ability to measure the execution time of a block of code or function call, and display the elapsed running time (in seconds) to the screen.
Unfortunately, by using the clock() function (instead of date based methods) to measure time, this class is only able to measure the time that was actually spent used by the CPU during the execution of the program. That means that if this timer class was used to measure how long it took for a user to enter data into the program, the users CPU wouldn’t notice any change in time, and this timer class would display that 0 seconds had elapsed.
However, by using the clock() function to measure elapsed time, it can be used to implement a simple and portable timer.
|
1 2 3 4 5 6 7 8 9 10 11 12 13 14 15 16 17 18 19 20 21 22 23 24 25 26 27 28 29 30 31 32 33 34 35 36 37 38 39 40 41 42 43 44 45 46 47 48 49 50 51 52 53 54 55 56 57 58 59 60 61 62 63 64 65 66 67 68 69 70 71 72 73 74 75 76 77 78 79 80 81 82 83 84 85 86 87 88 89 90 91 |
// ============================================================================ // Author: K Perkins // Date: Jul 22, 2013 // Taken From: http://programmingnotes.org/ // File: Timer.h // Description: This is a simple timer class using the "clock" function. // ============================================================================ #ifndef TIMER_H #define TIMER_H #include <cassert> #include <ctime> class Timer { public: Timer(); /* Function: Constructor initializes data Precondition: None Postcondition: Defines private variables */ void Start(); /* Function: Starts the timer Precondition: Timer has been initialized Postcondition: Timer has been started */ void Stop(); /* Function: Stops the timer Precondition: Timer has been initialized Postcondition: Timer has been stopped */ void Reset(); /* Function: Resets the clock Precondition: Timer has been initialized Postcondition: Timer has been restarted */ double Timestamp() const; /* Function: Returns the amount of time (in seconds) that has elapsed since the clock has started. Precondition: The timer has been started but does not need to be stopped. The timer continues to run Postcondition: The total time since the clock started is returned */ double Elapsed() const; /* Function: Returns the amount of time (in seconds) that has elapsed since the clock has started. Precondition: The timer has been started and must be stopped Postcondition: The total elapsed time after the clock has stopped is returned */ private: clock_t m_start; // the first reading by the clock clock_t m_end; // the last reading by the clock }; #endif //========================= Implementation ================================// Timer::Timer() { Reset(); }// end of Timer void Timer::Start() { m_start = clock(); }// end of Start void Timer::Stop() { m_end = clock(); }// end of Stop void Timer::Reset() { m_start = 0; m_end = 0; }// end of Reset double Timer::Timestamp() const { clock_t temp = clock(); assert(temp >= m_start); return (double)(temp-m_start)/((double)CLOCKS_PER_SEC); }// end of Timestamp double Timer::Elapsed() const { assert(m_end >= m_start); return (double)(m_end-m_start)/((double)CLOCKS_PER_SEC); }// http://programmingnotes.org/ |
QUICK NOTES:
The highlighted lines are sections of interest to look out for.
The code is heavily commented, so no further insight is necessary. If you have any questions, feel free to leave a comment below.
===== DEMONSTRATION HOW TO USE =====
Use of the above class is very simple to use. Here are sample programs demonstrating its use.
|
1 2 3 4 5 6 7 8 9 10 11 12 13 14 15 16 17 18 19 20 21 22 23 24 25 26 27 28 29 30 31 32 33 34 35 36 37 38 39 40 41 42 43 44 45 46 47 48 49 50 51 52 53 54 55 56 57 58 59 60 61 62 63 64 65 66 |
#include <iostream> #include <cstdlib> #include <ctime> #include <algorithm> #include "Timer.h" using namespace std; // function prototype void Display(int arry[], int size); // constant variable const int SIZE = 10000000; int main() { // declare variables srand(time(NULL)); Timer timer; int* arry = new int[SIZE]; // place random numbers into the array for(int x = 0; x < SIZE; ++x) { arry[x] = rand()%1000+1; } // display array data if within range if(SIZE <= 20) { cout<<"Original array values:n"; Display(arry, SIZE); } cerr<<"nStarting the timer.."; // start the timer timer.Start(); // sort the array using the built in function std::sort(arry, arry+SIZE); // stop the timer timer.Stop(); cout<<"nTimer stopped!n"; // display array data if within range if(SIZE <= 20) { cout<<"nThe current sorted array:n"; Display(arry, SIZE); } // display the elapsed time cout<<"nIt took "<<timer.Elapsed()*1000 <<" clicks ("<<timer.Elapsed()<<" seconds)"<<endl; return 0; }// end of main void Display(int arry[], int size) { for(int x = 0; x < size; ++x) { cout<<arry[x]<<" "; } cout<<"n"; }// http://programmingnotes.org/ |
SAMPLE OUTPUT:
Starting the timer..

Timer stopped!
It took 3749 clicks (3.749 seconds)
|
1 2 3 4 5 6 7 8 9 10 11 12 13 14 15 16 17 18 19 20 21 22 23 24 25 26 27 28 29 30 31 32 33 34 35 36 37 38 |
#include <iostream> #include "Timer.h" using namespace std; int main() { // declare variables Timer timer; int sleep = 0; int elapsedtime = 0; // ask user how long they want to sleep cout<< "How many seconds do you want to sleep?: "; cin >> sleep; cerr<<"nStarting the timer..n"; // start the timer timer.Start(); // use a loop to sleep while((int)timer.Timestamp() < sleep) { if((int)timer.Timestamp() == elapsedtime) { cout<<elapsedtime++<<endl; } } // stop the timer timer.Stop(); cout<<"naTimer stopped!n"; // display the elapsed time cout<<"nIt took "<<timer.Elapsed()*1000 <<" clicks ("<<timer.Elapsed()<<" seconds)"<<endl; return 0; }// http://programmingnotes.org/ |
SAMPLE OUTPUT:
How many seconds do you want to sleep?: 5Starting the timer..
0
1
2
3
4Timer stopped!
It took 5000 clicks (5 seconds)
C++ || Snippet – Custom “Shuffle” Function For Arrays

The following is a custom “Shuffle” function which shuffles the contents of an array. This function rearranges each item within the array by swapping the value of a given item with that of some other randomly selected item.
The code demonstrated on this page is different from the STL random_shuffle function in that this implementation is meant to work mainly on standard arrays.
This implementation revolves around using a series of void pointers.
|
1 2 3 4 5 6 7 8 9 10 11 12 13 14 15 16 17 18 19 20 21 22 23 24 25 26 27 28 29 30 31 32 33 34 35 36 37 38 39 40 41 42 43 44 45 46 47 48 49 50 51 52 53 54 55 56 57 58 59 60 61 62 63 64 65 66 67 68 69 70 71 72 73 74 75 76 77 78 79 80 81 82 83 84 85 86 87 88 89 90 91 |
// ============================================================================ // Author: K Perkins // Date: July 17, 2013 // Taken From: http://programmingnotes.org/ // File: Shuffle.cpp // Description: Demonstrates the use of a custom "Shuffle" function // which rearranges/shuffles the contents of an array. // ============================================================================ #include <iostream> #include <ctime> #include <cstdlib> #include <cstring> #include <string> using namespace std; // function prototype void Shuffle(const void* arry, int arrySize, size_t sizeType); int main() { // declare variables char charArry[] = "This is a simple C-String"; char* twoD_CharArry[] = {"This","is","a","2-D","C-String","array"}; int intArry[] = {1,2,3,4,5,6,7,8,9,10}; string str = "This is a simple std::string"; string strArry[] = {"This","is","a","std::string","array"}; // char array Shuffle(charArry, strlen(charArry), sizeof(char)); cout<<charArry<<endl<<endl; // int array Shuffle(intArry, 10, sizeof(int)); for(int x = 0; x < 10; ++x) { cout<<intArry[x]<<" "; } cout<<endl<<endl; // 2-D char array Shuffle(twoD_CharArry, 6, sizeof(char*)); for(int x = 0; x < 6; ++x) { cout<<twoD_CharArry[x]<<" "; } cout<<endl<<endl; // std::string Shuffle(str.c_str(), str.length(), sizeof(char)); cout<<str<<endl<<endl; // std::string array Shuffle(strArry, 5, sizeof(string)); for(int x = 0; x < 5; ++x) { cout<<strArry[x]<<" "; } cout<<endl<<endl; return 0; }// end of main /** * FUNCTION: Shuffle * USE: Rearranges each item within the array by swapping the value of a given * item with that of some other randomly selected item * @param arry - the array being shuffled * @param arrySize - the total number of items in the array (the array length) * @param sizeType - the number of bytes required to represent the data-type * of the individual items in the array * @return - the shuffled array */ void Shuffle(const void* arry, int arrySize, size_t sizeType) { srand(time(NULL)); for(unsigned x = 0; x < (unsigned)arrySize; ++x) { int r = rand() % arrySize; // get the value of two items in the array void* a = ((char*)arry)+(x*sizeType); void* b = ((char*)arry)+(r*sizeType); // swap the value of the two items void* tmp = malloc(sizeType); memcpy(tmp, a, sizeType); memcpy(a, b, sizeType); memcpy(b, tmp, sizeType); free(tmp); } }// http://programmingnotes.org/ |
QUICK NOTES:
The highlighted lines are sections of interest to look out for.
The code is heavily commented, so no further insight is necessary. If you have any questions, feel free to leave a comment below.
Once compiled, you should get this as your output
|
1 2 3 4 5 6 7 8 9 |
sesnisai g S-tmirp TlhiC 2 5 6 4 10 9 1 8 3 7 C-String array a 2-D is This i:gdsmsa: i ilnptti es Trshs is array std::string This a |
C++ || Snippet – Custom “For Each” Iterator Function For Arrays

A “For Each” algorithm is a function that iterates over all the elements contained in a storage collection, and calls a separate user defined function to manipulate each element within that collection.
The code demonstrated on this page is different from the STL for_each function in that this implementation is meant to work mainly on standard arrays.
The example below illustrates the “For Each” concept in a fully compilable and working demonstration. This example is trivial in that all it does is call a separate user defined function to display all of the contents within each array. This implementation revolves around using a simple function pointer and a series of void pointers.
|
1 2 3 4 5 6 7 8 9 10 11 12 13 14 15 16 17 18 19 20 21 22 23 24 25 26 27 28 29 30 31 32 33 34 35 36 37 38 39 40 41 42 43 44 45 46 47 48 49 50 51 52 53 54 55 56 57 58 59 60 61 62 63 64 65 66 67 68 69 70 71 72 73 74 75 76 77 78 79 80 81 82 83 84 85 86 87 88 89 |
// ============================================================================ // Author: K Perkins // Date: July 12, 2013 // Taken From: http://programmingnotes.org/ // File: ForEach.cpp // Description: Demonstrates the use of a custom "For Each" function // implementation. // ============================================================================ #include <iostream> #include <cstring> #include <string> using namespace std; // function prototypes void ForEach(const void* arry, int arrySize, size_t sizeType, void(*function)(void*)); void PrintChar(void* c); // user defined functions void PrintInt(void* c); void PrintCString(void* c); void PrintString(void* c); int main() { // declare variables char charArry[] = "This is a simple C-String"; char* twoD_CharArry[] = {"This","is","a","2-D","C-String","array"}; int intArry[] = {1,2,3,4,5,6,7,8,9,10}; string str = "This is a simple std::string"; string strArry[] = {"This","is","a","std::string","array"}; // char array ForEach(charArry, strlen(charArry), sizeof(char), PrintChar); cout<<endl<<endl; // int array ForEach(intArry, 10, sizeof(int), PrintInt); cout<<endl<<endl; // 2-D char array ForEach(twoD_CharArry, 6, sizeof(char*), PrintCString); cout<<endl<<endl; // std::string ForEach(str.c_str(), str.length(), sizeof(char), PrintChar); cout<<endl<<endl; // std::string array ForEach(strArry, 5, sizeof(string), PrintString); cout<<endl<<endl; return 0; }// end of main /** * FUNCTION: ForEach * USE: Applies the "void(*function)" to each of the elements in the array * @param arry - the array being iterated * @param arrySize - the total number of items in the array (the array length) * @param sizeType - the number of bytes required to represent the data-type * of the individual items in the array * @param *function - function pointer that accepts an element in the array as argument * @return - none */ void ForEach(const void* arry, int arrySize, size_t sizeType, void(*function)(void*)) { for(unsigned x = 0; x < (unsigned)arrySize; ++x) { function((char*)arry + (x*sizeType)); } }// end of ForEach void PrintChar(void* c) { cout<<*(char*)c <<" "; }// end of PrintChar void PrintInt(void* c) { cout<<*(int*)c <<" "; }// end of PrintInt void PrintCString(void* c) { cout<<*(char**)c <<" "; }// end of PrintCString void PrintString(void* c) { cout<<*(string*)c <<" "; }// http://programmingnotes.org/ |
QUICK NOTES:
The highlighted lines are sections of interest to look out for.
The code is heavily commented, so no further insight is necessary. If you have any questions, feel free to leave a comment below.
Once compiled, you should get this as your output
|
1 2 3 4 5 6 7 8 9 |
T h i s i s a s i m p l e C - S t r i n g 1 2 3 4 5 6 7 8 9 10 This is a 2-D C-String array T h i s i s a s i m p l e s t d : : s t r i n g This is a std::string array |
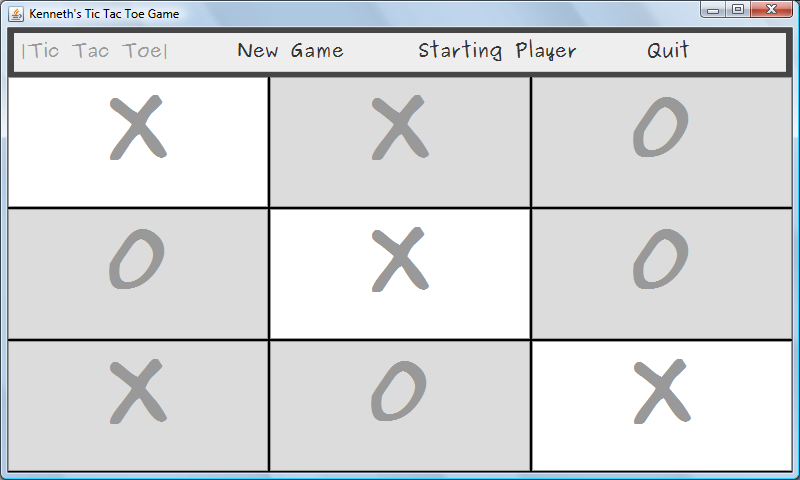
Java || Simple Tic Tac Toe Game Sample Code GUI
The following is another homework assignment which was presented in an intro to Java class. This program was used to provide more practice creating a graphical user interface.
REQUIRED KNOWLEDGE FOR THIS PROGRAM
JFrame

JMenu

JButtons

JPanel

JOptionPane

How To Play Tic-Tac-Toe

Special Fonts For This Game - Click Here To Download

Executable .Jar File - Click Here To Download & Play
This program features a graphical user interface (GUI) which has nine buttons arranged in a square. A user plays the game by clicking the mouse in a available button. The game then places a symbol on the clicked button alternating between the letters “X” and an “O.”
The game begins by clicking on the “New Game” button. This action will clear away any text on the 9 game buttons. The 9 game buttons are still disabled, but the radio button is enabled. This means someone must select who plays first: “X” or “O.” After selecting the starting player then the 9 game buttons become enabled.
When a player clicks on one of the 9 available game buttons, the text on that button will change into an “X” or an “O.” The game stops when one of the two players has 3 identical symbols in a row, a column, or a diagonal. When there is such a winner, the symbol of the winner is displayed to the screen. Sometimes all 9 game buttons have been clicked on but there is still no winner. In that case the text “Tie” is displayed to the screen.
The two buttons “New Game” and “Quit” remain enabled at all times. Clicking on “Quit” will close the window.
This program was implemented into 3 different files, so the code for this program will be broken up into 3 sections. The three-file solution always has one file (the driver) which contains the “main” function. Another file contains the implementation of the graphical user interface (GUI), and the last file contains logic, which in this case is the game algorithms.
==== File #1 – TicTacToe.java ====
|
1 2 3 4 5 6 7 8 9 10 11 12 13 14 15 16 17 18 19 20 21 22 23 24 25 |
// ============================================================================ // Author: Kenneth Perkins // Date: July 8, 2013 // Taken From: http://programmingnotes.org/ // File: TicTacToe.java // Description: This is the driver program for a three-file solution // which implements the game of tic tac toe. The driver program // always contains the method main. // ============================================================================ import javax.swing.*; public class TicTacToe { public static void main(String[] args) { // display message to the screen JOptionPane.showMessageDialog(null, "Game created by Kenneth Perkins for " + "use on the website 'My Programming Notes'" + "\n Visit: http://programmingnotes.org/", "Starting Game..", JOptionPane.INFORMATION_MESSAGE); // start game new GUI(); }// End of main }// http://programmingnotes.org/ |
==== File #2 – GUI.java ====
This is the GUI (graphical user interface) class for a three-file solution which implements the game of tic tac toe. The sole purpose of this source code is to define the GUI and call methods in the BusinessLogic class when needed.
|
1 2 3 4 5 6 7 8 9 10 11 12 13 14 15 16 17 18 19 20 21 22 23 24 25 26 27 28 29 30 31 32 33 34 35 36 37 38 39 40 41 42 43 44 45 46 47 48 49 50 51 52 53 54 55 56 57 58 59 60 61 62 63 64 65 66 67 68 69 70 71 72 73 74 75 76 77 78 79 80 81 82 83 84 85 86 87 88 89 90 91 92 93 94 95 96 97 98 99 100 101 102 103 104 105 106 107 108 109 110 111 112 113 114 115 116 117 118 119 120 121 122 123 124 125 126 127 128 129 130 131 132 133 134 135 136 137 138 139 140 141 142 143 144 145 146 147 148 149 150 151 152 153 154 155 156 157 158 159 160 161 162 163 164 165 166 167 168 169 170 171 172 173 174 175 176 177 178 179 180 181 182 183 184 185 186 187 188 189 190 191 192 193 194 195 196 197 198 199 200 201 202 203 204 205 206 207 208 209 210 211 212 213 214 215 216 217 218 219 220 221 222 223 224 225 226 227 228 229 230 231 232 233 234 235 236 237 238 239 240 241 242 243 244 245 246 247 248 249 250 251 252 253 254 255 256 257 258 259 260 261 262 263 264 265 266 267 268 269 270 271 272 273 274 275 276 277 278 279 280 281 282 283 284 285 286 287 288 289 290 291 292 293 294 295 296 297 298 299 300 301 302 303 304 305 306 307 308 309 310 311 312 313 314 315 316 317 318 319 320 321 322 323 324 325 326 327 328 329 330 331 332 333 334 335 336 337 338 339 340 341 342 343 344 345 346 347 348 349 350 351 352 |
// ============================================================================ // Author: Kenneth Perkins // Date: July 8, 2013 // Taken From: http://programmingnotes.org/ // File: GUI.java // Description: This is the GUI (graphical user interface) class // for a three-file solution which implements the game of tic tac toe. // The sole purpose of this source code is to define the GUI // and call methods in the BusinessLogic class when needed. // ============================================================================ import java.awt.*; import java.awt.event.*; import javax.swing.*; public class GUI extends JFrame implements ActionListener { // setting up ALL the variables JFrame window = new JFrame("Kenneth's Tic Tac Toe Game"); JMenuBar mnuMain = new JMenuBar(); JMenuItem mnuNewGame = new JMenuItem(" New Game"), mnuGameTitle = new JMenuItem("|Tic Tac Toe| "), mnuStartingPlayer = new JMenuItem(" Starting Player"), mnuExit = new JMenuItem(" Quit"); JButton btnEmpty[] = new JButton[10]; JPanel pnlNewGame = new JPanel(), pnlNorth = new JPanel(), pnlSouth = new JPanel(), pnlTop = new JPanel(), pnlBottom = new JPanel(), pnlPlayingField = new JPanel(); JPanel radioPanel = new JPanel(); private JRadioButton SelectX = new JRadioButton("User Plays X", false); private JRadioButton SelectO = new JRadioButton("User Plays O", false); private ButtonGroup radioGroup; private String startingPlayer= ""; final int X = 800, Y = 480, color = 190; // size of the game window private boolean inGame = false; private boolean win = false; private boolean btnEmptyClicked = false; private boolean setTableEnabled = false; private String message; private Font font = new Font("Rufscript", Font.BOLD, 100); private int remainingMoves = 1; private int wonNumber1 = 1, wonNumber2 = 1, wonNumber3 = 1; final int winCombo[][] = new int[][] { {1, 2, 3}, {1, 4, 7}, {1, 5, 9}, {4, 5, 6}, {2, 5, 8}, {3, 5, 7}, {7, 8, 9}, {3, 6, 9} /*Horizontal Wins*/ /*Vertical Wins*/ /*Diagonal Wins*/ }; //end array //=============================== GUI ========================================// public GUI() //This is the constructor { //Setting window properties: window.setSize(X, Y); window.setLocation(300, 180); window.setResizable(true); window.setLayout(new BorderLayout()); window.setDefaultCloseOperation(JFrame.EXIT_ON_CLOSE); //------------ Sets up Panels and text fields ------------------------// // setting Panel layouts and properties pnlNorth.setLayout(new FlowLayout(FlowLayout.CENTER)); pnlSouth.setLayout(new FlowLayout(FlowLayout.CENTER)); pnlNorth.setBackground(new Color(70, 70, 70)); pnlSouth.setBackground(new Color(color, color, color)); pnlTop.setBackground(new Color(color, color, color)); pnlBottom.setBackground(new Color(color, color, color)); pnlTop.setLayout(new FlowLayout(FlowLayout.CENTER)); pnlBottom.setLayout(new FlowLayout(FlowLayout.CENTER)); radioPanel.setBackground(new Color(color, color, color)); pnlBottom.setBackground(new Color(color, color, color)); radioPanel.setBorder(BorderFactory.createTitledBorder( BorderFactory.createEtchedBorder(), "Who Goes First?")); // adding menu items to menu bar mnuMain.add(mnuGameTitle); mnuGameTitle.setEnabled(false); mnuGameTitle.setFont(new Font("Purisa",Font.BOLD,18)); mnuMain.add(mnuNewGame); mnuNewGame.setFont(new Font("Purisa",Font.BOLD,18)); mnuMain.add(mnuStartingPlayer); mnuStartingPlayer.setFont(new Font("Purisa",Font.BOLD,18)); mnuMain.add(mnuExit); mnuExit.setFont(new Font("Purisa",Font.BOLD,18));//---->Menu Bar Complete // adding X & O options to menu SelectX.setFont(new Font("Purisa",Font.BOLD,18)); SelectO.setFont(new Font("Purisa",Font.BOLD,18)); radioGroup = new ButtonGroup(); // create ButtonGroup radioGroup.add(SelectX); // add plain to group radioGroup.add(SelectO); radioPanel.add(SelectX); radioPanel.add(SelectO); // adding Action Listener to all the Buttons and Menu Items mnuNewGame.addActionListener(this); mnuExit.addActionListener(this); mnuStartingPlayer.addActionListener(this); // setting up the playing field pnlPlayingField.setLayout(new GridLayout(3, 3, 2, 2)); pnlPlayingField.setBackground(Color.black); for(int x=1; x <= 9; ++x) { btnEmpty[x] = new JButton(); btnEmpty[x].setBackground(new Color(220, 220, 220)); btnEmpty[x].addActionListener(this); pnlPlayingField.add(btnEmpty[x]); btnEmpty[x].setEnabled(setTableEnabled); } // adding everything needed to pnlNorth and pnlSouth pnlNorth.add(mnuMain); BusinessLogic.ShowGame(pnlSouth,pnlPlayingField); // adding to window and Showing window window.add(pnlNorth, BorderLayout.NORTH); window.add(pnlSouth, BorderLayout.CENTER); window.setVisible(true); }// End GUI // =========== Start Action Performed ===============// public void actionPerformed(ActionEvent click) { // get the mouse click from the user Object source = click.getSource(); // check if a button was clicked on the gameboard for(int currentMove=1; currentMove <= 9; ++currentMove) { if(source == btnEmpty[currentMove] && remainingMoves < 10) { btnEmptyClicked = true; BusinessLogic.GetMove(currentMove, remainingMoves, font, btnEmpty, startingPlayer); btnEmpty[currentMove].setEnabled(false); pnlPlayingField.requestFocus(); ++remainingMoves; } } // if a button was clicked on the gameboard, check for a winner if(btnEmptyClicked) { inGame = true; CheckWin(); btnEmptyClicked = false; } // check if the user clicks on a menu item if(source == mnuNewGame) { System.out.println(startingPlayer); BusinessLogic.ClearPanelSouth(pnlSouth,pnlTop,pnlNewGame, pnlPlayingField,pnlBottom,radioPanel); if(startingPlayer.equals("")) { JOptionPane.showMessageDialog(null, "Please Select a Starting Player", "Oops..", JOptionPane.ERROR_MESSAGE); BusinessLogic.ShowGame(pnlSouth,pnlPlayingField); } else { if(inGame) { int option = JOptionPane.showConfirmDialog(null, "If you start a new game," + " your current game will be lost..." + "n" +"Are you sure you want to continue?" , "New Game?" ,JOptionPane.YES_NO_OPTION); if(option == JOptionPane.YES_OPTION) { inGame = false; startingPlayer = ""; setTableEnabled = false; } else { BusinessLogic.ShowGame(pnlSouth,pnlPlayingField); } } // redraw the gameboard to its initial state if(!inGame) { RedrawGameBoard(); } } } // exit button else if(source == mnuExit) { int option = JOptionPane.showConfirmDialog(null, "Are you sure you want to quit?", "Quit" ,JOptionPane.YES_NO_OPTION); if(option == JOptionPane.YES_OPTION) { System.exit(0); } } // select X or O player else if(source == mnuStartingPlayer) { if(inGame) { JOptionPane.showMessageDialog(null, "Cannot select a new Starting "+ "Player at this time.nFinish the current game, or select a New Game "+ "to continue", "Game In Session..", JOptionPane.INFORMATION_MESSAGE); BusinessLogic.ShowGame(pnlSouth,pnlPlayingField); } else { setTableEnabled = true; BusinessLogic.ClearPanelSouth(pnlSouth,pnlTop,pnlNewGame, pnlPlayingField,pnlBottom,radioPanel); SelectX.addActionListener(new RadioListener()); SelectO.addActionListener(new RadioListener()); radioPanel.setLayout(new GridLayout(2,1)); radioPanel.add(SelectX); radioPanel.add(SelectO); pnlSouth.setLayout(new GridLayout(2, 1, 2, 1)); pnlSouth.add(radioPanel); pnlSouth.add(pnlBottom); } } pnlSouth.setVisible(false); pnlSouth.setVisible(true); }// End Action Performed // =========== Start RadioListener ===============// private class RadioListener implements ActionListener { public void actionPerformed(ActionEvent event) { JRadioButton theButton = (JRadioButton)event.getSource(); if(theButton.getText().equals("User Plays X")) { startingPlayer = "X"; } if(theButton.getText().equals("User Plays O")) { startingPlayer = "O"; } // redisplay the gameboard to the screen pnlSouth.setVisible(false); pnlSouth.setVisible(true); RedrawGameBoard(); } }// End RadioListener /* ---------------------------------- Start of all the other methods. | ---------------------------------- */ private void RedrawGameBoard() { BusinessLogic.ClearPanelSouth(pnlSouth,pnlTop,pnlNewGame, pnlPlayingField,pnlBottom,radioPanel); BusinessLogic.ShowGame(pnlSouth,pnlPlayingField); btnEmpty[wonNumber1].setBackground(new Color(220, 220, 220)); btnEmpty[wonNumber2].setBackground(new Color(220, 220, 220)); btnEmpty[wonNumber3].setBackground(new Color(220, 220, 220)); remainingMoves = 1; for(int x=1; x <= 9; ++x) { btnEmpty[x].setText(""); btnEmpty[x].setEnabled(setTableEnabled); } win = false; } private void CheckWin() { for(int x=0; x < 8; ++x) { if(!btnEmpty[winCombo[x][0]].getText().equals("") && btnEmpty[winCombo[x][0]].getText().equals(btnEmpty[winCombo[x][1]].getText()) && btnEmpty[winCombo[x][1]].getText().equals(btnEmpty[winCombo[x][2]].getText()) /* The way this checks the if someone won is: First: it checks if the btnEmpty[x] is not equal to an empty string- x being the array number inside the multi-dementional array winCombo[checks inside each of the 7 sets][the first number] Secong: it checks if btnEmpty[x] is equal to btnEmpty[y]- x being winCombo[each set][the first number] y being winCombo[each set the same as x][the second number] (So basically checks if the first and second number in each set is equal to each other) Third: it checks if btnEmtpy[y] is eual to btnEmpty[z]- y being the same y as last time and z being winCombo[each set as y][the third number] Conclusion: So basically it checks if it is equal to the btnEmpty is equal to each set of numbers */ ) { win = true; wonNumber1 = winCombo[x][0]; wonNumber2 = winCombo[x][1]; wonNumber3 = winCombo[x][2]; btnEmpty[wonNumber1].setBackground(Color.white); btnEmpty[wonNumber2].setBackground(Color.white); btnEmpty[wonNumber3].setBackground(Color.white); break; } } if(win || (!win && remainingMoves > 9)) { if(win) { if(startingPlayer.equals("X")) { if(remainingMoves % 2 == 0) message = " X has won!"; else message = " O has won!"; } else { if(remainingMoves % 2 == 0) message = " O has won!"; else message = " X has won!"; } JOptionPane.showMessageDialog(null, message, "Congrats!", JOptionPane.INFORMATION_MESSAGE); } else if(!win && remainingMoves > 9) { message = "Both players have tied!"; JOptionPane.showMessageDialog(null, message, "Tie Game!", JOptionPane.WARNING_MESSAGE); } for(int x=1; x <= 9; ++x) { btnEmpty[x].setEnabled(false); } win = false; inGame = false; startingPlayer = ""; } }// End of CheckWin }// http://programmingnotes.org/ |
==== File #3 – BusinessLogic.java ====
This is the BusinessLogic class for a three-file solution which implements the game of tic tac toe. The is the class containing algorithms.
|
1 2 3 4 5 6 7 8 9 10 11 12 13 14 15 16 17 18 19 20 21 22 23 24 25 26 27 28 29 30 31 32 33 34 35 36 37 38 39 40 41 42 43 44 45 46 47 48 49 50 51 52 53 54 55 56 57 58 59 60 |
// ============================================================================ // Author: Kenneth Perkins // Date: July 8, 2013 // Taken From: http://programmingnotes.org/ // File: BusinessLogic.java // Description: This is the BusinessLogic class for a three-file solution // which implements the game of tic tac toe. The is the class // containing algorithms. // ============================================================================ import javax.swing.*; import java.awt.*; public class BusinessLogic { public static void GetMove(int currentMove, int remainingMoves, Font font, JButton btnEmpty[], String startingPlayer) {// gets the current move "X" or "O" for the user & displays to screen btnEmpty[currentMove].setFont(font); if(startingPlayer.equals("X")) { if(remainingMoves % 2 != 0) { btnEmpty[currentMove].setText("X"); } else { btnEmpty[currentMove].setText("O"); } } else { if(remainingMoves % 2 != 0) { btnEmpty[currentMove].setText("O"); } else { btnEmpty[currentMove].setText("X"); } } }// End of GetMove public static void ShowGame(JPanel pnlSouth, JPanel pnlPlayingField) {// shows the Playing Field pnlSouth.setLayout(new BorderLayout()); pnlSouth.add(pnlPlayingField, BorderLayout.CENTER); pnlPlayingField.requestFocus(); }// End of ShowGame public static void ClearPanelSouth(JPanel pnlSouth, JPanel pnlTop, JPanel pnlNewGame, JPanel pnlPlayingField, JPanel pnlBottom, JPanel radioPanel) {// clears any posible panals on screen pnlSouth.remove(pnlTop); pnlSouth.remove(pnlBottom); pnlSouth.remove(pnlPlayingField); pnlTop.remove(pnlNewGame); pnlSouth.remove(radioPanel); }// End of ClearPanelSouth }// http://programmingnotes.org/ |
QUICK NOTES:
The highlighted lines are sections of interest to look out for.
The code is heavily commented, so no further insight is necessary. If you have any questions, feel free to leave a comment below.
This program uses custom fonts. To obtain those fonts, click here!
Click here to download & play the executable .jar file.
SAMPLE SCREENSHOT:
(click to enlarge)