


Tag Archives: vue router
Vue || How To Build & Deploy A Vue Site/App For Production Under A Web Hosting Environment

The following page demonstrates how to build and deploy a Vue site/app for production under a shared hosting environment.
Note: This page assumes you already have a domain and hosting plan setup. It also assumes your project is completed and ready to be deployed. For an overview on how to get started with Vue, visit the official documentation.
Contents
1. Build The Project

2. Deploy Site

3. Deploy Site - Subfolder

4. Server Configuration - HTML5 History Mode
1. Build The Project
The first step is to build the project for production. This can be achieved by a simple command.
First, navigate to the project directory in the terminal, then type one of the following commands depending on your package manager.
NPM:
npm run build
Yarn:
yarn build
Once this process is complete, in your project directory you will see a new folder named ‘dist‘. This dist folder will contain the files that are needed to upload to the server.
The ‘dist‘ folder should contain something like the following:
• css - [folder]

• img - [folder]

• js - [folder]

• favicon.ico - [file]

• index.html - [file]
2. Deploy Site
The files generated in Step 1 contained in the ‘dist‘ folder can be uploaded to your server using any method familiar to you.
On your server, the public_html directory is typically where you would place the files, which is the document root folder for your primary domain name.
Once the files are uploaded, your site should be live!
3. Deploy Site – Subfolder
If you wish to deploy your site into a subfolder (i.e: site.com/your-subfolder/), this can be done by making only a few changes!
Before you build your project (as highlighted in Step 1), it needs to be updated to point to the subfolder as the ‘base’ path. This is configured in the vue.config.js file.
If this file doesn’t already exist in your project, you can create it. It should be placed in the root directory of your project.
Next, add the following to the vue.config.js file:
|
1 2 3 4 5 6 7 8 9 10 11 12 13 14 15 16 17 18 |
// ============================================================================ // Author: Kenneth Perkins // Date: Jan 17, 2021 // Taken From: http://programmingnotes.org/ // File: vue.config.js // Description: Adds additional options to the site config // ============================================================================ module.exports = { // Project deployment base // By default we assume your app will be deployed at the root of a domain, // e.g. https://www.my-app.com/ // If your app is deployed at a sub-path, you will need to specify that // sub-path here. For example, if your app is deployed at // https://www.foobar.com/my-app/ // then change this to '/my-app/' publicPath: process.env.NODE_ENV === 'production' ? '/your-subfolder/' : '/', }// http://programmingnotes.org/ |
If you are using Vue Router in your project, make sure to update the related base property of the router.
This can be done by updating the router index.js like so:
|
1 2 3 4 5 6 7 8 9 10 11 12 13 14 15 16 17 18 |
// ============================================================================ // Author: Kenneth Perkins // Date: Jan 17, 2021 // Taken From: http://programmingnotes.org/ // File: index.js // Description: Router index file which sets up the routes for the project // ============================================================================ import { createWebHistory, createRouter } from 'vue-router'; let routes = []; // This sets the base url using the 'publicPath' property from vue.config.js const router = createRouter({ history: createWebHistory( process.env.BASE_URL ), routes }); export default router; // http://programmingnotes.org/ |
After the changes above are applied, follow the steps highlighted in Step 1 to build your project.
Next, upload the files generated in the ‘dist‘ folder into the subfolder directory on your server. The files can be uploaded using any method familiar to you.
Once the files are uploaded, your site should be live!
4. Server Configuration – HTML5 History Mode
When using Vue Router with HTML5 history mode, without a proper server configuration, users will get a 404 server error if they access ‘http://yoursite.com/user/id’ directly in their browser.
To fix the issue, all you need to do is add a simple catch-all fallback route to your server. If the URL doesn’t match any static assets, it should serve the same index.html page that your app lives in.
For example, if using Apache, this is configured in the .htaccess file.
If this file doesn’t already exist, you can create it. It should be placed in the same directory as your apps index.html file.
Next, add the following to the .htaccess file:
|
1 2 3 4 5 6 7 8 9 10 11 12 13 14 15 16 |
# ============================================================================ # Author: Kenneth Perkins # Date: Jan 17, 2021 # Taken From: http://programmingnotes.org/ # File: .htaccess # Description: Catch all server fallback for routes in a app # ============================================================================ <IfModule mod_rewrite.c> RewriteEngine On RewriteBase / RewriteRule ^index\.html$ - [L] RewriteCond %{REQUEST_FILENAME} !-f RewriteCond %{REQUEST_FILENAME} !-d RewriteRule . /index.html [L] </IfModule> # http://programmingnotes.org/ |
If your app is deployed in a subfolder, using Apache, this is also configured in the .htaccess file.
If this file doesn’t already exist, you can create it. It should be placed in the same directory as your apps index.html file.
Next, add the following to the .htaccess file:
Note: Replace ‘[[[your-subfolder]]]‘ with the subfolder name where your app resides.
|
1 2 3 4 5 6 7 8 9 10 11 12 13 14 15 16 |
# ============================================================================ # Author: Kenneth Perkins # Date: Jan 17, 2021 # Taken From: http://programmingnotes.org/ # File: .htaccess # Description: Catch all server fallback for routes in a subfolder app # ============================================================================ <IfModule mod_rewrite.c> RewriteEngine On RewriteBase / RewriteRule ^index\.html$ - [L] RewriteCond %{REQUEST_FILENAME} !-f RewriteCond %{REQUEST_FILENAME} !-d RewriteRule . /[[[your-subfolder]]]/index.html [L] </IfModule> # http://programmingnotes.org/ |
For more example configurations, visit the official documentation for more information!
QUICK NOTES:
The highlighted lines are sections of interest to look out for.
The code is heavily commented, so no further insight is necessary. If you have any questions, feel free to leave a comment below.
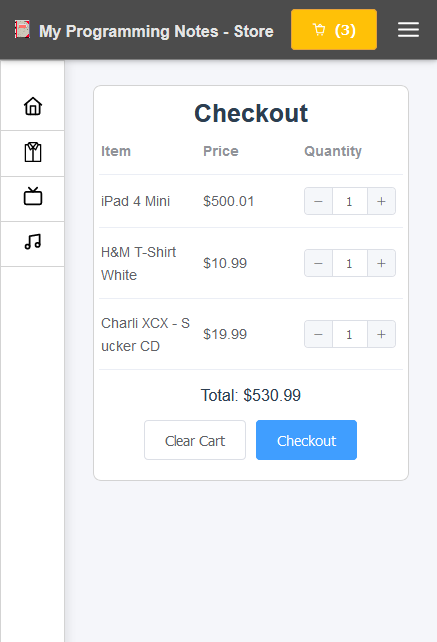
Vue || How To Create A Simple Store With Shopping Cart Using Vuex, Vue Router & Vue
The following is an implementation which demonstrates how to create a simple store with a shopping cart using Vuex, Vue Router and Vue.
This store allows you to add and remove items from a cart, filter items by category, create a new user, log in and log out (with automatic redirect), and “purchase” the items in the cart on the checkout page.
1. Get Started
To get started, make sure you have a package manager like Node.js installed. Node.js is used to install packages.
You’ll also want to have vue-cli installed. Visit the official documentation for more information on how this is done.
Next, navigate to the project directory in the terminal, then run the following commands (Node.js):
Project Setup
npm install
Compiles and hot-reloads for development
npm run serve
2. Features
This project implements a simple store with the following features:
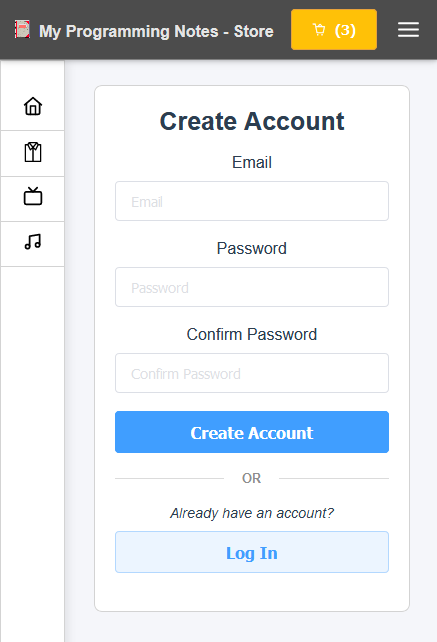
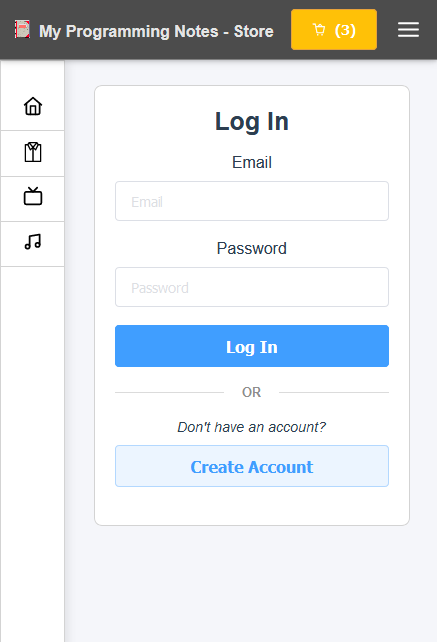
1. Login / Create account (with automatic redirect)
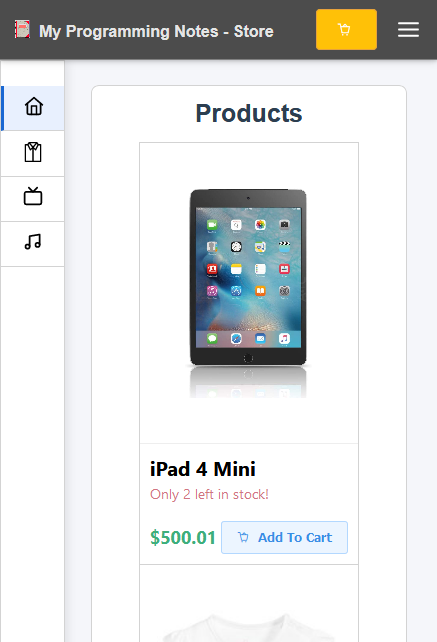
2. Retrieve products from a mock 'API'
3. Add/Remove item to shopping cart
4. Simulate purchasing items on checkout
5. Custom 404 page
6. Display products per category
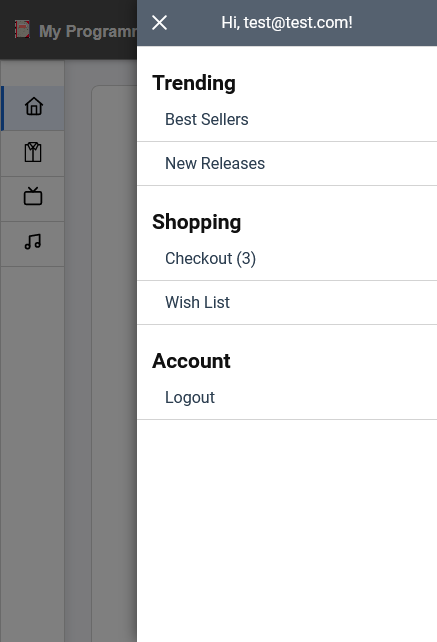
7. Hamburger 'options' menu
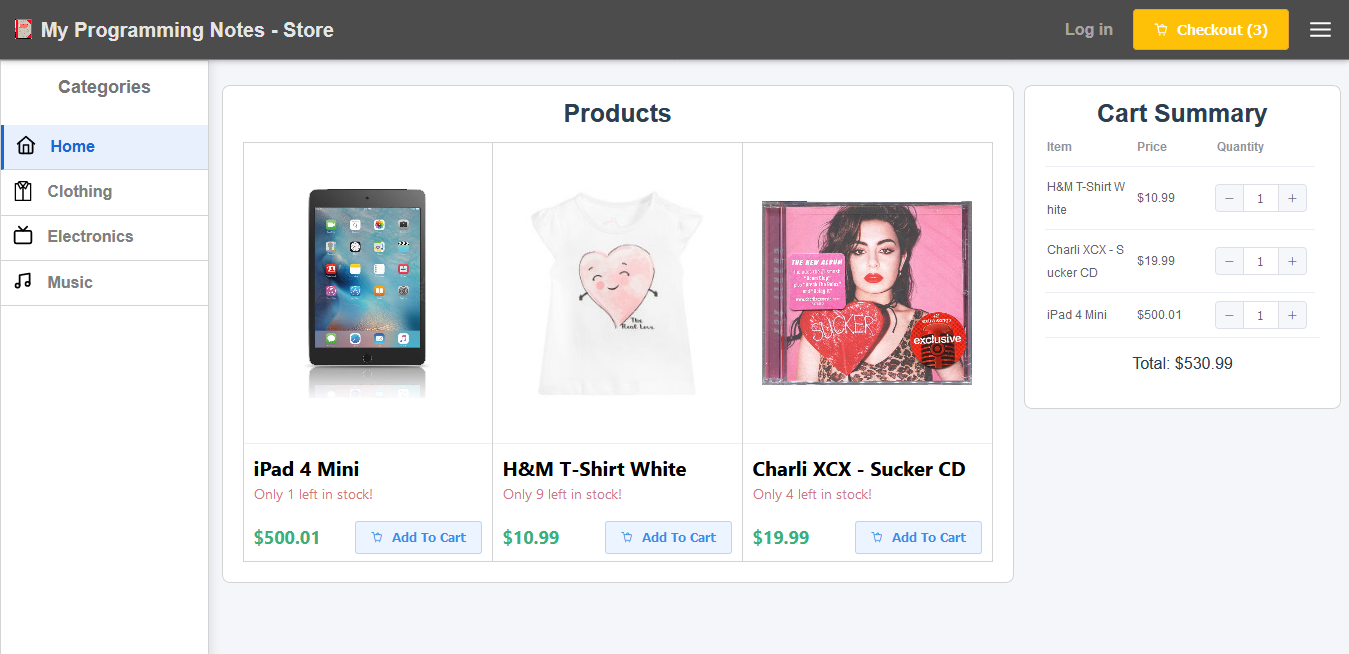
3. Screenshots
Home Page
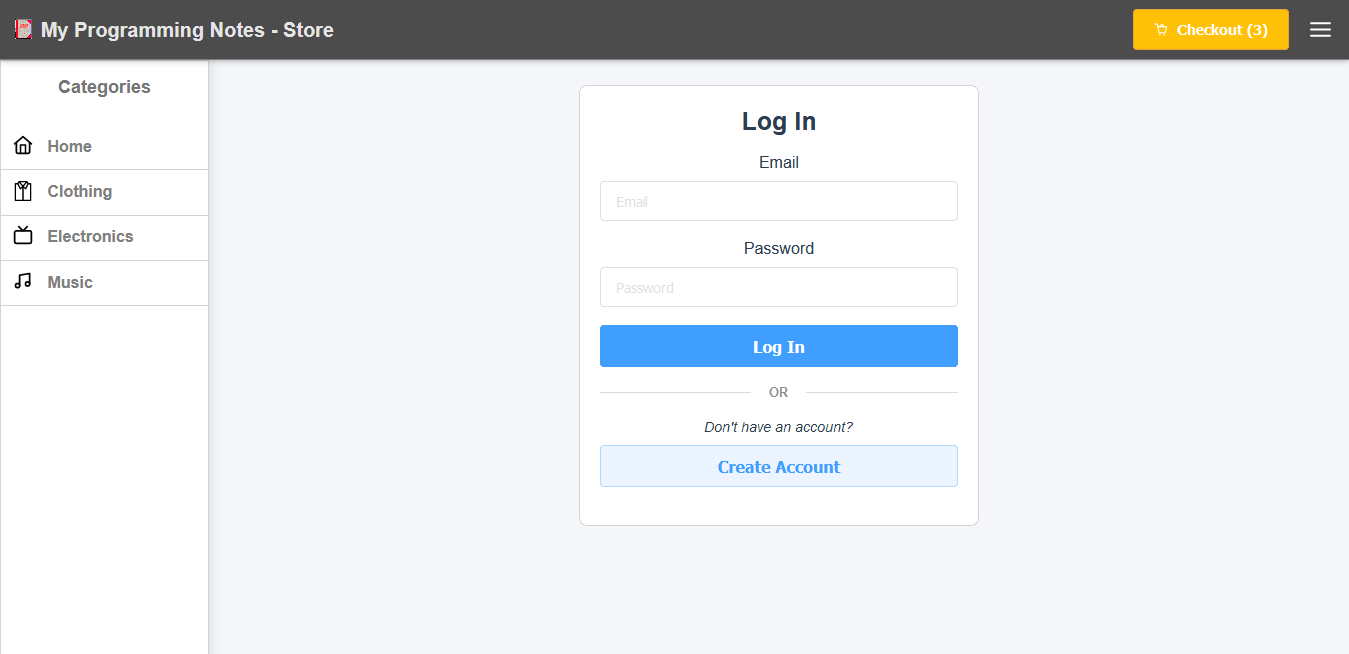
Log In Page
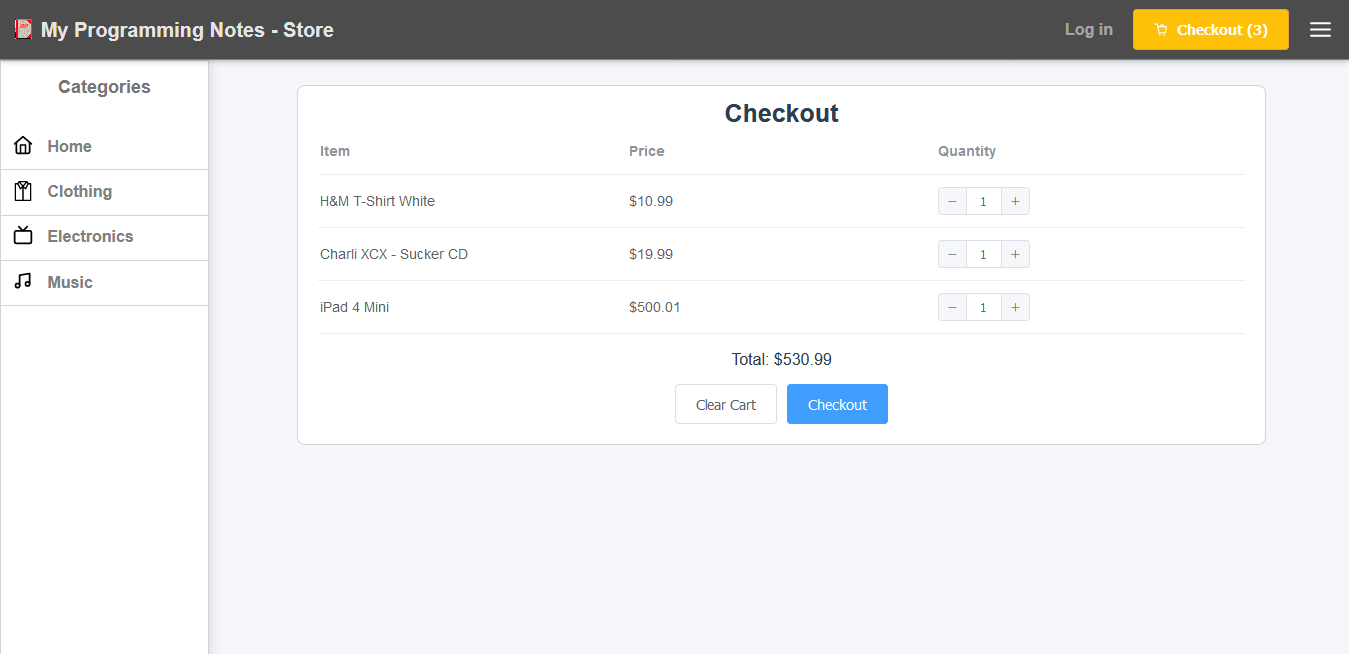
Check Out Page
Hamburger Options Menu
Create Account Page
Log In Page
Home Page
Check Out Page
4. Download
QUICK NOTES:
The highlighted lines are sections of interest to look out for.
The code is heavily commented, so no further insight is necessary. If you have any questions, feel free to leave a comment below.
Vue || How To Set, Add & Update Query Params With Vue Router Using Vue
The following is a module which demonstrates how to set, add and update query params with Vue using Vue Router.
Note: The examples below assumes your project is already set up and configured. For an overview on how to get started with Vue and Vue Router, visit the official documentation.
1. Add & Update Query
The example below is a simple page with a login link. The link has a redirect parameter to navigate back to the referring page after successful login.
Clicking on the link results in the following:
/login?[existing query + computed result]
|
1 2 3 4 5 6 7 8 9 10 11 12 13 14 15 16 17 18 19 20 21 22 23 24 25 26 27 28 29 30 31 32 |
<!-- // ============================================================================ // Author: Kenneth Perkins // Date: Dec 31, 2020 // Taken From: http://programmingnotes.org/ // File: Home.vue // Description: Page that has a login redirect link // ============================================================================ --> <template> <section> <router-link :to="{name: 'Login', query: redirectQuery}"> Log in </router-link> </section> </template> <script> export default { data() { return {} }, computed: { redirectQuery() { return Object.assign({}, this.$route.query, {redirect: this.$route.query.redirect || this.$route.path}); } }, }; </script> <style scoped> </style> <!-- http://programmingnotes.org/ --> |
QUICK NOTES:
The highlighted lines are sections of interest to look out for.
The code is heavily commented, so no further insight is necessary. If you have any questions, feel free to leave a comment below.
Vue || How To Set Up Fade In & Fade Out Router View Transitions With Vue Router Using Vue

The following is a module which demonstrates how to set up fade in and fade out router view transitions with Vue using Vue Router.
Note: The examples below assumes your project is already set up and configured. For an overview on how to get started with Vue and Vue Router, visit the official documentation.
1. Router Index File
The example below is a sample router index.js file. This file sets up the routes in the project.
There are 2 routes: a ‘Home‘ page, and a ‘About‘ page.
|
1 2 3 4 5 6 7 8 9 10 11 12 13 14 15 16 17 18 19 20 21 22 23 24 25 26 27 28 |
// ============================================================================ // Author: Kenneth Perkins // Date: Dec 30, 2020 // Taken From: http://programmingnotes.org/ // File: index.js // Description: Router index.js file // ============================================================================ import { createRouter, createWebHistory } from 'vue-router'; const routes = [ { path: '/', name: 'Home', component: () => import(/* webpackChunkName: "Home" */ '../views/Home.vue') }, { path: '/about', name: 'About', component: () => import(/* webpackChunkName: "About" */ '../views/About.vue') } ]; const router = createRouter({ history: createWebHistory(), routes }); export default router; // http://programmingnotes.org/ |
The layout of the routes above are not important. They are declared here simply to demonstrate a project with multiple routes set up.
2. App.vue
The example below is the ‘App.vue‘ page. This is the root of the application. In this example, this is where the fade in and fade out router view transitions will take effect.
When a route is clicked, its contents is loaded inside the router-view. The example below demonstrates how to set up the fade in and fade out router view transition effect.
|
1 2 3 4 5 6 7 8 9 10 11 12 13 14 15 16 17 18 19 20 21 22 23 24 25 26 27 28 29 30 31 32 33 34 35 36 37 38 39 40 |
<!-- // ============================================================================ // Author: Kenneth Perkins // Date: Dec 30, 2020 // Taken From: http://programmingnotes.org/ // File: App.vue // Description: Home page that displays content via router-view // ============================================================================ --> <template> <div id="nav"> <router-link :to="{name: 'Home'}">Home</router-link> | <router-link :to="{name: 'About'}">About</router-link> </div> <router-view v-slot="slotProps"> <transition name="fade" mode="out-in"> <component :is="slotProps.Component"></component> </transition> </router-view> </template> <script> export default { data() { return {} }, methods: {} } </script> <style> .fade-enter-active, .fade-leave-active { transition: opacity 0.3s; } .fade-enter, .fade-leave-to { opacity: 0; } </style> <!-- http://programmingnotes.org/ --> |
QUICK NOTES:
The highlighted lines are sections of interest to look out for.
The code is heavily commented, so no further insight is necessary. If you have any questions, feel free to leave a comment below.
Vue || How To Set Up Vue Smooth Scroll Behavior With Vue Router Using Vue

The following is a module which demonstrates how to set up smooth anchor scroll behavior when navigating to a new route with Vue using Vue Router.
Note: The examples below assumes your project is already set up and configured. For an overview on how to get started with Vue and Vue Router, visit the official documentation.
1. Router Index File
The example below is a sample router index.js file. This file sets up the routes in the project. Its also where you set up the scrolling behavior when navigating to a new route.
|
1 2 3 4 5 6 7 8 9 10 11 12 13 14 15 16 17 18 19 20 21 22 23 24 25 26 27 28 |
// ============================================================================ // Author: Kenneth Perkins // Date: Dec 26, 2020 // Taken From: http://programmingnotes.org/ // File: index.js // Description: Router index.js file // ============================================================================ import { createWebHistory, createRouter } from "vue-router"; const routes = []; const router = createRouter({ history: createWebHistory(), routes, scrollBehavior(to, from, savedPosition) { let defaultPos = {left: 0, top: 0}; if (savedPosition) { return savedPosition; } else if (to.hash) { let elem = document.querySelector(to.hash); return elem ? elem.scrollIntoView({ behavior: 'smooth' }) : defaultPos; } else { return defaultPos; } } }); export default router; // http://programmingnotes.org/ |
QUICK NOTES:
The highlighted lines are sections of interest to look out for.
The code is heavily commented, so no further insight is necessary. If you have any questions, feel free to leave a comment below.
Vue || How To Create A 404 Not Found Route With Dynamic Nested Routes With Vue Router Using Vue
The following is a module which demonstrates how to create a 404 not found route with dynamic nested routes via Vue Router using Vue.
Routes can be checked using Navigation Guards. This page will demonstrate verifying nested routes using the Per Route Guard.
This will demonstrate how to create a route that catches all non existing routes with Vue Router. It will also demonstrate how to use navigation guards to make sure nested dynamic routes exists.
Note: The examples below assumes your project is already set up and configured. For an overview on how to get started with Vue and Vue Router, visit the official documentation.
1. Router Index File
The example below is a sample router index.js file. This file sets up the routes in the project.
There are 4 routes: a ‘Home‘ page, a ‘DestinationDetails‘ page, a ‘ExperienceDetails‘ page, and a ‘NotFound‘ page.
The ‘ExperienceDetails‘ page is a nested child route.
|
1 2 3 4 5 6 7 8 9 10 11 12 13 14 15 16 17 18 19 20 21 22 23 24 25 26 27 28 29 30 31 32 33 34 35 36 37 38 39 40 41 42 43 44 45 46 47 48 49 50 51 52 53 54 55 56 57 58 59 60 61 62 63 64 65 66 67 |
// ============================================================================ // Author: Kenneth Perkins // Date: Dec 25, 2020 // Taken From: http://programmingnotes.org/ // File: index.js // Description: Router index.js file // ============================================================================ import { createWebHistory, createRouter } from "vue-router"; const routes = [ { path: "/", name: "Home", component: () => import(/* webpackChunkName: "Home" */ "../views/Home.vue"), }, { path: "/destination/:slug", name: "DestinationDetails", props: true, component: () => import(/* webpackChunkName: "DestinationDetails" */ "../views/DestinationDetails.vue"), children: [{ path: ":experienceSlug", name: "ExperienceDetails", props: true, component: () => import(/* webpackChunkName: "ExperienceDetails" */ "../views/ExperienceDetails.vue") }], beforeEnter: (to, from, next) => { // Verify the route exists by checking the API let exists = false; // If this is a parent route, check if it exists if (to.params.slug) { // Do something to check if this is valid exists = true; } // If this is a child route, check if it exists if (to.params.experienceSlug) { // Do something to check if this is valid exists = true; } // If the route exists, navigate to it if (exists) { next(); } else { next({name: "NotFound"}); } } }, { path: "/404", name: "NotFound", component: () => import(/* webpackChunkName: "NotFound" */ "../views/NotFound.vue") }, { path: "/:catchAll(.*)", redirect: {name: "NotFound"} } ]; const router = createRouter({ history: createWebHistory(), routes }); export default router; // http://programmingnotes.org/ |
The DestinationDetails route is a dynamic route that accepts props. In this example, the route.params will be set as the component props. In this component, the ‘slug‘ prop is used as the dynamic route path identifier.
The ExperienceDetails nested child route is also a dynamic route. In this component, the ‘experienceSlug‘ prop is used as the dynamic route path identifier.
Using the beforeEnter navigation guard, we can check if the route is valid by checking the dynamic route path identifier. If the route is not valid, the ‘NotFound‘ route is navigated to.
The NotFound route catches all non existing routes.
2. Home Page
The example below is the ‘Home‘ route page. This demonstrates how to navigate to the DestinationDetails route using the dynamic props.
It uses router-link to navigate to the specific route.
|
1 2 3 4 5 6 7 8 9 10 11 12 13 14 15 16 17 18 19 20 21 22 23 24 25 26 27 28 29 30 31 32 33 34 35 36 37 38 39 40 41 42 43 44 45 46 47 48 49 50 51 52 53 |
<!-- // ============================================================================ // Author: Kenneth Perkins // Date: Dec 25, 2020 // Taken From: http://programmingnotes.org/ // File: Home.vue // Description: Home page that shows all destinations // ============================================================================ --> <template> <section> <h1> All Destinations </h1> <div> <section v-for="destination in destinations" :key="destination.id"> <router-link :to="getNavigationPath(destination)" > <h2>{{destination.name}}</h2> </router-link> <figure> <router-link :to="getNavigationPath(destination)"> <img :src="destination.image" :alt="destination.name"> </router-link> </figure> </section> </div> </section> </template> <script> export default { data() { return { destinations: api.destinations } }, methods: { getNavigationPath(destination) { return { name: 'DestinationDetails', params: { id: destination.id, slug: destination.slug } }; } } }; </script> <style scoped> </style> <!-- http://programmingnotes.org/ --> |
3. Destination Details Page
The example below is the ‘DestinationDetails‘ route page. This demonstrates how to display information about the destination and navigate to the ExperienceDetails route using the dynamic props passed to it.
It uses router-link to navigate to the specific route, and uses router-view to display the nested content from the navigated child route.
When calling the child component, it will automatically receive the parent ‘slug‘ dynamic route path identifier as a parameter.
|
1 2 3 4 5 6 7 8 9 10 11 12 13 14 15 16 17 18 19 20 21 22 23 24 25 26 27 28 29 30 31 32 33 34 35 36 37 38 39 40 41 42 43 44 45 46 47 48 49 50 51 52 53 54 55 56 57 58 59 60 61 62 63 64 65 66 67 68 69 70 71 |
<!-- // ============================================================================ // Author: Kenneth Perkins // Date: Dec 25, 2020 // Taken From: http://programmingnotes.org/ // File: DestinationDetails.vue // Description: Displays information about a destination // ============================================================================ --> <template> <section> <div> <h1>{{destination.name}}</h1> <div"> <img :src="destination.image" :alt="destination.name"> <p>{{ destination.description }}</p> </div> </div> <section> <h2> Top experiences in {{destination.name}} </h2> <div> <article v-for="experience in destination.experiences" :key="experience.slug"> <router-link :to="getNavigationPath(experience)"> <img :src="experience.image" :alt="experience.name"> <span> {{experience.name}} </span> </router-link> </article> </div> <router-view :key="$route.path" /> </section> </section> </template> <script> export default { data() { return { } }, props: { slug: { type: String, required: true } }, computed: { destination() { return api.destinations.find( destination => destination.slug == this.slug ); } }, methods: { getNavigationPath(experience) { return { name: 'ExperienceDetails', params: { experienceSlug: experience.slug }, hash: '#experience', }; } } } </script> <style scoped> </style> <!-- http://programmingnotes.org/ --> |
4. Experience Details Page
The example below is the ‘ExperienceDetails‘ route page. This demonstrates how to display information about the destination experience using the dynamic props passed to it.
|
1 2 3 4 5 6 7 8 9 10 11 12 13 14 15 16 17 18 19 20 21 22 23 24 25 26 27 28 29 30 31 32 33 34 35 36 37 38 39 40 41 42 43 44 45 46 47 48 49 50 |
<!-- // ============================================================================ // Author: Kenneth Perkins // Date: Dec 25, 2020 // Taken From: http://programmingnotes.org/ // File: ExperienceDetails.vue // Description: Displays information about an experience // ============================================================================ --> <template> <section> <h2>{{experience.name}}</h2> <div> <img :src="experience.image" :alt="experience.name"> <p id="experience"> {{experience.description}} </p> </div> </section> </template> <script> export default { props: { slug: { type: String, required: true, }, experienceSlug: { type: String, required: true, } }, computed: { destination() { return api.destinations.find( destination => destination.slug == this.slug ); }, experience() { return this.destination.experiences.find( experience => experience.slug == this.experienceSlug ); } } } </script> <style scoped> </style> <!-- http://programmingnotes.org/ --> |
5. Not Found (404) Page
The example below is the ‘NotFound‘ route page. This page catches all non existing routes.
|
1 2 3 4 5 6 7 8 9 10 11 12 13 14 15 16 17 18 19 20 21 22 23 24 25 26 27 28 29 30 31 |
<!-- // ============================================================================ // Author: Kenneth Perkins // Date: Dec 25, 2020 // Taken From: http://programmingnotes.org/ // File: NotFound.vue // Description: Not found (404) page // ============================================================================ --> <template> <section> <h1>Not Found</h1> <p>Oops we couldn't find that page. Try going <router-link :to="{name: 'Home'}"> home </router-link> </p> </section> </template> <script> export default { data() { return {} }, methods: {} } </script> <style scoped> </style> <!-- http://programmingnotes.org/ --> |
QUICK NOTES:
The highlighted lines are sections of interest to look out for.
The code is heavily commented, so no further insight is necessary. If you have any questions, feel free to leave a comment below.
Vue || How To Set Up Vue Login Authentication & Route Handling With Vue Router Using Vue
The following is a module which demonstrates how to set up Vue login authentication and route handling using Vue Router.
Note: The examples below assumes your project is already set up and configured. For an overview on how to get started with Vue and Vue Router, visit the official documentation.
1. Router Index File
The example below is a sample router index.js file. This file sets up the routes in the project.
There are 3 routes: a ‘Home‘ page, a ‘User‘ page, and a ‘Login‘ page.
|
1 2 3 4 5 6 7 8 9 10 11 12 13 14 15 16 17 18 19 20 21 22 23 24 25 26 27 28 29 30 31 32 33 34 35 36 37 38 39 40 41 42 43 44 45 46 47 48 49 50 51 52 53 54 55 56 57 58 |
// ============================================================================ // Author: Kenneth Perkins // Date: Dec 24, 2020 // Taken From: http://programmingnotes.org/ // File: index.js // Description: Vue Router index.js file // ============================================================================ import { createWebHistory, createRouter } from "vue-router"; const routes = [ { path: "/", name: "home", component: () => import(/* webpackChunkName: "home" */ "../views/Home.vue"), }, { path: "/user", name: "user", component: () => import(/* webpackChunkName: "user" */ "../views/User.vue"), meta: {requiresAuth: true} // Indicates that this route requires authentication }, { path: "/login", name: "login", component: () => import(/* webpackChunkName: "login" */ "../views/Login.vue") } ]; const router = createRouter({ history: createWebHistory(), routes }); router.beforeEach((to, from, next) => { // Determine if the route requires authentication if (to.matched.some(record => record.meta.requiresAuth)) { // Get value from somewhere to determine if the user is // logged in or not let isLoggedIn = false; // If user is not logged in, navigate to the named "login" route // with a query string parameter indicating where to navigate to after // successful login if (!isLoggedIn) { // Navigate to login route next({ name: "login", query: {redirect: to.fullPath} }); } else { next(); } } else { next(); } }); export default router; // http://programmingnotes.org/ |
The ‘User‘ route has a meta property that says that it requires authentication.
Next, the route records are iterated over to check if the requested page requires authentication. If it does, the route is redirected to the ‘Login‘ named route, with a query string parameter of the original page to redirect to after successful login.
2. Login Route Page
The example below is the ‘Login‘ route page. It doesn’t do anything special, it just demonstrates how to accept user input and redirect to the specified path after successful login is complete.
Accessing the route redirect path can be done by using the ‘query’ property on the route object.
|
1 2 3 4 5 6 7 8 9 10 11 12 13 14 15 16 17 18 19 20 21 22 23 24 25 26 27 28 29 30 31 32 33 34 35 36 37 38 39 40 41 42 43 44 45 46 47 48 49 50 51 52 53 54 |
<!-- // ============================================================================ // Author: Kenneth Perkins // Date: Dec 24, 2020 // Taken From: http://programmingnotes.org/ // File: Login.vue // Description: Login authentication page // ============================================================================ --> <template> <section> <h1> Login </h1> <div class="form"> <label for="username">Username</label> <input v-model="username" type="text" name="username" class="input" autocomplete="off" /> <label for="password">Password</label> <input v-model="password" type="password" class="input" autocomplete="off" /> <button @click="login" class="btn">Login</button> </div> </section> </template> <script> export default { data() { return { username: null, password: null, } }, methods: { login() { // Authenticate user against API console.log(this.username, this.password); // Set value somewhere to indicate that the user is logged in let isLoggedIn = true; // Redirect to page const redirectPath = this.$route.query.redirect || '/'; this.$router.push(redirectPath); } } } </script> <style scoped> .form { display: flex; flex-direction: column; max-width: 400px; margin: 0 auto; } </style> <!-- http://programmingnotes.org/ --> |
QUICK NOTES:
The highlighted lines are sections of interest to look out for.
The code is heavily commented, so no further insight is necessary. If you have any questions, feel free to leave a comment below.


