


Tag Archives: python
Python || Aku Aku Snake Game Using Pygame

The following is another homework assignment which was presented in an Introduction to Game Design and Production class. This project is an implementation of the classic “Snake” game using Python 3.2 and Pygame 1.9.2a0.
REQUIRED KNOWLEDGE FOR THIS PROGRAM
Pygame - How To Install

Pygame - Download Here

How To Use Pygame

How To Create Executable Python Programs

Aku Aku Snake! Source Code - Click Here To Download

Aku Aku Snake! Executable File - Click Here To Download
==== 1. DESCRIPTION ====
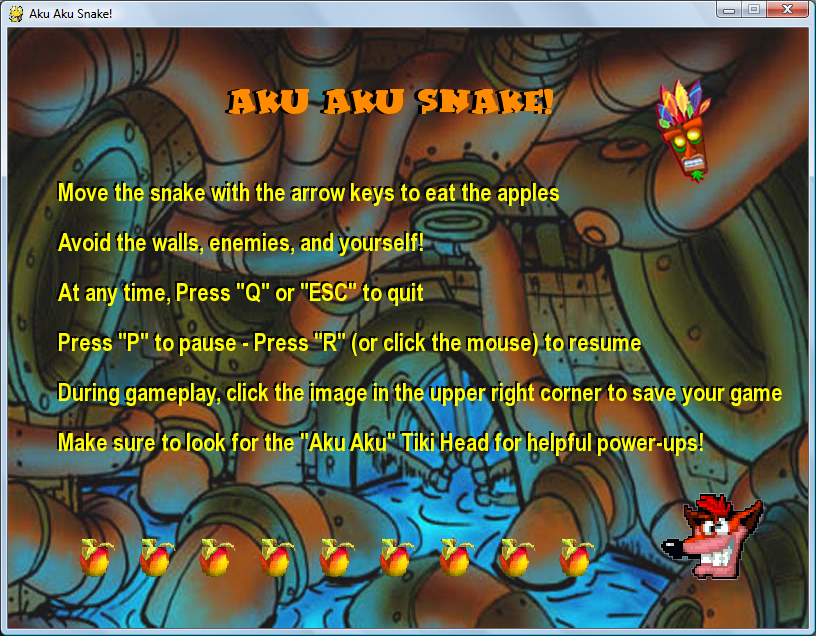
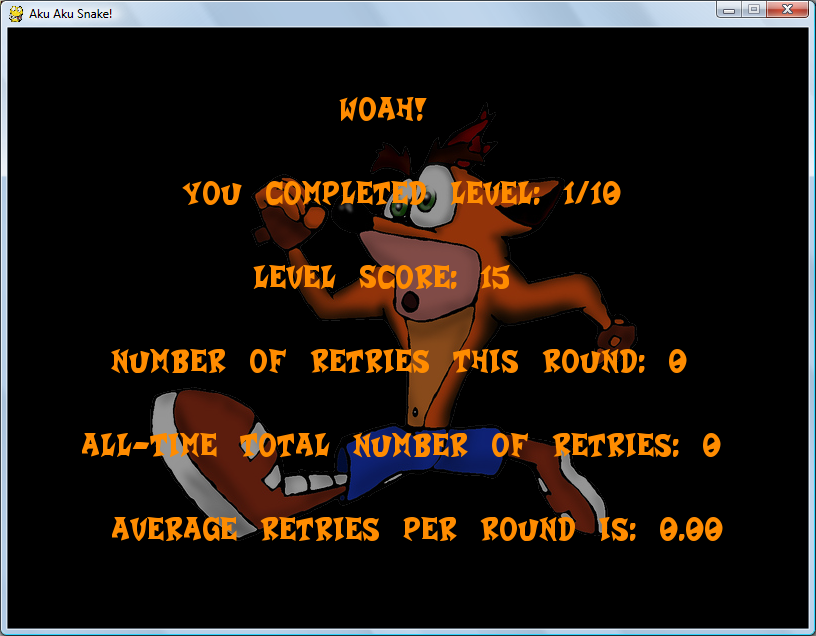
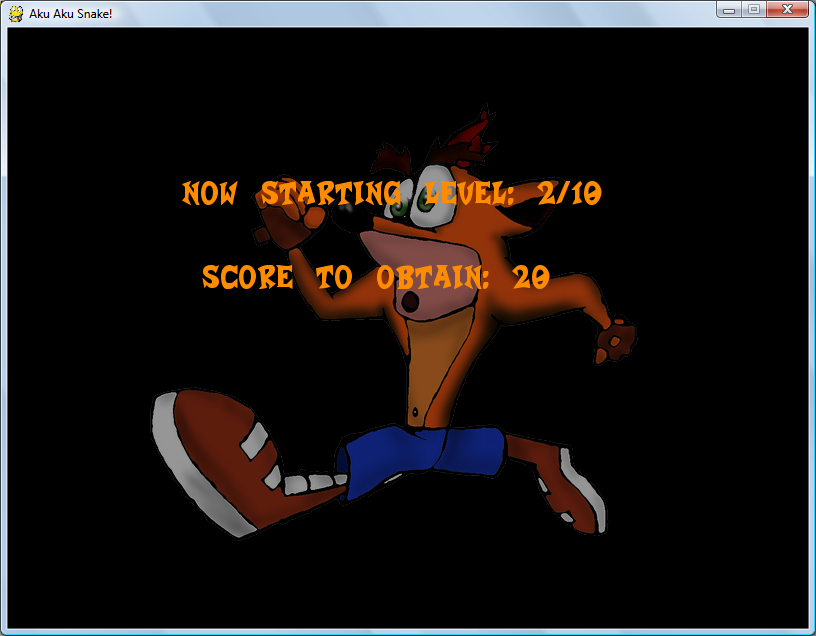
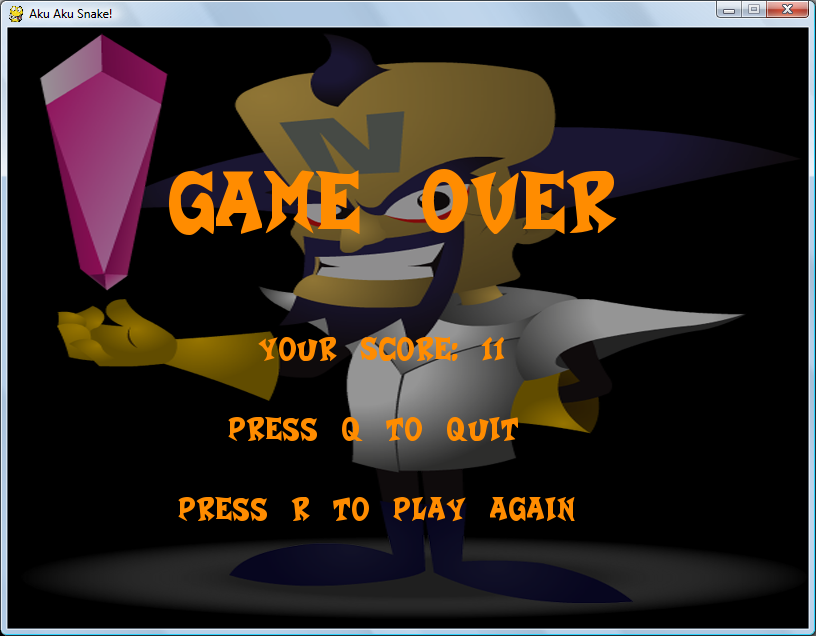
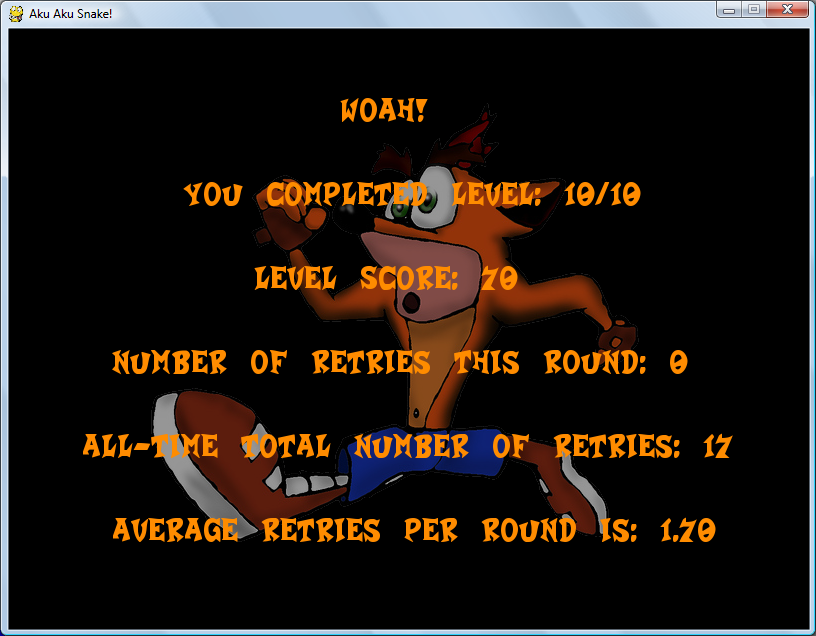
Aku Aku Snake is a new take on the classic “snake” game. It features ten levels, with characters and sounds taken from the PlayStation hit: “Crash Bandicoot 2: Cortex Strikes Back.” The purpose of this game is to successfully complete all ten levels in the fewest amount of retries possible.
To advance in the game, each round the player must consume a specified number of fruit items. Once the required score is obtained during each round, a new one is started. This process is repeated until the player finishes all ten levels. But watch out! The game gets harder as the game progresses.
==== 2. USAGE ====
This game utilizes the python “pygame” module. To play this game, it is assumed that the user already has python 3 and pygame installed on their computer. If that is not the case, here are documents explaining how to obtain the necessary resources for play.
How to install Python:
How to install Pygame:
After the required resources are obtained, to start the game, the easiest way this to do would be to extract the entire .zip file into the directory of your choice, and to simply run the “main.py” source file through the python interpreter. Once the “main.py” source file is ran through the python interpreter, the game should automatically start.
NOTE: Python and Pygame are not needed to play the executable file!
==== 3. EXTERNAL DEPENDENCIES ====
Other than the pygame module and the “main.py” file mentioned above, there are eight other source files this program depends on. The additional source files should be saved within the “libs” folder, which is located in the directory: “data -> libs”
The following is a brief description of each additional source file.
• “gameBoard.py” sets up the game board and background images for display. This class also reads files (images/fonts) from the “img” & “fnt” directory for use within this program.
• “gameMusic.py” sets up the game sounds and music. This class also reads files (.ogg) from the “snd” directory for use within this program.
• “gameSave.py” sets up the game to have the ability to save its current status. This class uses the “pickle” module to save the players current progress to a file.
• “snake.py” sets up the snake for display on the game board. This class also reads files (images) from the “img” directory for use within this program.
• “fruit.py” sets up the fruit for display on the game board. This class also reads files (images) from the “img” directory for use within this program.
• “enemy.py” sets up the enemies for display on the game board. This class also reads files (images) from the “img” directory, and uses the “spriteStripAnim” class for use within this program.
• “spriteSheet.py” handles sprite sheet animations.
• “spriteStripAnim.py” extends the spriteSheet.py module, providing an iterator (iter() and next() methods), and a __add__() method for joining strips, which comes in handy when a strip wraps to the next row.
These additional files are located within the directory: “data -> libs” folder.
==== 4. FEATURES ====
This game features various colorful images and background music which are taken from the original Crash Bandicoot game. Each level in this game features background music that are unique to each level.
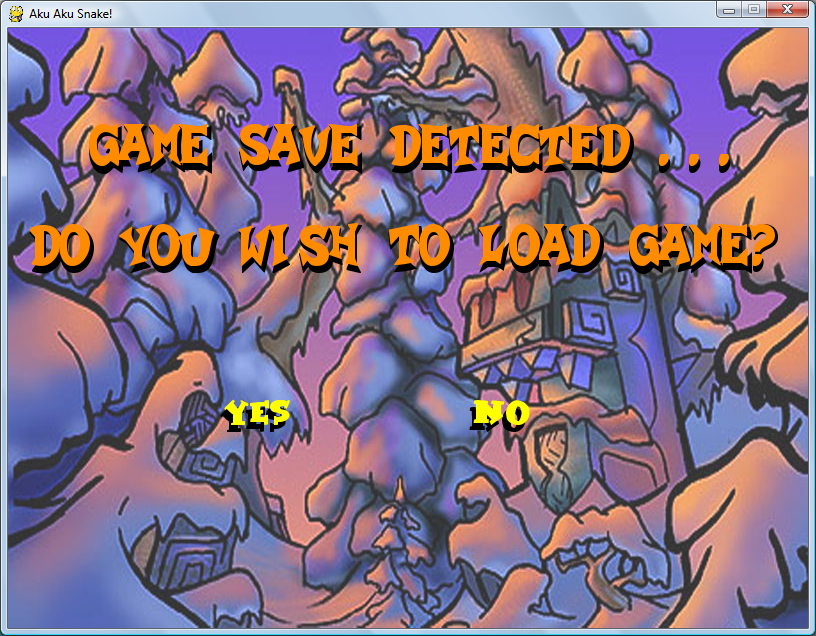
The most useful feature implemented in this game is the “save game” element, which allows a player to save their current progress at any moment during gameplay. This allows a player to save their current status and continue playing the game at a later date if they desire.
To save the game, during gameplay simply click on the boss image in the upper right corner. Once the save is complete, a sound jingle will play confirming the successful save.
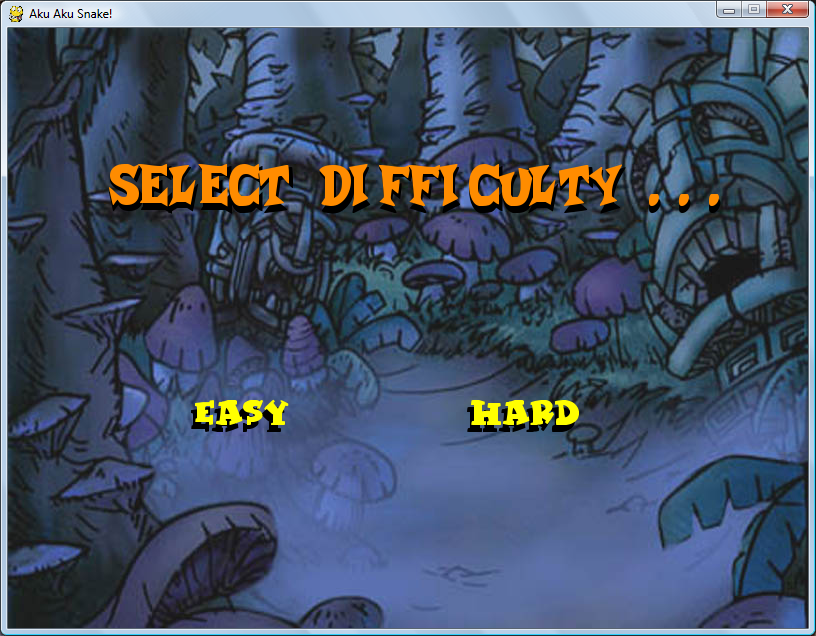
This game also features two modes of operation: “Easy” and “Hard” mode. When easy mode is selected, the game saves the user’s current game progress every time they die, but when hard mode is selected, that feature is turned off and the user HAS to save their current progress manually, or else it will be lost after each death.
Here are screenshots of the game during play. (on all images, click to enlarge)


==== 5. DOWNLOAD AND PLAY ====
• Aku Aku Snake! Source Code - Click Here To Download

• Aku Aku Snake! Executable File - Click Here To Download
NOTE: Python and Pygame are not needed to play the executable file!
Python || Brainy Memory Game Using Pygame

The following is another homework assignment which was presented in an Introduction to Game Design and Production class. This project is an implementation of the classic “Memory” game using Python 3.2 and Pygame 1.9.2a0.
REQUIRED KNOWLEDGE FOR THIS PROGRAM
Pygame - How To Install

Pygame - Download Here

How To Use Pygame

How To Create Executable Python Programs

Brainy Memory Game Source Code - Click Here To Download

Brainy Memory Game Executable File - Click Here To Download
==== 1. DESCRIPTION ====
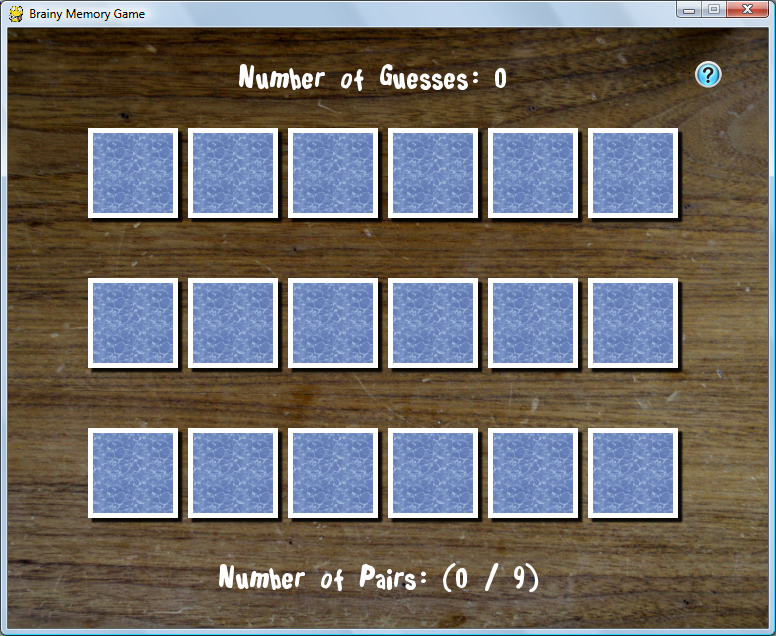
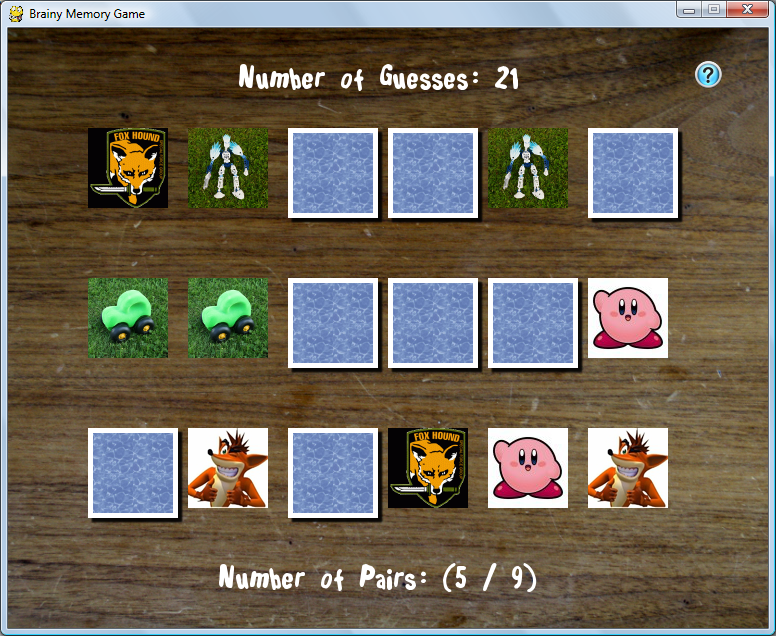
Brainy Memory Game is a mind stimulating educational card game in which an assortment of cards are laid face down on a surface, and the player tries to find and uncover two identical pairs. If the two selected cards match, they are removed from gameplay. If the two selected cards do not match, both of the cards are turned back over, and the process repeats until all identical matching cards have been uncovered! The object of this game is to find identical pairs of two matching cards in the fewest number of turns possible. This game can be played alone or with multiple players, and is especially challenging for children and adults alike.
==== 2. USAGE ====
This game utilizes the python “pygame” module. To play this game, it is assumed that the user already has python and pygame installed on their computer. If that is not the case, here are documents explaining how to obtain the necessary resources for play.
How to install Python:
How to install Pygame:
After the required resources are obtained, to start the game, the easiest way to do this would be to extract the entire .zip file into the directory of your choice, and to simply run the “memory.py” source file through the python interpreter. Once the “memory.py” source file is ran through the python interpreter, the game should automatically start.
NOTE: Python and Pygame are not needed to play the executable file!
==== 3. EXTERNAL DEPENDENCIES ====
Other than the pygame module and the memory.py file mentioned above, there are two other source files this program depends on. They are named “gameBoard.py” and “gameMusic.py.”
• “gameBoard.py” sets up the game board and playing cards for display. It also reads files (images/fonts) from the “img” & “fnt “directory for use within this program.
• “gameMusic.py” sets up the game sounds and music. It also reads files (.ogg/.wav) from the “snd” directory for use within this program.
Both of these source files should be located in the same directory as “memory.py”
==== 4. FEATURES ====
This game features various colorful images and sounds for a pleasant user experience. By default, there are 27 playing cards (image size: 80×80) for use located in the “img” folder, and more can be added by the player in the future if they desire.
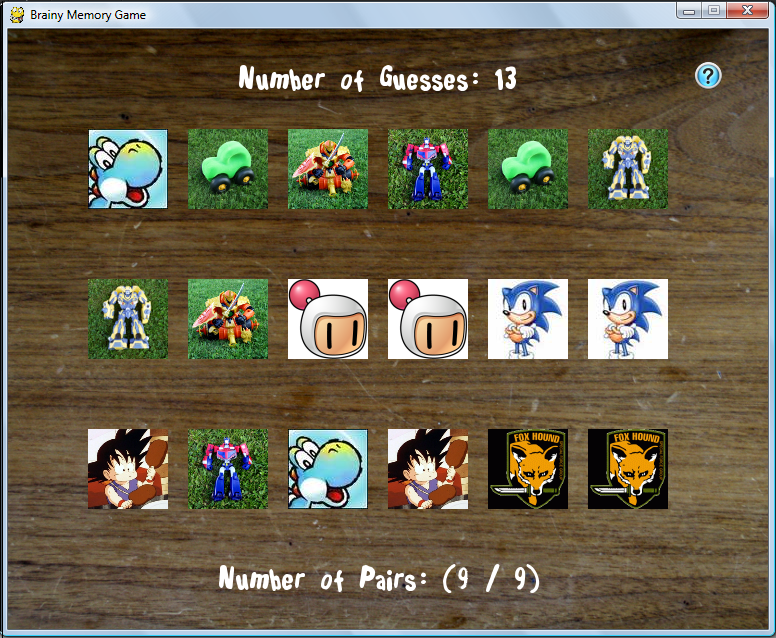
There are four attainable memory ranks available in this game, with two of them being displayed below. Play the full game to discover the rest!
Here are screenshots of the game during play. (on all images, click to enlarge)


==== 5. DOWNLOAD AND PLAY ====
• Brainy Memory Game Source Code - Click Here To Download

• Brainy Memory Game Executable File - Click Here To Download
NOTE: Python and Pygame are not needed to play the executable file!
Python || Random Number Guessing Game Using Random MyRNG & While Loop

Here is another homework assignment which was presented in introduction class. The following is a simple guessing game using commandline arguments, which demonstrates the use of generating random numbers.
REQUIRED KNOWLEDGE FOR THIS PROGRAM
How To Get User Input

Getting Commandline Arguments

While Loops

MyRNG.py - Random Number Class
==== 1. DESCRIPTION ====
The following program is a simple guessing game which demonstrates how to generate random numbers using python. This program will seed the random number generator (located in the file MyRNG.py), select a number at random, and then ask the user for a guess. Using a while loop, the user will keep attempting to guess the selected random number until the correct guess is obtained, afterwhich the user will have the option of continuing play or exiting.
==== 2. USAGE ====
The user enters various options into the program via the commandline. An example of how the commandline can be used is given below.
python3 guess.py [-h] [-v] -s [seed] -m 2 -M 353
Where the brackets are meant to represent features which are optional, meaning the user does not have to specify them at run time.
The -m and -M options are mandatory.
• -M is best picked as a large prime integer
• -m is best picked as an integer in the range of 2,3,..,M-1
NOTE: The use of commandline arguments is not mandatory. If any of the mandatory options are not selected, the program uses its own logic to generate random numbers.
==== 3. FEATURES ====
The following lists and explains the command line argument options.
• -s (seed): Seed takes an integer as a parameter and is used to seed the random number generator. When omitted, the program uses its own logic to seed the generator
• -v (verbose): Turn on debugging messages.
• -h (help): Print out a help message which tells the user how to run the program and a brief description of the program.
• -m (minimum): Set the minimum of the range of numbers the program will select its numbers from.
• -M (maximum): Set the maximum of the range of numbers the program will select its numbers from.
|
1 2 3 4 5 6 7 8 9 10 11 12 13 14 15 16 17 18 19 20 21 22 23 24 25 26 27 28 29 30 31 32 33 34 35 36 37 38 39 40 41 42 43 44 45 46 47 48 49 50 51 52 53 54 55 56 57 58 59 60 61 62 63 64 65 66 67 68 69 70 71 72 73 74 75 76 77 78 79 80 81 82 83 84 85 86 87 88 89 90 91 92 93 94 95 96 97 98 99 100 101 102 103 104 105 106 107 108 109 110 111 112 113 114 115 116 117 118 119 120 121 122 123 124 125 126 127 128 129 130 131 132 133 134 135 136 137 138 139 140 141 142 143 144 145 146 147 148 149 150 151 152 153 154 155 156 157 158 159 160 161 162 163 164 165 166 167 168 |
# ============================================================================= # Name: K Perkins # Date: Aug 6, 2013 # Taken From: http://programmingnotes.org/ # File: guess.py # Description: This is the guess.py module which uses a random number # generator to simulate a simple guessing game. This program will seed the # random number generator (located in the file MyRNG.py), select a number at # random, and then ask the user for a guess. The user will keep attempting # to guess the selected random number until the correct guess is obtained, # afterwhich the user will have the option of continuing play or exiting # ============================================================================= # Sample commandline: guess.py -s 3454 -m 1 -M 1000 import sys, pdb from MyRNG import * def Usage(status, msg = ""): # Function prints out usage directions aswell as a simple # message if a string is sent as a 2nd parameter if(msg): print(msg) print("nUSAGE:n ", sys.argv[0],"[-h help] [-v] [-s seed] [-m minimum number]", "[-M maximum number]") sys.exit(status) def IsWarmer(userGuess, numGuess, randomNumber): # Function determines if the current number the user guesses is closer # to the random number than the previous guess. # Function returns TRUE if current user guess is 'warmer' # than previous, otherwise returns FALSE currGuessDifference = userGuess[numGuess] - randomNumber currGuessDifference = math.fabs(currGuessDifference) prevGuessDifference = userGuess[numGuess-1] - randomNumber prevGuessDifference = math.fabs(prevGuessDifference) if(currGuessDifference < prevGuessDifference): return True else: return False def main(): # This is the 'main' function which first takes a string via the commandline # and parses it to determine various modes of operation, namely being # 'seed,' 'minimum,' and 'maximum.' After the commandline options # are obtained, that information is sent to the MyRNG class in order # to generate a random number. After a random number is found, using # a while loop, the user is prompted to try and guess that specified # number, repeatedly doing so until a correct guess is found # declare variables index = 0 # counter which is used to index the sys.argv string verbose = False choices = (("y"),("yes"),("n"),("no")) # This is to be used for the while loop seed = 806189064 # saves the seed from the command line minimum = 1 # saves the minimum num from the command line maximum = 1000 # saves the maximum num from the command line loop = True # this controls the while loop randomNumber = 0 # this saves the random number from the generator userGuess = [] # this saves the user guesses numGuess = 0 # this is the counter wgich keeps track of the num of usr guesses newGame = True # bool to determine if the user is playing a new game programDescr = """nDESCRIPTION: The following is a simple guessing game in which the user is prompted to guess a number and the computer determines if the guess is above, below or exactly the random number which was selected.""" # == determine if the user entered enough args via commandline == # if(len(sys.argv) < 1): #if not enough args, stop the program and print an error message Usage(1, "n** Must provide atleast 1 argument") # == parse thru the argv string to find the appropriate tokens == # for currentArg in sys.argv: if(currentArg == "-h"): # print out the usage message and exit. Usage(2, programDescr) elif(currentArg == "-v"): # set verbose mode to be true for debugging messages verbose = True elif(currentArg == "-s"): # set the seed here # if the user doesnt specify a seed, the # default is my CWID if((index+1 < len(sys.argv)) and (sys.argv[index+1].isdigit())): seed = int(sys.argv[index+1]) else: seed = 806189064 elif currentArg == "-m": # set the minimum here # if the user doesnt specify a min, the default is 1 if((index+1 < len(sys.argv)) and (sys.argv[index+1].isdigit())): minimum = int(sys.argv[index+1]) else: minimum = 1 elif currentArg == "-M": # set the maximum here # if the user doesnt specify a max, the default is 1000 if((index+1 < len(sys.argv)) and (sys.argv[index+1].isdigit())): maximum = int(sys.argv[index+1]) else: maximum = 1000 # increment the index counter index += 1 # print debugging messages if debug mode is on if(verbose): print ("nThis message only appears if verbose mode is turned on.") print (""" ** To continue seeing debugging messages, press the "n" button when prompted. To print the current value of variables, press the "p" button followed by the name of the variable you wish to print. Press the "l" button to visually see where you are in the programs souce code. To quit debugging, press the "c" button.n""") pdb.set_trace() print("nSeed = %d, Minimum = %d, Maximum = %d" %(seed, minimum, maximum)) # == declare the class object == # random = MyRNG(minimum, maximum) random.Seed(seed) randomNumber = random.Next() print("nI'm thinking of a number between %d and %d" ". Go ahead and make your first guess. " %(minimum, maximum)) # * this is the while loop which simulates a guessing game. # * the loop gets a number from the user and determines if the # user input is a "winner, warmer, or colder" in relation to the # random number which was generated. # * once the user guesses correctly, they have a choice of continuing # play or exiting the game. If they choose to play again, a new # random number is generated while(loop): userGuess.append(int(input(">> "))) if(newGame): newGame = False if((userGuess[numGuess] > randomNumber) or (userGuess[numGuess] < randomNumber)): print("nSorry that was not correct, please try again...n") elif((userGuess[numGuess] > randomNumber) or (userGuess[numGuess] < randomNumber)): if(IsWarmer(userGuess, numGuess, randomNumber)): print("nWARMERn") else: print("nCOLDERn") if(userGuess[numGuess] == randomNumber): print("nWINNER! You have guessed correctly!") print("It took you %d attempt(s) to find the answer!" %(numGuess+1)) del userGuess[:] numGuess = -1 answer = input("nWould you like to play again? (Yes or No): ") answer = answer.lower() if(answer in choices[:2]): randomNumber = random.Next() print("nMake a guess between %d and %dn" %(minimum, maximum)) newGame = True elif((answer in choices[2:]) or (answer not in choices[2:])): loop = False numGuess += 1 print("nThanks for playing!!") if __name__ == "__main__": main() # http://programmingnotes.org/ |
QUICK NOTES:
The highlighted lines are sections of interest to look out for.
The code is heavily commented, so no further insight is necessary. If you have any questions, feel free to leave a comment below.
Once compiled, you should get this as your output:
Seed = 806189064, Minimum = 1, Maximum = 1000I'm thinking of a number between 1 and 1000. Go ahead and make your first guess.
>> 500Sorry that was not correct, please try again...
>> 400
WARMER
>> 600
COLDER
>> 300
WARMER
>> 150
WARMER
>> 100
COLDER
>> 180
COLDER
>> 190
COLDER
>> 130
WARMER
>> 128
WINNER! You have guessed correctly!
It took you 10 attempt(s) to find the answer!Would you like to play again? (Yes or No): y
------------------------------------------------------------
Make a guess between 1 and 1000
>> 500
Sorry that was not correct, please try again...
>> 600
COLDER
>> 400
WARMER
>> 300
WARMER
>> 280
WARMER
>> 260
WARMER
>> 250
COLDER
>> 256
WINNER! You have guessed correctly!
It took you 8 attempt(s) to find the answer!Would you like to play again? (Yes or No): n
Thanks for playing!!
Python || Custom Random Number Generator Class MyRNG

The following is sample code for a simple random number generator class. This random number generator is based on the Park & Miller paper “Random Number Generators: Good Ones Are Hard To Find.”
This class has three functions. The constructor initializes data members “m_min” and “m_max” which stores the minimum and maximum range of values in which the random numbers will generate.
The “Seed()” function stores the value of the current seed within the class, and the “Next()” function returns a random number to the caller using an algorithm based on the Park & Miller paper listed in the paragraph above. Each time the “Next()” function is called, a new random number is generated and returned to the caller.
|
1 2 3 4 5 6 7 8 9 10 11 12 13 14 15 16 17 18 19 20 21 22 23 24 25 26 27 28 29 30 31 32 33 34 35 36 37 38 39 40 41 42 43 44 45 46 47 48 49 50 51 52 53 54 55 56 57 58 59 60 61 62 63 64 65 66 67 68 69 70 71 72 73 74 75 |
# ============================================================================= # Author: K Perkins # Date: Aug 6, 2013 # Taken From: http://programmingnotes.org/ # File: MyRNG.py # Description: This is the MyRNG.py module which contains the class # declaration for the random number generator. This module recieves a # seed, minimum, and maximum number and generates a random number using # the "Next()" function. Each time the "Next()" function is called, a new # random number is generated and returned to the caller # ============================================================================= import math, time class MyRNG: # MyRNG class. This is the class declaration for the random number # generator. The constructor initializes data members "m_min" and # "m_max" which stores the minimum and maximum range of values in which # the random numbers will generate. There is another variable named "m_seed" # which is initialized using the method Seed(), and stores the value of the # current seed within the class. Using the obtained values from above, the # "Next()" method returns a random number to the caller using an algorithm # based on the Park & Miller paper "RANDOM NUMBER GENERATORS: GOOD ONES ARE # HARD TO FIND" def __init__(self, low = 0, high = 0): # The constructor initializes data members "m_min" and "m_max" if(low < 2): low = 2 if(high < 2): high = 9223372036854775807 self.m_min = low self.m_max = high self.m_seed = time.time() def Seed(self, seed): # Seed the generator with 'seed' self.m_seed = seed def Next(self): # Return the next random number using an algorithm based on the # Park & Miller paper "RANDOM NUMBER GENERATORS: GOOD ONES ARE # HARD TO FIND" a = self.m_min m = self.m_max q = math.trunc(m / a) r = m % a hi = self.m_seed / q lo = self.m_seed % q x = (a * lo) - (r * hi) if(x < a): x += a self.m_seed = x self.m_seed %= m # ensure that the random number is not less # than the minimum number within the user specified range if(self.m_seed < a): self.m_seed += a return int(self.m_seed) def test(): # Simple test function to see if the functionality of my class # is there and works random = MyRNG(7, 1987) random.Seed(806189064) for x in range(15): print("%d, " %(random.Next()), end = "") if __name__ == '__main__': test() # http://programmingnotes.org/ |
QUICK NOTES:
The highlighted lines are sections of interest to look out for.
The code is heavily commented, so no further insight is necessary. If you have any questions, feel free to leave a comment below.
===== DEMONSTRATION HOW TO USE =====
Use of the above class is very simple to use. A sample function demonstrating its use is provided on line #64 in the above code snippet.
After running the code, the following is sample output:
SAMPLE OUTPUT:
1037, 1296, 1123, 1900, 1375, 1676, 1798, 662, 664, 674, 746, 1249, 793, 1578, 1112,
Python || Pdf Merge Using PyPdf

The following is a simple pdf file merger program which utilizes the “pyPdf” library to manipulate pdf files. This program has the ability to merge entire selected pdf files together, and save the selected files into one single new pdf file.
REQUIRED KNOWLEDGE FOR THIS PROGRAM
PyPdf - What Is It?

How To Create Executable Python Programs

Display The Time In Python

Metadata With PyPdf

Pdf Merge Executable File - Click Here To Download
This program first asks the user to place the pdf file(s) they wish to merge into a specified folder. The default input folder is titled “Files To Merge.” After the input pdf file(s) have been placed into the specified input folder, the program prompts the user to select which file(s) they wish to merge together. As soon as the input pdf file(s) have been selected, the file merging begins, with the files being saved to the output pdf file in the exact same order as specified by the user. As soon as the file merging is complete, the single merged pdf file is saved into an output folder titled “Completed Merged Files.”
|
1 2 3 4 5 6 7 8 9 10 11 12 13 14 15 16 17 18 19 20 21 22 23 24 25 26 27 28 29 30 31 32 33 34 35 36 37 38 39 40 41 42 43 44 45 46 47 48 49 50 51 52 53 54 55 56 57 58 59 60 61 62 63 64 65 66 67 68 69 70 71 72 73 74 75 76 77 78 79 80 81 82 83 84 85 86 87 88 89 90 91 92 93 94 95 96 97 98 99 100 101 102 103 104 105 106 107 108 109 110 111 112 113 114 115 116 117 118 119 120 121 122 123 124 125 126 127 128 129 130 131 132 133 134 135 136 137 138 139 140 141 142 143 144 145 146 147 148 149 150 151 152 153 154 155 156 157 158 159 160 161 162 163 164 165 166 167 168 169 170 171 172 173 174 175 176 177 178 179 180 181 182 183 184 185 186 187 188 189 190 191 192 193 194 195 196 197 198 199 200 201 202 203 204 205 206 207 208 209 210 211 212 213 214 215 216 217 218 219 220 221 222 223 224 225 226 227 228 229 230 231 232 233 234 235 236 237 238 239 240 241 242 243 244 245 246 247 248 249 250 251 252 253 254 255 256 257 258 259 260 261 262 263 264 265 266 267 268 269 270 271 272 273 274 275 276 277 278 279 280 281 282 283 284 |
# ============================================================================= # Author: K Perkins # Date: Aug 5, 2013 # Taken From: http://programmingnotes.org/ # File: PdfMerge.py # Description: This is a simple program utilizing the pyPdf library to # manipulate pdf files. This program has the ability to merge entire # selected pdf files together, and save the selected files into one # single new pdf file. # ============================================================================= import sys, os, datetime, platform from pyPdf.pdf import PdfFileWriter, PdfFileReader from pyPdf.generic import NameObject, createStringObject # ---- START GLOBAL VARIABLES ---- # INPUT_FILE_FOLDER = "Files To Merge" OUTPUT_FILE_FOLDER = "Completed Merged Files" OUTPUT_FILE_NAME = "Merged File.pdf" PDF_PRODUCER = "KENNETH'S PDF MERGER" # Determine the platform if(platform.system() == "Windows"): CURRENT_USER = os.environ.get("USERNAME") else: CURRENT_USER = os.environ.get("USER") # ---- END GLOBAL VARIABLES ---- # def DoesFileExists(fileName, fileFolder): # determine if a file exists try: filePath = os.path.join(fileFolder, fileName) with open(filePath) as f: pass return True except IOError as e: return False def DoesFolderExist(fileFolder): # determine if a folder exists if not os.path.exists(fileFolder): os.makedirs(fileFolder) return False return True def CheckOutFileDigits(outfile): # check if a file already exists in a folder char = outfile[len(outfile)-1] if(char == ")"): return True return False def GetPageNumbers(pageRange): # parse a page range (i.e: 1,2,5,56-100,241) and return its # integer equivalent pageIndex = 0 inDigit = False inNums2 = False nums = "" nums2 = "" fileNumbers = [] while(pageIndex < len(pageRange)): if(pageRange[pageIndex].isdigit()): inDigit = True else: inDigit = False if(inDigit): if(inNums2 == False): nums += pageRange[pageIndex] else: nums2 += pageRange[pageIndex] else: if(nums != "" and pageRange[pageIndex] == "," and inNums2 == False): fileNumbers.append(int(nums)) nums = "" elif(nums != "" and pageRange[pageIndex] == "-"): inNums2 = True elif(nums2 != "" and inNums2): for x in range(int(nums), int(nums2)+1): fileNumbers.append(x) nums = "" nums2 = "" inNums2 = False elif((nums != "" and pageRange[pageIndex] != ",") or (nums != "" and pageRange[pageIndex] != "-")): fileNumbers.append(int(nums)) nums = "" pageIndex += 1 # DO THIS IF NUMBERS ARE LEFT OVER FROM THE ABOVE LOOP ^ if(nums != "" and nums2 != ""): for x in range(int(nums), int(nums2)+1): fileNumbers.append(x) elif(nums != ""): fileNumbers.append(int(nums)) return fileNumbers def DisplayFiles(files): # display files in a folder numFiles = 1 print("Index # ||tFile Namen"+ "-----------------------------------") for x in files: print("(%d) t ||t%s" %(numFiles, x)) numFiles += 1 def GetFileName(index, files): # return the filename from the input folder return files[index] def Cls(): # clear the console screen os.system(["clear","cls"][platform.system()=="Windows"]) def GetFiles(): # prompt the user to enter files into the input folder while(len(os.listdir(INPUT_FILE_FOLDER)) < 1): print("** NOTE: To continue, please place the file(s) that you wish to "+ "nmerge inside the "%s" folder located in:" %(INPUT_FILE_FOLDER)) print("n%s%s" %(os.getcwd(), INPUT_FILE_FOLDER)) input("nPlease press ENTER to continue...") Cls() # clear the console screen def main(): # declare variables input_pdfFile = "" output_pdfFile = PdfFileWriter() files = [] index = 0 outfileName = "" numPages = 0 pageRange = "" fileNumbers = [] removePage = [] errorPage = False # CHECK TO SEE IF INPUT/OUTPUT FOLDERS EXIST, CREATE THEM IF THEY DONT DoesFolderExist(INPUT_FILE_FOLDER) DoesFolderExist(OUTPUT_FILE_FOLDER) # GET FILE NAMES FROM THE USER TO MERGE TOGETHER while(len(files) < 1): Cls() fileNumbers = [] removePage = [] while(len(fileNumbers) < 1): # MAKE SURE THERE ARE FILES IN THE INPUT FOLDER errorPage = False if(len(os.listdir(INPUT_FILE_FOLDER)) < 1): GetFiles() print("nThese are the files thats currently located in "+ "the "%s" folder..n" %(INPUT_FILE_FOLDER)) # DISPLAY THE FILES THATS IN THE INPUT FOLDER TO THE SCREEN DisplayFiles(os.listdir(INPUT_FILE_FOLDER)) # ASK THE USER FOR FILES NAMES/INDEXES print("nPlease enter the index numbers of the files that " +"you wish to merge together:") print("Example: 1,2,5,56-100,241") pageRange = input(">> ") # REMOVE WHITESPACES FROM THE STRING pageRange = pageRange.replace(" ", "") print("nYou have selected to merge the file(s): %s" %(pageRange)) # GET THE TOTAL NUMBER OF FILES FROM THE USER AS SPECIFIED FROM ABOVE fileNumbers = GetPageNumbers(pageRange) # FIND ANY FILES FROM THE LIST WHICH DONT EXIST IN THE FOLDER for x in fileNumbers: if((x > len(os.listdir(INPUT_FILE_FOLDER))) or (x < 1)): errorPage = True removePage.append(x) # REMOVE ALL FILE INDEX NUMBERS THAT DONT EXIST IN THE FOLDER for x in removePage: fileNumbers.remove(x) # CHECK IF THERE ARE ANY VALID FILES TO BE MERGED FROM THE FOLDER if(len(fileNumbers) < 1): print("n----------------------------------------------------------") print("n** ERROR: No files have been selected to be merged!") input("nPlease press ENTER to continue...") Cls() else: for x in fileNumbers: files.append(GetFileName(x-1, os.listdir(INPUT_FILE_FOLDER))) if(errorPage): print("n----------------------------------------------------------") print("n** ERROR: The folder "%s" only contains %d files!n" %(INPUT_FILE_FOLDER, len(os.listdir(INPUT_FILE_FOLDER)))) print("Invalid file index numbers have been detected") input("nPlease press ENTER to continue...") removePage = [] print("n----------------------------------------------------------") print("nThe following files have been selected to be merged!n") DisplayFiles(files) # IF ALL ABOVE IS OK, CHECK IF THE SELECTED INPUT FILES ARE PDF FILES for x in files: if(x.endswith(".pdf") == False): removePage.append(x) errorPage = True # REMOVE ALL THE FILES THAT ARENT PDF FILES if(errorPage): print("n** ERROR: Sorry, but the files listed below are " + "not pdf files and cannot be merged..n") index = 1 for x in removePage: files.remove(x) print("(%d) t"%s"" %(index, x)) index += 1 if(len(files) < 1): input("nPlease press ENTER to continue...") input("nPlease press ENTER to continue...") print("n----------------------------------------------------------n") # IF ALL IS OK, MERGE THE EXISITING FILES TOGETHER for x in range(0, len(files)): filePath = os.path.join(INPUT_FILE_FOLDER, files[x]) input_pdfFile = PdfFileReader(open(filePath, "rb")) print("%s has %d pages." % (files[x], input_pdfFile.getNumPages())) for y in range(input_pdfFile.getNumPages()): output_pdfFile.addPage(input_pdfFile.getPage(y)) # CONSTRUCT AN OUTPUT FILENAME outfileName = files[0][:-4] +" - "+ OUTPUT_FILE_NAME while(DoesFileExists(outfileName, OUTPUT_FILE_FOLDER)): outfileName = outfileName[:-4] # remove ".pdf" # do this if there is already 2 copies of the outfile if(CheckOutFileDigits(outfileName)): outfileName = outfileName[:-1]# remove ")" count = int(outfileName[len(outfileName)-1]) # get num count += 1 outfileName = outfileName[:-1]# remove num outfileName += str(count)+")"# add new incremented num # do this if outfile exists only once else: outfileName += " ("+str(2)+")" outfileName += ".pdf" # GET THE NUMBER OF PAGES IN THE OUTPUT PDF FILE numPages = output_pdfFile.getNumPages() # SAVE OUTPUT FILE TO THE OUTPUT FOLDER now = datetime.datetime.now() time = str(now.strftime("CREATED: %m/%d/%Y, %I:%M:%S %p")) infoDict = output_pdfFile._info.getObject() infoDict.update({ NameObject('/Title'): createStringObject(outfileName), NameObject('/Author'): createStringObject(CURRENT_USER), NameObject('/Subject'): createStringObject(time), NameObject('/Creator'): createStringObject(PDF_PRODUCER) }) filePath = os.path.join(OUTPUT_FILE_FOLDER, outfileName) outputStream = open(filePath, "wb") output_pdfFile.write(outputStream) outputStream.close() # DISPLAY FINAL MESSAGE TO USER print("n"%s" has been created and contains %d total page(s)" %(outfileName, numPages)) print("nThis file is located in the following directory:n" +"n%s%s" %(os.getcwd(), OUTPUT_FILE_FOLDER)) input("nPlease press ENTER to continue...") if __name__ == "__main__": main() # http://programmingnotes.org/ |
QUICK NOTES:
The highlighted lines are sections of interest to look out for.
The code is heavily commented, so no further insight is necessary. If you have any questions, feel free to leave a comment below.
Click here to download a Windows executable file demonstrating the above use.
Python || Pdf Split & Extract Using PyPdf
The following is a simple pdf file split & extractor program which utilizes the “pyPdf” library to manipulate pdf files. This program has the ability to extract selected pages from an existing pdf file, and save the extracted pages into a new pdf file.
REQUIRED KNOWLEDGE FOR THIS PROGRAM
PyPdf - What Is It?

How To Create Executable Python Programs

Display The Time In Python

Metadata With PyPdf

Pdf Split Executable File - Click Here To Download
This program first asks the user to place the pdf file(s) they wish to extract pages from into a specified folder. The default input folder is titled “Files To Extract.” After the input pdf file(s) have been placed into the specified input folder, the program prompts the user to select which file they wish to extract pages from. As soon as an input pdf file has been selected, the user is asked to enter in the page numbers they wish to extract from the specified input pdf file. After the page extraction is completed, the selected pages are merged into one single pdf file, and is saved into an output folder titled “Completed Extracted Files.”
|
1 2 3 4 5 6 7 8 9 10 11 12 13 14 15 16 17 18 19 20 21 22 23 24 25 26 27 28 29 30 31 32 33 34 35 36 37 38 39 40 41 42 43 44 45 46 47 48 49 50 51 52 53 54 55 56 57 58 59 60 61 62 63 64 65 66 67 68 69 70 71 72 73 74 75 76 77 78 79 80 81 82 83 84 85 86 87 88 89 90 91 92 93 94 95 96 97 98 99 100 101 102 103 104 105 106 107 108 109 110 111 112 113 114 115 116 117 118 119 120 121 122 123 124 125 126 127 128 129 130 131 132 133 134 135 136 137 138 139 140 141 142 143 144 145 146 147 148 149 150 151 152 153 154 155 156 157 158 159 160 161 162 163 164 165 166 167 168 169 170 171 172 173 174 175 176 177 178 179 180 181 182 183 184 185 186 187 188 189 190 191 192 193 194 195 196 197 198 199 200 201 202 203 204 205 206 207 208 209 210 211 212 213 214 215 216 217 218 219 220 221 222 223 224 225 226 227 228 229 230 231 232 233 234 235 236 237 238 239 240 241 242 243 244 245 246 247 248 249 250 251 252 253 254 255 256 257 258 259 260 261 262 263 264 265 266 267 268 269 270 271 272 273 274 275 276 277 278 279 280 281 282 283 284 285 286 287 288 289 290 291 292 293 294 295 296 |
# ============================================================================= # Author: K Perkins # Date: Aug 4, 2013 # Taken From: http://programmingnotes.org/ # File: PdfSplit.py # Description: This is a simple program utilizing the pyPdf library to # manipulate pdf files. This program has the ability to extract selected # pages from an existing pdf file, and save the extracted pages into # a new pdf file. # ============================================================================= import sys, os, datetime, platform from pyPdf.pdf import PdfFileWriter, PdfFileReader from pyPdf.generic import NameObject, createStringObject # ---- START GLOBAL VARIABLES ---- # INPUT_FILE_FOLDER = "Files To Extract" OUTPUT_FILE_FOLDER = "Completed Extracted Files" OUTPUT_FILE_NAME = "Extracted File.pdf" PDF_PRODUCER = "KENNETH'S PDF EXTRACTOR" # Determine the platform if(platform.system() == "Windows"): CURRENT_USER = os.environ.get("USERNAME") else: CURRENT_USER = os.environ.get("USER") # ---- END GLOBAL VARIABLES ---- # def DoesFileExists(fileName, fileFolder): # determine if a file exists try: filePath = os.path.join(fileFolder, fileName) with open(filePath) as f: pass return True except IOError as e: return False def DoesFolderExist(fileFolder): # determine if a folder exists if not os.path.exists(fileFolder): os.makedirs(fileFolder) return False return True def CheckOutFileDigits(outfile): # check if a file already exists in a folder char = outfile[len(outfile)-1] if(char == ")"): return True return False def GetPageNumbers(pageRange): # parse a page range (i.e: 1,2,5,56-100,241) and return its # integer equivalent pageIndex = 0 inDigit = False inNums2 = False nums = "" nums2 = "" pageNumbers = [] while(pageIndex < len(pageRange)): if(pageRange[pageIndex].isdigit()): inDigit = True else: inDigit = False if(inDigit): if(inNums2 == False): nums += pageRange[pageIndex] else: nums2 += pageRange[pageIndex] else: if(nums != "" and pageRange[pageIndex] == "," and inNums2 == False): pageNumbers.append(int(nums)) nums = "" elif(nums != "" and pageRange[pageIndex] == "-"): inNums2 = True elif(nums2 != "" and inNums2): for x in range(int(nums), int(nums2)+1): pageNumbers.append(x) nums = "" nums2 = "" inNums2 = False elif((nums != "" and pageRange[pageIndex] != ",") or (nums != "" and pageRange[pageIndex] != "-")): pageNumbers.append(int(nums)) nums = "" pageIndex += 1 # DO THIS IF NUMBERS ARE LEFT OVER FROM THE ABOVE LOOP ^ if(nums != "" and nums2 != ""): for x in range(int(nums), int(nums2)+1): pageNumbers.append(x) elif(nums != ""): pageNumbers.append(int(nums)) return pageNumbers def DisplayFiles(files): # display files in a folder numFiles = 1 print("Index # ||tFile Namen"+ "-----------------------------------") for x in files: print("(%d) t ||t%s" %(numFiles, x)) numFiles += 1 def GetFileName(index, files): # return the filename from the input folder return files[index] def Cls(): # clear the console screen os.system(["clear","cls"][platform.system()=="Windows"]) def GetFiles(): # prompt the user to enter files into the input folder while(len(os.listdir(INPUT_FILE_FOLDER)) < 1): print("** NOTE: To continue, please place the file(s) that you wish to "+ "nextract pages from inside the "%s" folder located in:" %(INPUT_FILE_FOLDER)) print("n%s%s" %(os.getcwd(), INPUT_FILE_FOLDER)) input("nPlease press ENTER to continue...") Cls() # clear the console screen def main(): # declare variables fileName = "" currFile = "" outfileName = "" input_pdfFile = "" output_pdfFile = PdfFileWriter() numPages = 0 numPagesInPDF = 0 pageRange = "" pageNumbers = [] removePage = [] errorPage = False initial = "" Cls() # CHECK TO SEE IF INPUT/OUTPUT FOLDERS EXIST, CREATE THEM IF THEY DONT DoesFolderExist(INPUT_FILE_FOLDER) DoesFolderExist(OUTPUT_FILE_FOLDER) # GET A FILE NAME FROM USER TO EXTRACT PAGES FROM while(fileName == ""): while(initial.isdigit() == False): # MAKE SURE THERE ARE FILES IN THE INPUT FOLDER if(len(os.listdir(INPUT_FILE_FOLDER)) < 1): GetFiles() print("nThese are the files thats currently located in "+ "the "%s" folder..n" %(INPUT_FILE_FOLDER)) # DISPLAY THE FILES THATS IN THE INPUT FOLDER TO THE SCREEN DisplayFiles(os.listdir(INPUT_FILE_FOLDER)) # GET THE FILE INDEX NUMBER FROM THE USER initial = input("nPlease enter the index number of the file that " +"you wish to extract pages from:n>> ") # CHECK IF THE USER ENTERED A DIGIT OR NOT if(initial.isdigit()): fileIndex = abs(int(initial)) # CHECK IF THE DIGIT IS WITHIN A VALID INDEX RANGE if((fileIndex > len(os.listdir(INPUT_FILE_FOLDER))) or (fileIndex <= 0)): print("nSorry, but "%d" is not a valid index number..." %(fileIndex)) input("nPlease press ENTER to continue...") Cls() # clear the console screen initial = "" fileIndex = "" # GET THE FILENAME FROM THE FOLDER else: currFile = GetFileName(fileIndex-1, os.listdir(INPUT_FILE_FOLDER)) else: print("nSorry, but "%s" is not a positive digit..." "nPlease enter positive digits only!" %(initial)) input("nPlease press ENTER to continue...") Cls() # CHECK IF ITS A PDF FILE if(currFile.endswith(".pdf")): fileName = currFile else: print("nSorry, but "%s" is not a pdf file!" %(currFile)) input("nPlease press ENTER to continue...") Cls() # clear the console screen initial = "" # GET INPUT FILE DOCUMENT INFO filePath = os.path.join(INPUT_FILE_FOLDER, fileName) input_pdfFile = PdfFileReader(open(filePath, "rb")) numPagesInPDF = input_pdfFile.getNumPages() # DISPLAY DIRECTIONS TO USER print("nCurrent file = "%s" and contains %d page(s)" %(currFile, numPagesInPDF)) print("nPlease enter the page numbers you wish to extract," +" separated by commas") print("Example: 1,2,5,56-100,241") pageRange = input(">> ") # REMOVE WHITESPACES FROM THE STRING pageRange = pageRange.replace(" ", "") print("nYou have selected to extract page(s): %s" %(pageRange)) print("n----------------------------------------------------------") # GET THE TOTAL NUMBER OF PAGES FROM THE USER AS SPECIFIED FROM ABOVE pageNumbers = GetPageNumbers(pageRange) # FIND ANY PAGE NUMBERS FROM THE LIST WHICH DONT EXIST IN THE FILE for x in pageNumbers: if((x > numPagesInPDF) or (x < 1)): errorPage = True removePage.append(x) # REMOVE ALL PAGE NUMBERS THAT DONT EXIST for x in removePage: pageNumbers.remove(x) # CHECK IF THERE ARE ANY VALID PAGES TO BE EXTRACTED FROM THE PDF FILE if(len(pageNumbers) < 1): print("n** ERROR: No pages have been selected to extract!n" +"Exiting...") input("nPlease press ENTER to continue...") sys.exit() # DISPLAY ERROR IF A PAGE NUMBER DOESNT EXIST IN PDF DOCUMENT elif(errorPage): print("n** ERROR: "%s" only contains %d page(s).nThe pages selected " "after page #%d cannot be extracted from "%s"" %(currFile,numPagesInPDF,numPagesInPDF,currFile)) print("nOnly page(s)",pageNumbers,"will be extracted from the file!") input("nPlease press ENTER to continue...") print("n----------------------------------------------------------") # START EXTRACTING PAGE NUMBERS # GET SELECTED PAGES FROM THE INPUT FILE for x in pageNumbers: output_pdfFile.addPage(input_pdfFile.getPage(x-1)) # CONSTRUCT OUTPUT FILENAME outfileName = fileName[:-4] +" - "+ OUTPUT_FILE_NAME while(DoesFileExists(outfileName, OUTPUT_FILE_FOLDER)): outfileName = outfileName[:-4] # remove ".pdf" # do this if there is already 2 copies of the outfile if(CheckOutFileDigits(outfileName)): outfileName = outfileName[:-1]# remove ")" count = int(outfileName[len(outfileName)-1]) # get num count += 1 outfileName = outfileName[:-1]# remove num outfileName += str(count)+")"# add new incremented num # do this if outfile exists only once else: outfileName += " ("+str(2)+")" outfileName += ".pdf" # GET THE NUMBER OF PAGES IN THE OUTPUT PDF FILE numPages = output_pdfFile.getNumPages() # SAVE OUTPUT FILE TO THE OUTPUT FOLDER now = datetime.datetime.now() time = str(now.strftime("CREATED: %m/%d/%Y, %I:%M:%S %p")) infoDict = output_pdfFile._info.getObject() infoDict.update({ NameObject('/Title'): createStringObject(outfileName), NameObject('/Author'): createStringObject(CURRENT_USER), NameObject('/Subject'): createStringObject(time), NameObject('/Creator'): createStringObject(PDF_PRODUCER) }) filePath = os.path.join(OUTPUT_FILE_FOLDER, outfileName) outputStream = open(filePath, "wb") output_pdfFile.write(outputStream) outputStream.close() # DISPLAY FINAL MESSAGE TO USER print("n"%s" has been created and contains %d total page(s)" %(outfileName, numPages)) print("nThis file is located in the following directory:n" +"n%s%s" %(os.getcwd(), OUTPUT_FILE_FOLDER)) input("nPlease press ENTER to continue...") if __name__ == "__main__": main() # http://programmingnotes.org/ |
QUICK NOTES:
The highlighted lines are sections of interest to look out for.
The code is heavily commented, so no further insight is necessary. If you have any questions, feel free to leave a comment below.
Click here to download a Windows executable file demonstrating the above use.
Python || How To Install PyPdf Using Python 3
“pyPdf” is a pure Python library built as a PDF toolkit. It is capable of:
• Extracting document information (title, author, ...),

• Splitting documents page by page,

• Merging documents page by page,

• Cropping pages,

• Merging multiple pages into a single page,

• Encrypting and decrypting PDF files.
By being pure Python, it should run on any Python platform without any dependencies on external libraries. It can also work entirely on StringIO objects rather than file streams, allowing for PDF manipulation in memory. It is therefore a useful tool for websites that manage or manipulate PDFs.
=== 1. INSTALLING PYPDF ===
A Windows installer for pyPdf is available here. At the time of this writing, the installer that was listed on the download page was titled “pyPdf-1.13.win32.exe.”
Note: If you are using Python 2 and want to install pyPdf, the Windows installer available on the download page should be all you need. No further installation instructions are necessary.
Next, follow the command prompts from the installer and wait!
When the pyPdf installer is completed, you should see the newly installed files which correspond to this module located in the following directory:
C:\Python32\Lib\site-packages\pyPdf
Note: Python 3.2 is installed on my system, and the above directory reflects that. The Python directory may be named something different on your individual system depending on the Python version you are using.
If everything installed correctly, proceed to the next step.
=== 2. UPDATE EXISTING PYPDF FILES ===
pyPdf was originally written for Python 2, but a Python 3 compatible branch has since been made available. The updated files can be found here, and enable pyPdf to be integrated with Python 3.
To update these new Python 3 files with the old Python 2 files, locate the following directory on your system:
C:\Python32\Lib\site-packages\pyPdf
Here is a sample screenshot demonstrating the files which resides in the above directory: (click to enlarge)

Next, update all of the old Python 2 files that’s listed in the above directory with the new Python 3 files that’s listed on this page.
One way to update the files that’s currently stored on your computer is to locate the file on your system with the exact same file name as listed here, and copy/paste the contents of the new file into the contents of the old file that’s currently stored on your computer.
Or you can download all of the files at once here, and move/replace these new files with the existing files that’s currently located on your system.
=== 3. UBUNTU USERS ===
If you are an Ubuntu Linux user and want to install pypdf, open the terminal and run the following command:
NOTE: Replace “python3.2” with whatever version of python that’s installed on your system.
sudo mkdir /usr/local/lib/python3.2/dist-packages/pyPdf
Next, copy and paste the files located in the above download link into the following directory:
/usr/local/lib/python3.2/dist-packages/pyPdf
Once the following steps are completed, you should now be ready to use pyPdf with Python 3 programs!
Python || How To Create An Executable Using Cx_Freeze
Python is a simple and powerful programming language for scripting and application development. Various GUI packages available for Python makes it a great choice for developing applications. But what if you want to create an executable file from the Python script you just created? This page demonstrates that process using a free third party module called “cx_Freeze.” This module is ideal for use because it supports Python 2.7 or higher, including Python 3.
Contents
1. Introduction

2. Installing cx_freeze

3. Verify Installation

4. Create The Setup Script

5. Begin Compilation

6. Output Directory
1. Introduction
cx_Freeze is a set of scripts and modules for freezing Python scripts into executables, in much the same way that py2exe and py2app do. Unlike these two tools, cx_Freeze is cross platform and should work on any platform that Python itself works on. It supports Python 2.7 or higher, including Python 3.
2. Installing cx_freeze
In the terminal (cmd), install by running the following command:
pip install cx-Freeze
– OR –
python -m pip install cx-Freeze
If this process completes with no errors, skip to the next step!
Note: If using Windows and you get an error that says 'python' is not recognized as an internal or external command, a simple solution is to navigate in the terminal (cmd) to the directory of your Python installation folder, and then follow the steps below.
The default Python installation directory is the following:
C:\Users\YOUR_USERNAME\AppData\Local\Programs\Python\Your-Python-Version\
Once you have navigated to the Python folder for the version you are using, in the terminal (cmd), run the following command.
python.exe -m pip install cx-Freeze
Tip: If you want to run the Python command from the terminal without having to navigate to the installation folder, it is recommended that you add your Python directory to the Windows Path. Click here for information on how this is done.
3. Verify Installation
Once the cx_Freeze installation is complete, you should see the newly installed files for this module located in the following directory (Windows):
C:\Path-To-Your-Python-Version\Lib\site-packages\cx_Freeze
If everything installed correctly, you should now be ready to create executable Python programs!
4. Create The Setup Script
To use cx_Freeze we need to create a setup.py file which tells the cx_Freeze “compiler” what you want to do. Here’s a sample setup.py file whose simplicity is appropriate for our sample “Hello World” program.
This is the sample Python file.
|
1 2 3 4 5 6 7 8 9 10 11 12 13 14 |
# ============================================================================= # Author: Kenneth Perkins # Date: Jul 25, 2013 # Taken From: http://programmingnotes.org/ # File: hello.py # Description: Simple hello world program # ============================================================================= def main(): print("Hello World, created using Python") input("\nPlease press ENTER to continue...") if __name__ == "__main__": main() # http://programmingnotes.org/ |
This is the setup.py file.
|
1 2 3 4 5 6 7 8 9 10 11 12 13 14 15 16 17 18 19 20 21 22 23 24 25 26 27 28 29 30 31 32 33 34 35 36 |
# ============================================================================= # Author: Kenneth Perkins # Date: Jul 25, 2013 # Updated: Feb 12, 2021 # Taken From: http://programmingnotes.org/ # File: setup.py # Description: This is the cx_Freeze setup file for creating an exe program # ============================================================================= from cx_Freeze import setup, Executable # NOTE: you can include any other necessary external imports here aswell includefiles = [] # include any files here that you wish excludes = [] packages = [] exe = Executable( # what to build script = "hello.py", # the name of your main python script goes here init_script = None, base = None, # if creating a GUI instead of a console app, type "Win32GUI" target_name = "Hello World.exe", # this is the name of the executable file icon = None # if you want to use an icon file, specify the file name here ) setup( # the actual setup & the definition of other misc. info name = "Hello World", # program name version = "0.1", description = 'A general enhancement utility', author = "Kenneth Perkins", options = {"build_exe": {"excludes":excludes,"packages":packages, "include_files":includefiles}}, executables = [exe] ) # http://programmingnotes.org/ |
5. Begin Compilation
In order to start compiling the hello.py file, we need to open the terminal (cmd).
Next, once you have created the setup.py file, save the setup.py file into the same directory as your project, and run the following command in the terminal (cmd) from your project directory:
python setup.py build
This command essentially starts compiling the hello.py file.
If this process completes with no errors, skip to the next step!
Note: If using Windows and you get an error that says 'python' is not recognized as an internal or external command, a simple solution is to copy and paste the setup.py file and ALL of the Python files associated with your project into the directory of your Python installation before running the command.
The default Python installation directory is the following:
C:\Users\YOUR_USERNAME\AppData\Local\Programs\Python\Your-Python-Version\
Note: I have Python installed in the following directory, so the steps below will use this path.
C:\Python39
Here is a sample screenshot of the instructions after copy and pasting the files into the Python installation directory: (click to enlarge)

Next, copy and paste these commands into the terminal (cmd).
#1. Change directories into your Python installation folder
cd C:\Python39
#2. Start compiling the hello.py program using the setup.py file
python.exe setup.py build
6. Output Directory
If the cx_Freeze build finished with no errors, then the process should be complete!
By default, the Python executable should be located in a folder titled ‘build‘, located in the same directory as where your setup.py resides.
If you followed the steps above to copy and paste your files during the build process, it should be located at the following:
C:\Path-To-Your-Python-Version\build\exe.win-3.9
Here is a sample screenshot demonstrating the directory where the executable file resides: (click to enlarge)

Note: In order for the executable file to run, the other files within that folder that are generated by cx_Freeze must be bundled with the executable file at all times.
And there you have it! Here is a sample screenshot of the running ‘Hello World’ executable: (click to enlarge)

QUICK NOTES:
The highlighted lines are sections of interest to look out for.
The code is heavily commented, so no further insight is necessary. If you have any questions, feel free to leave a comment below.
Python || Snippet – How To Input Numbers Into A List & Display Its Contents Back To User
This snippet demonstrates how to place numbers into a list. It also shows how to display the contents of the list back to the user via stdout.
REQUIRED KNOWLEDGE FOR THIS SNIPPET
|
1 2 3 4 5 6 7 8 9 10 11 12 13 14 15 16 17 18 19 20 21 22 23 24 25 |
def main(): # declare variables arry = [] # initialize the list numElems = 0 # ask user how many items they want to place in list numElems = int(input("How many items do you want to place into the list?: ")) # print a newline print("") # user enters data into list using a for loop # you can also use a while loop, but for loops are more common # when dealing with lists for x in range(0, numElems): arry.append(int(input("Enter item #%d: " % (x+1)))) # display data print("nThe current items inside the list are: ") for x in range(0, numElems): print("Item #%d: %d" % ((x+1),arry[x])) if __name__ == "__main__": main() # http://programmingnotes.org/ |
QUICK NOTES:
The highlighted lines are sections of interest to look out for.
The code is heavily commented, so no further insight is necessary. If you have any questions, feel free to leave a comment below.
Once compiled, you should get this as your output
How many items do you want to place into the list?: 3Enter item #1: 6
Enter item #2: 4
Enter item #3: 2008The current items inside the list are:
Item #1: 6
Item #2: 4
Item #3: 2008
Python || Using If Statements & String Variables

As previously mentioned, you can use “int” and “float” to represent numbers, but what if you want to store letters? Strings help you do that.
==== SINGLE CHAR ====
This example will demonstrate a simple program using strings, which checks to see if the user entered the correctly predefined letter.
|
1 2 3 4 5 6 7 8 9 10 11 12 13 14 15 16 17 18 19 20 21 22 23 24 25 26 27 28 29 30 |
# ============================================================================= # Author: Kenneth Perkins # Date: May 29, 2013 # Updated: Feb 16, 2021 # Taken From: http://programmingnotes.org/ # File: char.py # Description: Demonstrates using char variables # ============================================================================= def main(): # declare variables userInput = "" # this variable is a string letter = '' # this holds the individual character # get data from user userInput = input("Please try to guess the letter I am thinking of: ") # we only want to check the first character in the string, # so we get the letter at index zero and save it into its # own variable letter = userInput[0] # use an if statement to check equality. if ((letter == 'a') or (letter == 'A')): print("\nYou have guessed correctly!") else: print("\nSorry, that was not the correct letter I was thinking of..") if __name__ == "__main__": main() # http://programmingnotes.org/ |
Notice in line 11 I declare the string data type, naming it “userInput.” I also initialized it as an empty variable. In line 23 I used an “If/Else Statement” to determine if the user entered value matches the predefined letter within the program. I also used the “OR” operator in line 23 to determine if the letter the user entered into the program was lower or uppercase. Try compiling the program simply using this
if (letter == 'a') as your if statement, and notice the difference.
The resulting code should give this as output
Please try to guess the letter I am thinking of: A

You have guessed correctly!
==== CHECK IF LETTER IS UPPER CASE ====
This example is similar to the previous one, and will check if a user entered letter is uppercase.
|
1 2 3 4 5 6 7 8 9 10 11 12 13 14 15 16 17 18 19 20 21 22 23 24 25 26 27 28 |
# ============================================================================= # Author: Kenneth Perkins # Date: May 29, 2013 # Updated: Feb 16, 2021 # Taken From: http://programmingnotes.org/ # File: uppercase.py # Description: Demonstrates checking if a char variable is uppercase # ============================================================================= def main(): # declare variables userInput = "" # this variable is a string letter = '' # this holds the individual character # get data from user userInput = input("Please enter an UPPERCASE letter: ") # get the 1st character in the string letter = userInput[0] # check to see if entered data falls between uppercase values if ((letter >= 'A') and (letter <= 'Z')): print("\n'%c' is an is an uppercase letter!" % (letter)) else: print("\nSorry, '%c' is not an uppercase letter.." % (letter)) if __name__ == "__main__": main() # http://programmingnotes.org/ |
Notice in line 21, an If statement was used, which checks to see if the user entered data falls between letter A and letter Z. We did that by using the “AND” operator. So that IF statement is basically saying (in plain english)
IF ('letter' is equal to or greater than 'A') AND ('letter' is equal to or less than 'Z')THEN it is an uppercase letter
The resulting code should give this as output
Please enter an UPPERCASE letter: g

Sorry, 'g' is not an uppercase letter..
==== CHECK IF LETTER IS A VOWEL ====
This example will utilize more if statements, checking to see if the user entered letter is a vowel or not. This will be very similar to the previous example, utilizing the OR operator once again.
|
1 2 3 4 5 6 7 8 9 10 11 12 13 14 15 16 17 18 19 20 21 22 23 24 25 26 27 28 29 30 31 |
# ============================================================================= # Author: Kenneth Perkins # Date: May 29, 2013 # Updated: Feb 16, 2021 # Taken From: http://programmingnotes.org/ # File: vowel.py # Description: Demonstrates checking if a char variable is a vowel # ============================================================================= def main(): # declare variables userInput = "" # this variable is a string letter = '' # this holds the individual character # get data from user userInput = input("Please enter a vowel: ") # get the 1st character in the string letter = userInput[0] # check to see if entered data is A,E,I,O,U,Y if ((letter == 'a')or(letter == 'A')or(letter == 'e')or (letter == 'E')or(letter == 'i')or(letter == 'I')or (letter == 'o')or(letter == 'O')or(letter == 'u')or (letter == 'U')or(letter == 'y')or(letter == 'Y')): print("\nCorrect, '%c' is a vowel!" % (letter)) else: print("\nSorry, '%c' is not a vowel.." % (letter)) if __name__ == "__main__": main() # http://programmingnotes.org/ |
This program should be very straight forward, and its basically checking to see if the user entered data is the letter A, E, I, O, U or Y.
The resulting code should give the following output
Please enter a vowel: K

Sorry, 'K' is not a vowel..
==== HELLO WORLD v2 ====
This last example will demonstrate using the string data type to print the line “Hello World!” to the screen.
|
1 2 3 4 5 6 7 8 9 10 11 12 13 14 15 16 17 18 19 20 21 |
# ============================================================================= # Author: Kenneth Perkins # Date: May 29, 2013 # Updated: Feb 16, 2021 # Taken From: http://programmingnotes.org/ # File: string.py # Description: Demonstrates using string variables # ============================================================================= def main(): # declare variables userInput = "" # this variable is a string # get data from user userInput = input("Please enter a sentence: ") # display string print("\nYou Entered: '%s'" % (userInput)) if __name__ == "__main__": main() # http://programmingnotes.org/ |
The following is similar to the other examples listed on this page, except we display the entire string instead of just simply the first character.
The resulting code should give following output
Please enter a sentence: Hello World!

You Entered: 'Hello World!'
Python || Hello World!

This page will consist of creating the typical “hello world!” application. First, open a text editor and save the file as “HelloWorld.py“. The “.py” is the file extension for python applications.
When you have everything loaded up, you will start your code off by declaring a “main” function like so. This should be placed at the bottom of your source code.
|
1 2 |
if __name__ == "__main__": main() |
In simple terms, line #1 from above tells the python interpreter to check to see if the current source code thats being executed is the main module; and if it is, line #2 tells the python interpreter to look for the function within the source code whose name is “main.”
NOTE: Main functions are not needed in python, but it is worth noting that without the main sentinel, the entire source code will be executed even if the script was imported as a module.
Next, we will define the main function. This should be placed at the top of your source code.
|
1 2 |
def main(): # YOUR CODE GOES HERE |
Unlike most programming languages, brackets “{}” are not needed when defining a function, but statements following each function block must be uniformly indented throughout the code. Also, an important fact to remember is, functions must be declared before they are used.
We are halfway finished, now all we have to do is say hello to the world! You will do that by adding this line of code to your program, which basically outputs data to the screen
|
1 2 |
def main(): print("Hello World!") |
So when you add everything together, your full code will look something like this
|
1 2 3 4 5 6 |
# This is the main function def main(): print("Hello World!") if __name__ == "__main__": main() |
To execute the above code, simply hit the “run” button in whichever IDE you are using. If you are using a unix system along with a text editor, enter the command below in the terminal.
python3 HelloWorld.py
And there you have it. After executing the above code, you should get this as your output
Hello World!


